Pages

Tuesday, October 4, 2016

My First Handmade Bag: The Bia

I haven't posted in a while. I was kept busy sewing for others and managing this year's Pattern Review Sewing Bee. I have so many projects in my wishlist and I'm so excited that I was able to cross out one from that list.

Presenting my very first handmade bag:


Small, delightful, chock-full of beautiful details, practical are just some of the words to describe the Bia Bag. And best of all, the pattern is free! It was designed by Maria Wallin of Pink Pony Designs and can be downloaded through Craftsy. Difficulty is rated as "Intermediate" but a newbie to bagmaking but not to sewing can easily tackle this pattern. I have reviewed this pattern here at Pattern Review.com. 

As a novice to bagmaking, I encountered a few challenges but nothing that could not be solved by researching online and reading a lot of references. So I just want to share some tips that might prove helpful to a novice trying out this pattern:

Interfacing
I am quite familiar with the different kinds of interfacing used for garment sewing. Bagmaking is a totally different world. I didn't realize there were so many types to choose from. I am sure experience will be the best teacher in the long run. 

I ended up using two types of interfacing. For the exterior body and lining, I used a medium weight interfacing by Pellon called Shape Flex (SF 101). This is a fusible woven and I fused two layers for the exterior to add more structure without making it stiff. I also interfaced the lining with one layer to make it more durable. 

For the base of the bag, I used a thicker fusible interfacing called Peltex 71F. This has a cardboard like texture and a bit thicker. I made sure to trim off the seam allowance on the base interfacing so as not to add bulk to the seams.

Hardware
I had so much fun choosing hardware for my bag. I thought the antique brass finish went well with the muted colors of my fabrics. 


Key holder


Tuck Lock


Riri Zipper

D-ring

Except for the zipper which was not available in the color I wanted, all my hardware including the leather strap used to make the handles were purchased from BuckleGuy.com. I highly recommend this site. The products are topnotch quality!

Zipper
I have sewn all kinds of zippers during garment construction yet I still learned a couple of new things like how to cover a zipper tape with decorative fabric as shown below


or how to cut the zipper ends and reattach them successfully as seen below.


I practiced on a cheaper zipper before attempting to work on my actual hardware. I found this 
YouTube clip by Erin Erikson on How to Reattach a Zipper Pull really helpful.

Bag Handles
The pattern had no instructions for making the handles since it relied on purchased ready made ones. I browsed Etsy before deciding to make my own leather strap. That way, I was able to customize the length and the color to my liking. 

I bought this 60" long 5/8" wide genuine leather strap from Buckle Guy. It was quite thick and had a nice tan color, perfect for my bag! With the help of the site's customer service, I was able to decide on the correct size of Chicago screws to use. For this strap which had a thickness of 3.2-4 mm, I used 3/8" sized screws. 


It was a bit challenging trying to insert the screws. I used leather puncher to create the holes.

To attach the handles to the bag I used a brass D-ring and sewed my own tabs.


To sew my tabs, I relied on instructions I found in "The Better Bag Maker" book by Nicole Mallalieu. On page 100, she had instructions on how to make an O-ring tab which I adapted to my project. 


Decorative Details
What I love about this bag pattern is it allowed me to customize the tiny details like adding lace trim,  to my inside pockets as seen below:

And here are some more pics of the lovely details:


Last but not least, all the fabrics I used for the exterior of the bag were purchased from Fabric.com and they are part of the Tim Holtz Eclectic Elements line. For the lining, I just used a quilting cotton from my 15-year old stash. 

And here is the bag being modeled by yours truly!


For reference the bag measures 10-1/4" H x 9-1/2"W x 2-1/2"D and I measure 4'10ish"!


Monday, August 1, 2016

Pikachu Hoodie Revisited

My nephew finally received his Pikachu hoodie! I'm impressed it took only one week to ship from  US to Australia via USPS First Class mail! Needless to say, he loved it and here are some pictures of him wearing it.


Judging from the photos, it looks like there is enough ease in the hoodie that will allow him to wear it for more than one season!

If you missed it, here is the post detailing the hoodie sewing process.


Saturday, July 23, 2016

Pikachu Hoodie Using Jalie 2795

I'm back! June was spent visiting family and friends across the globe. The first few weeks of July was spent recuperating from jet lag and battling post-holiday blues. But I am raring to go back to sewing and have several projects in queue. This hoodie had to be at the top of my list because the recipient lives in Australia and it is winter there right now. Anyway, during our holiday, I got to spend time with my 10-year old nephew who is an avid Pokemon collector. I ended up showing him a photo of the Pikachu hoodie I have sewn for my daughter six Christmasses ago and promising him his very own!

Some people may wonder why not just buy a ready made jacket and hot glue the embellishments to make a character hoodie. But if you are a sewist like me, you'll understand why I chose to make the hoodie myself. 

My base pattern was Jalie 2795.

This is a multi-sized pattern for a jacket or hoodie and although it seems to be marketed for females (based on the model pics and sizing), I thought it could work for boys, too. I used my nephew's hip measurement to choose the appropriate size since that was the widest measurement. It didn't matter much if the chest ended up being a little wider since it's a hoodie meant for layering. 

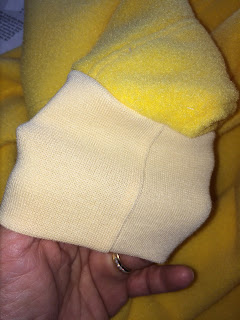
The fabric recommended was medium weight fleece or knit with at least 25% stretch. I used an anti pill fleece purchased from Jo-Ann's fabric. It didn't have the recommended stretch so for the cuff, I used a ribbed knit from my stash. Since I was going to make a Pikachu hoodie, I also purchased some felt squares in black, white and red. 

I have sewn with this pattern before and found the instructions easy to follow especially if one pays close attention to the included illustrations. A few construction notes:

1. For my medium weight fleece fabric, I used a size 90/14 jersey needle. 
2. Even though fleece does not ravel, I still serged the seams to finish the edges and make it easier to handpress it to one side in preparation for topstitching. 


3. Topstitching was a bit challenging because the thick fleece tended to hide the seamline. So I just sewed from the wrong side, used one side of my pressor foot to serve as a guide and adjusted my needle position so that it sewed near the edge of the folded seam. I also lengthened the stitches so that they were more visible on the right side. 


I tried sewing with the Edge Sewing Pressor foot on the right side but I liked the results better with the first technique I mentioned.

4. Instead of self-fabric, I used ribbed knit for the sleeve cuffs. I felt my main fabric didn't have enough stretch.

5.  The hoodie was made up of three part--upper part, lower part and front. Before stitching together these three parts, I constructed the Pikachu ears first. 


6. The ears were inserted between the upper and lower hoodie parts.


7. After the hoodie was assembled and before it was attached to the rest of the jacket, the other embellishments--eyes, cheeks, nose and mouth--were machine appliqued. It was easier to manipulate the hoodie without the rest of the bulky materials.


After the hoodie was embellished, it was time to attach it to the rest of the garment. 


And for some finishing touches:

A really adorable Pikachu enamel zipper pull purchased from Etsy.


A patch purchased also from Etsy which was machine sewn to the left front of the hoodie.

And here is the finished hoodie!


Finished garment measurements:
Chest--32"
Waist--28
Hips as measured at the bottom hem--31"
Center back length as measured from neck to bottom hem--20"
Sleeves as measured from "assumed shoulder" to cuff--24"
Wrist circumference--8"


I can't wait for my nephew to try this on! I just mailed it out today and hopefully it should reach him in one week. Meanwhile, here is a modeling picture of my daughter wearing her own Pikachu hoodie which I made for her in 2011.


Tuesday, May 24, 2016

Simplicity 1693


This pattern is definitely one of my TNT patterns. I have sewn five different styles of blouses just from this pattern alone. I am going to talk about the most recent three finished projects.

True to its name, this pattern is so simple. One yard of fabric was able to accommodate the front, back and sleeve pieces.


View A is blouson style with elasticized waistline and long sleeves. 

Fabric used was a silk blouseweight fabric purchased from Emma One Sock. 

Modifications I made:
Neckline sewn with elastic thread on the bobbin to make subtle ruffles.


Instead of making a waistline casing and putting a 1/4" wide elastic, I just sewed around the waistline using an elastic thread in the bobbin. 


I made the sleeves 3/4 instead of full length and sewed around the bottom edge using elastic thread in the bobbin (again!) to achieve a ruffled effect. I also finished the hem using the roll hemmer of my Juki MO 654 serger.

I finished the bottom hem of the blouse in the same manner as the sleeves.

View B is a simple pullover style with flutter sleeves.
I did not make any modifications and followed everything as instructed. 

Fabric used was a polyester crepe de chine from Sawyer Brooks.


Since my fabric was not sheer, I finished the seams by simply serging. I decided to have some fun and use contrasting thread  for serging. 


View C is a sleeveless blouson style with attached ribbon. 

Fabric used was 100% cotton voile from Sawyer Brooks.


Modifications:


I fully lined the top as the fabric was really sheer. I just used the same pattern pieces to draft the lining. 
Instead of attaching a separate piece of casing for the waistline elastic, I just sewed through the lining and main fabric layers to create a casing for the 1/4" wide elastic. 

I finished all seams using the serger.

A final note about the pattern. I found the sizing to be really generous. My body measurements placed me at size 8 but after sewing a muslin, I had to use straight size 4 with no alterations, not even in the bodice length. With that said, this pattern is definitely a keeper!