To summarize:
1. Interfacing
I used two kinds, a lightweight woven interfacing and a hair cloth canvas
interfacing for different parts of the jacket.
Hair cloth interfacing used on the jacket's front facing was cut on the bias to allow for shaping.
Hair cloth interfacing used on the upper collar was also cut on the bias to allow for a nice roll.
Although not included in the pattern, I also interfaced the pocket and the tab. This time I cut the hair canvas on the cross wise grain so the pieces will hold their shapes.
Finally using two kinds of interfacing allowed me to achieve a nice jacket hem with no stitches showing on the right side. Sew Stylish magazine issue Fall 2010 has great instructions on this technique.
2. Lining
The pattern did not include instructions for a lining and I didn't really care much for a jacket or coat with exposed seams. Adding a lining allowed me to skip much of the serging process. To make the lining I used the side front and side back pattern pieces as is. For the back lining, I added 1" to the center for allowance. During lining assembly, the excess was pleated on top and bottom. I also changed the shape of the back facing as shown below to make it easier to cut out a back lining piece.
I also lined the pocket and the sleeves but used a black silk charmeuse as I didn't have enough of the pretty silk twill print left.
After assembling the jacket front and back pieces, I did the same with the lining pieces. I chose not to bag the lining and instead treated the two layers as one.
The sleeve lining was added last and hand sewn to the armhole to achieve a better fit. The lining hem was also hand sewn.
3. Collar
Typically, pattern instructions tell us to trim seam allowance and clip corners before turning collar pieces inside out. Instead I sewed the seams up to the raw edge of the fabric then folded the corners at right angles before turning inside out.
4. Hemming
A great technique I learned from Sew Stylish Magazine Fall 2010 allowed me to achieve a nicely tailored jacket hem with no visible stitches on the outside.
Applied 2.5"-wide fusible interfacing 1/2" above bottom edge.
*I serged the bottom edge beforehand as my fabric was beginning to fray.
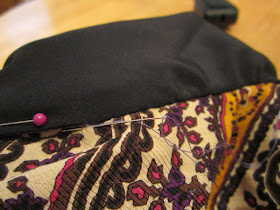
I marked the hemline with running basting stitches.
I pressed the hem upward along the basted line, inserted a 3" wide hair canvas interfacing and basted in place. The interfacing was cut on the bias to allow more flexibility.
To hem, I used tiny catchstitches running through the jacket hem, the hair canvas and the fusible interfacing.
As for the lining, I used a blindstitch through the lining fabric and jacket hem.
And finally let's not forget the basics:
1. Make the muslin.
Oftentimes, I am tempted to skip this step but it is essential to achieve a perfect fit. Fortunately for me, the only adjustment required was around the armscye where I had to take in about 1/2" for better fit.
2. Use the proper sewing foot.
Sewing this wool fabric was like quilting, The fabric was thick but the use of a walking foot made for a smooth sewing process.
3. Press, press, press!
For a perfectly pressed seam, the use of a clapper, a pressing cloth and an iron set on wool setting were essential.
This loop turner set was a definite time saver.
Finally the fun part!
Nothing like attaching buttons and snap to signal that I'm near the finish line!
Inspired by an old Talbots jacket, I bought a bracelet chain from Walmart and used it as a hanging loop for my jacket.
Here are pics of the finished jacket:

No comments:
Post a Comment