My newest blouse was sewn using the Kanerva Peplum Blouse pattern from Named Clothing, a Finnish clothing pattern label founded by two sisters. I learned about it from Pattern Review.com. Googling "Kanerva blouse" results in quite a number of beautiful versions.
About the pattern:
I bought the PDF version.Likes:
*It consists of only 12 tiles!
*The test square is easily found on the first page. (One of my pet peeves with digital patterns is having to search through pages of tiles to locate the test square. The least designers can do is indicate which page the test square they decided to embed it in.)
*One can choose which size to print.
*Built-in seam allowance.
Dislike:
*To save on paper, the pattern pieces overlap. This is not really a dealbreaker. One just has to be careful when tracing.
*I would have preferred a 5/8" seam allowance to make French seams easier. However only 3/8" were included for all edges and 3/4" for the hems. Nevertheless, this didn't stop me from using French seams.
About the sewing process:
Although construction is really simple, the instructions are detailed and cover the basics of sewing so this pattern is perfect for a beginner, too! Depending on the type of fabric used and the method of finishing, this can be a really quick sewing project. Mine took a little bit longer and you'll find out why.Because this is a new-to-me pattern, I decided to take the painful route and sew some mock-ups using muslin. Looking at the model's picture on the website, it is evident that this blouse is drafted for a tall person. My muslin version confirmed that. I wanted to preserve the top to peplum ratio and not just cut off at the hem. There is no lengthen/shorten line in the pattern so I had to choose an arbitrary location for shortening the bodice. As for the peplum, I just shaved off the excess at the bottom hem.
 |
| This is my "wearable muslin" sewn after applying changes based on the first pretest garment. |
The photo above shows the following changes to the original pattern:
*bodice shortened by 2" along my arbitrarily placed shorten line
*peplum hem shortened by 1.5"
I thought it was a tad short so for my final version I just added 1" to the bodice which means shortening the bodice of the original pattern by only 1".
I opted to finish the neckline by using bias binding.
 |
| I used a polyester woven fabric from my stash for this neckline binding. |
 |
| I used self-fabric for this neckline binding. |
 |
| After machine sewing the binding to the neck edges, I hand sewed the remaining free edge in place. |
 |
| I also bound the sleeve hems using the same method. |
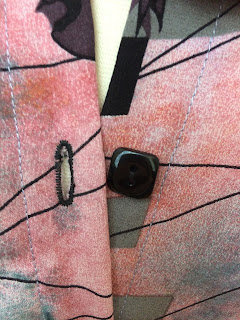
I used 1/2" coordinating buttons from my stash.
I added nylon snaps where needed to prevent gaping.
Apart from the blouse length, the only other modification I made was to shorten the sleeves and add an inch to the side seams as I found the sleeves a bit too snug.
Other than that, I was happy with how the blouse was drafted. The shoulder width was perfect and the armscye was just right.
For the fabrics used, both were from Emma One Sock. Both were lightweight and necessitated careful handling and patience but it was all worth it!
 |
| Silk/Lycra |
 |
| Silk/Cotton |
I am so happy with how this project turned out that I have inducted the pattern to my TNT file by transferring my tracings with modifications to a nice Swedish pattern paper! I'm pretty sure I'll be sewing more versions of this blouse in the future. I just love the fit and design!


A feminine, pretty blouse and you look great in it!
ReplyDeleteThanks Carol! Can't wait for the weather to get warmer so I can start wearing them!
DeleteVery nice! That bird fabric is special!
ReplyDeleteThanks Bunny! I agree about the fabric. It is so gorgeous in real life! Thank goodness I found a pattern suitable for it.
DeleteBoth tops are beautiful - very nicely done!
ReplyDeleteThank you so much!
DeleteVery pretty tops and love how you still managed to do French seams.
ReplyDeleteThanks Sharon! This was a great learning experience for me!
DeleteThanks so much for these details. I am "petiting" a Named dress right now and your notes are really helpful. I was wondering if I was going to have to make a change above the armscye. I'm glad to know it worked out for you. I did a quick tissue check and it seemed possibly OK - a pleasant surprise! Both blouses are lovely.
ReplyDeleteThanks Robyn! Glad to know you found this post helpful. Good luck with your Named dress!
DeleteReally pretty blouses. Muslins are a lot of work but usually well worth it. Especially when you planned to use that gorgeous bird print fabric. I have two Named patterns printed and taped together. I hope to sew garments from them sometime soon.
ReplyDeleteThanks Audrey! So true about muslins. Good luck with your Named projects!
DeleteI can see that you are an expert at your field! I am launching a website soon, and your information will be very useful for me.. Thanks for all your help and wishing you all the success in your business. blouse back neck designs
ReplyDeleteThank you for your kind words! I'm glad you found this post helpful!
DeleteLove this look very much, and the top looks great. I'm a big fan of the clogs as well. blouse designs new
ReplyDeleteThank you!
Delete