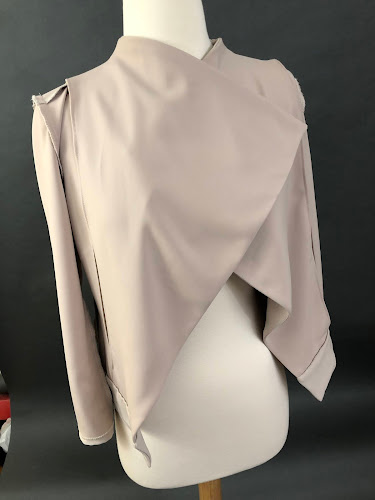
If you are looking for a graceful unstructured jacket that is easy and fast to sew, then this Style Arc Sienna may just be the answer.
As always, I'll be posting a detailed review of the pattern at PatternReview.com. This post will concentrate on the sewing process involving the chosen fabric which is matte hybrid. If you are not familiar with this, it is a reversible polyester spandex blend with a jersey side and a matte crepe side. It has 35% stretch widthwise and is quite drapey. I usually buy mine from Emma One Sock and she has shared a very helpful sewing guide which can be found here. I followed Kathryn Brenne's excellent tutorial on handling that fabric and it made the construction process of this jacket a smooth and painless! Just a few of the tips I followed included:
*lower the pressure foot to make it easier to feed the fabric through the machine
*use microtex needle size 60 and polyester thread
*use pressing tools to aid in pressing since the fabric could not tolerate high heat
Since this jacket is unlined, I had to make sure the inside seams were properly finished. This fabric was prone to a bit of fraying. However I chose not to use my serger as the outline of the bulky stitches created would show through the right side.
I used one of the overcasting stitches on my regular sewing machine (Juki F600).
The center stitches are from the cover stitch machine which I used over the center back seam in an attempt to keep that seam nice and flat. The polyester fabric did not take to high heat so unlike cotton or linen, it was not possible to achieve a perfectly flattened seam allowance.
This is the right side of the center back seam.
The pattern calls for a lot of stitching in the ditch. Using the right machine foot makes the job more accurate. Above is the Juki edgestitch foot (R) which I also use for stitching in the ditch.
Close-up of the sewing foot.
Before stitching, I handbasted to make sure I catch the edge of the collar on the wrong side.
A view of the back collar after it was stitched.
The pattern provides one with the option to attach a front facing that becomes part of the waterfall edge. Leaving out the facing will require one to finish the edges nicely. I opted to use the facing.
For the front facing, I used the jersey side of the fabric as the right side to provide a nice albeit subtle contrast to the crepe texture of the main body. It is not stated in the pattern but one has to finish the edge of the facing that is hanging free.
The front facing is anchored at two points. One is at the shoulder seam.
The other anchor point is at the hem band.
It may be helpful to know that the front facing will only partially cover the shoulder seams so best to finish that seam before attaching the facing.
Although the jacket was simple to sew, it required some careful matching of crossing seams like the seams of the undersleeve and the princess seam at the back. To ensure this and avoid unpicking, I machine basted just the area where the two seams met before stitching the whole seamline.
Another area where crossing seams have to be matched--the hem band and facing, and the hemband and center back seam.
I guess that's it for construction. Here are some photos of the finished garment.
Thanks for stopping by!


No comments:
Post a Comment