Many many years ago, I saw a quilted outerwear vest in the most gorgeous shade of mustard yellow displayed in an Anthropologie store. I couldn’t bring myself to buy it because of the price tag and thankfully it sold out and my obsession flew away with it. Fast forward to latter of of last year when quilted outerwear seemed to be everywhere. I fell in love with a quilted jacket from Uniqlo that featured wavy quilts instead of the popular horizontal or vertical ones. I vowed to create something akin to that and the opportunity arose with this month’s “Corduroy Sew-Along” at
Pattern Review
Armed with a fun polka dotted fine wale corduroy from Marcy Tilton and a black ultrasuede which is the oldest fabric in my stash, I decided to make my own quilted vest using Simplicity 1499.
 |
This pattern features three options for a vest with variations in collar, front opening and pockets.
I made view A which uses quilted fabric. For a detailed review of the pattern itself including fitting adjustments and construction techniques, kindly check out my review at PatternReview.com
|
Since I decided to quilt my own fabric, this post will largely focus on that process.
Fabrics:
The vest is designed with side panels in both front and back--a perfect opportunity to for color or print blocking.
 |
| Top layer: 100% Japanese cotton corduroy for the center front and back. |
 |
| Top layer: Black ultra suede for side panels. |
 |
| Backing layer: 100% woven cotton for inner layer of quilt |
 |
Middle Layer: cotton/poly mid loft batting.
|
Quilting Process:
 |
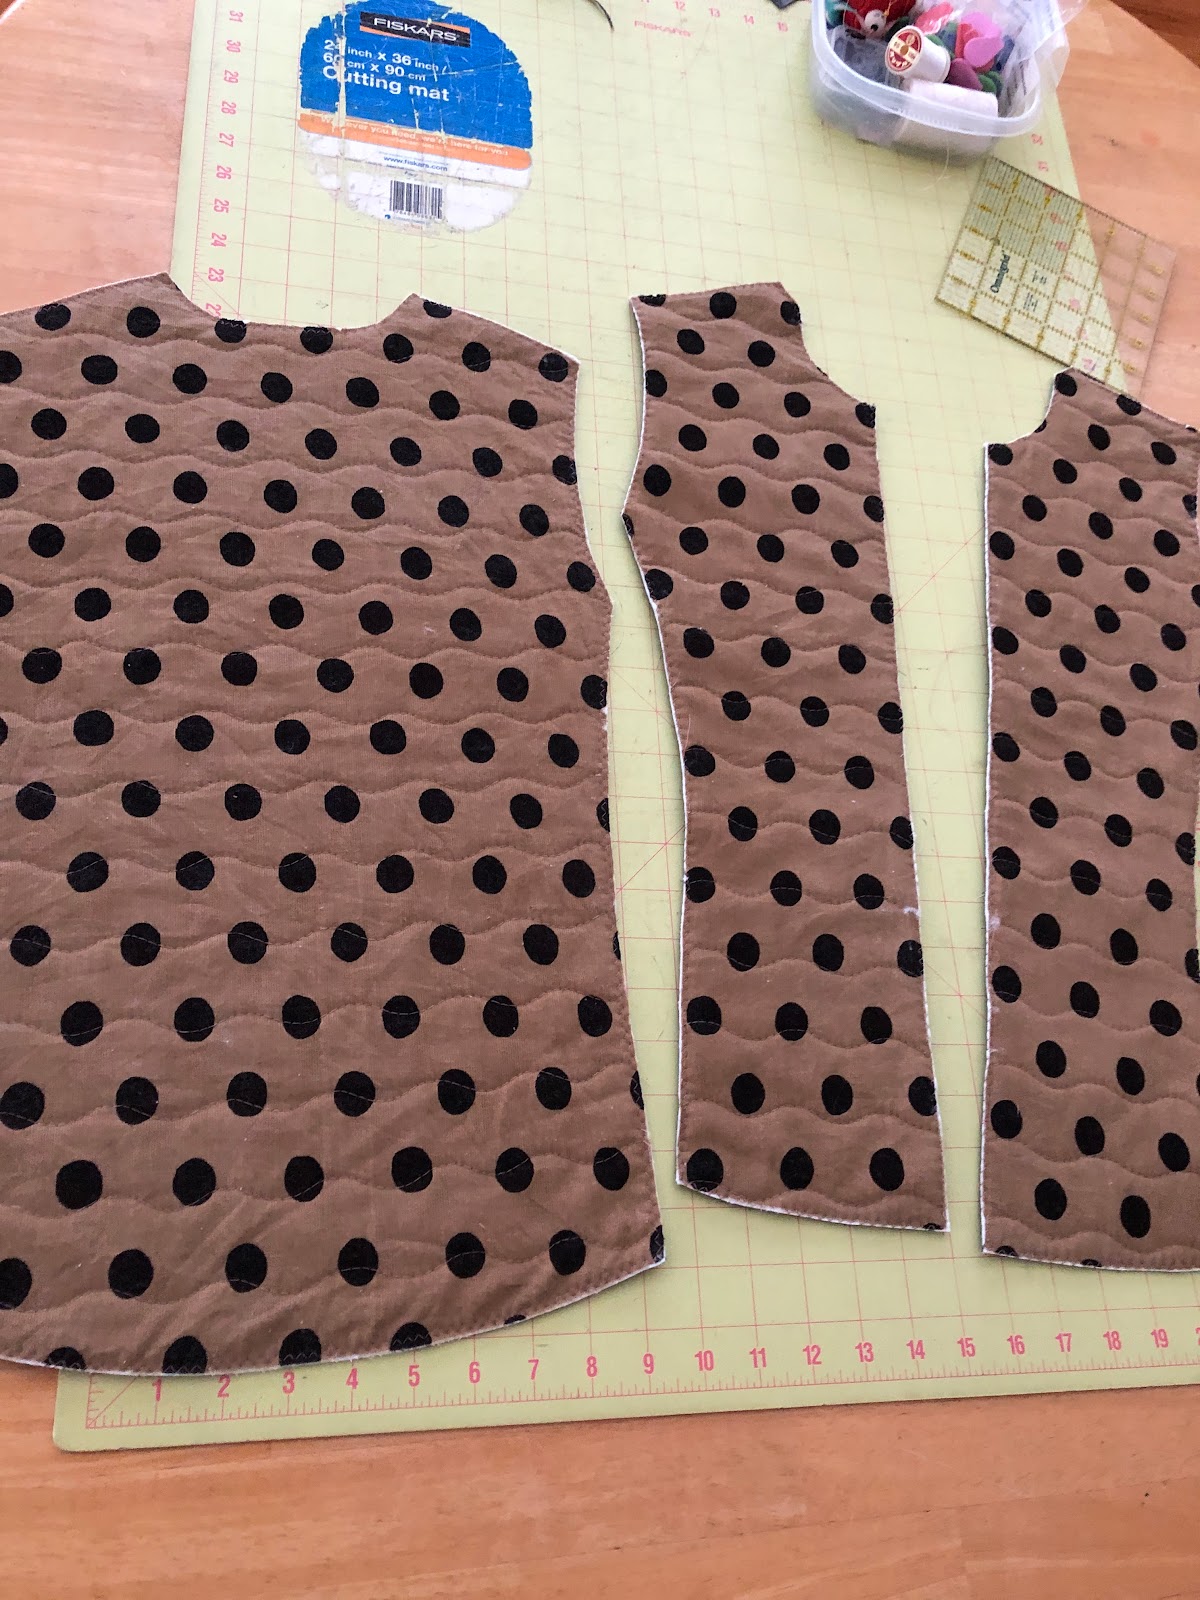
| Only the outer main fabric was cut following the pattern pieces for the vest. The middle and backing layer were not cut to shape. I made sure they were at least 2" larger than the main fabric along all edges. I also made sure to cut the backing layer following the pattern's grainlines. |
 |
| To hold the three layers together, one can use pins, fabric glue or basting spray but I opted for hand basting. |
 |
| Shown here are the front center pieces basted to the other layers. |
 |
| A closer look at the basted fabric. I had to make sure the backing layer was flat and smooth. |
 |
| I used stitch no. 66 in my Juki HZL F600 sewing machine to create the quilting lines. I set it to the widest and longest stitches. |
 |
| To ensure my quilting lines were uniform in distance and straight across the grain line, I used Quilter's masking tape, making sure not to press too hard to make it easier to pull off without harming the fabric. |
 |
| Here is the back center piece ready for quilting. |
 |
| A walking foot was essential for this step. I aligned the edge of one sole with the edge of the masking tape and set the needle position all the way to that side. |
 |
|
 |
| Instead of pulling the masking tape off from one end, I loosened it with the aid of a seam ripper before gently pulling it away. This helped prevent fraying of the raw edges of the corduroy fabric. |
 |
| For the black ultrasuede, I didn't use the masking tape as it left some mark on the fabric. I had to rely on a 1" template I made from cardboard. I didn't use heat erasable marking pen either because after testing it, I found that heat didn't totally erase the marking in spite of the claims. |
 |
| It's a little bit hard to see but I used diagonal lines instead of wavy quilting lines. Not only was it a design choice, it also saved me the trouble of having to align the waves at the adjoining seams. |
 |
| I zigzagged the edges before trimming the batting and backing layers. |
Vest Construction:
Sewing the vest itself was pretty simple and straightforward. The fiddly part was finishing all the raw edges both inside and outside. The pattern itself did not offer any instructions on how to handle the raw edges of the seam allowances so I opted for HongKong binding then topstitching to hold the seams down.
 |
| This photo shows topstitching being done on both sides of the seam that joins the side panel to the main panel. |
To finish the front edges, collar edges, hems and armholes, the pattern called for bias tape binding. I made my own bias tape using a wider width to account for the turn of cloth caused by the thick quilted fabric.
 |
| I cut an 18" square fabric to make continuous bias loop and it was enough to cover all the edges in my vest. But take into consideration the fact that using size 6, I also shortened the pattern by a total of 3" and made some adjustment on the armhole. |
 |
| This Clover bias tape maker made it easier to make my own bias tape. |
 |
| A closer view of the armhole binding from the inside. |
 |
| A view of the finished vest. |
Special Feature:
I wanted to have the option of using a removable faux fur collar so I tried on one that came with an RTW down vest of mine. It had elastic loops along the edges and I just needed to add some buttons to the inside of my collar.
 |
| I added a 3/4" wide strip (plus 5/8" seam allowance) of ultrasuede to the lower part of the inner collar before attaching the collar to the neckline. |
 |
| I sewed some buttons to the strip I added. |
 |
| The faux fur collar was then attached to the collar via those buttons. |
Zipper Tips:
 |
I used size #5 plastic mirror separating zipper from Zprz.com. To avoid having to shorten zipper, I measured the finished length of my garment before purchasing the zipper. Mine was 18" long compared to the 20" suggested by the pattern envelope. Important to note that the zipper is attached with 1/4" allowance between the teeth and the front edge. Depending on the size of the teeth, one will be adding a few inches to the total width of the front, something to consider during fitting.
Finished VestAnd now for some modeling shots!
|