This weekend I was browsing through my old digital photos
and chanced upon a picture of my daughter wearing a draped top that I have sewn six
years ago. It was based off a Paco Peralta pattern and originally meant for me.
However I thought it suited her better so I gave it to her and up to now, I
still see her wear that top every now and then. So I decided to revisit the
pattern and sew myself a wearable muslin using a matte jersey fabric from my
stash.
About the pattern:
Six years ago when I purchased this pattern, it did not have
the sleeve option. I bought it from the designer’s Etsy shop at bcnuniquepatterns. Unlike commercial printed patterns, this one was hand drawn
by the designer on a medium weight onion skin paper.
It is multisized but available only in four sizes—S (bust of
31.5”), M (34.5”), L (37.5”), XL (40.5”). There are no instructions included.
However there are only four pattern pieces and the construction is simple enough
to figure out. And 5/8” seam allowances are already included.
Construction Notes:
As mentioned above, there are only four pattern pieces:
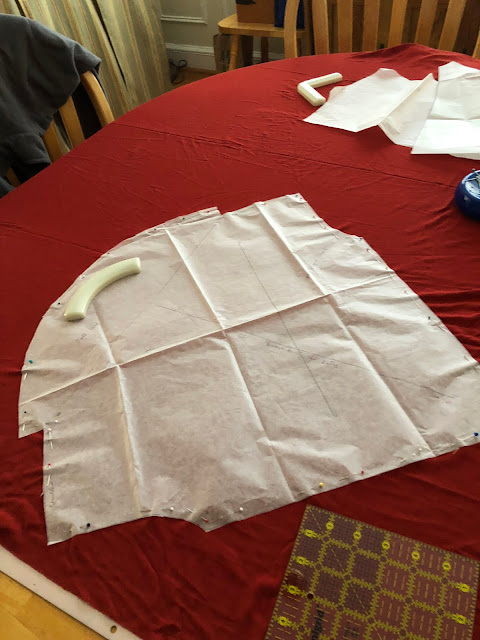
*upper front that has a self facing which forms part of the
draped neckline
*lower front which has a v-shaped upper edge
 |
| Shown here, the lower front piece is laid out on the fabric fold. |
*back which is cut in two pieces, although one may also cut this
on the fold
*back facing which I interfaced with a lightweight tricot
interfacing since my fabric was a jersey
Order of construction:
1.
Stabilize the neckline edges by staystitching.
2.
Reinforce around the perimeter of the V-shaped
edges in both upper and lower front pieces.
3.
Sew the two front pieces together along the V
seam. To reinforce the area near the center of the V, sew small stitches about one
inch on both sides of the center. Clip the center of the V in the lower front making
sure not to clip the stitching.
4.
Sew the two back pieces along center back.
5.
Sew the back facing to the back neckline.
Note: If your fabric is woven, you may need to put invisible zipper at the center back seam. You can choose to sew the center back seam along the length of the back facing then leave the rest open for the zipper.
Note: If your fabric is woven, you may need to put invisible zipper at the center back seam. You can choose to sew the center back seam along the length of the back facing then leave the rest open for the zipper.
6.
Sew front to back along shoulder seams
continuing to the corresponding shoulder seams of the back facing and the front
self facing. Understitch the back facing to help stop rolling to the outside. Tack the facing to the shoulder seams.
7.
Sew the side seams.
8.
Finish the armhole edges and the bottom hem. In
my case, I used a bias cut strip of self fabric to bind the armhole edges. Then
I just used blindstitch to hem the bottom of the top.
9.
Since I used matte jersey, I just finished the
edges with my serger. If I had used silk I would have probably underlined it
then added a lining.
 |
| View of the V-shaped seam between upper and lower front. |
 |
| View of the right side of the front after V seam has been pressed. |
 |
| The interfaced back facing sewn to the back neckline. |
 |
| View of the shoulder seam (the closer to the bottom) and the seam joining the back facing and front self-facing. |
 |
| Understitch the back facing. |
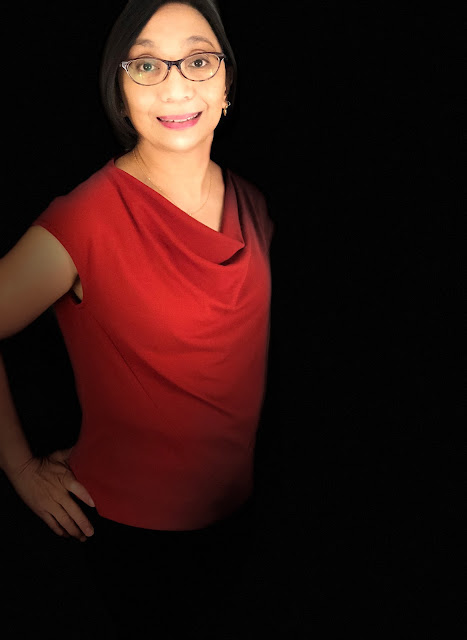
And now here are some photos of the finished top:
This dressform is more well endowed than me.
I played around with the different settings of the Iphone's portrait mode. This stage lighting can be really dramatic!
Finally here's a picture of my daughter when she visited us. She's wearing the first version of the draped top I made in ITY fabric.
My review of the pattern can also be found at Pattern Review.


It’s beautiful in that red matte jersey!!
ReplyDeleteThank you! That fabric turned out to be a really good match for that pattern!
DeleteThanks so much Faye!
ReplyDeleteSo nice, thank you.
ReplyDelete