How times flies! Eleven years ago, my first blog post was
inspired by the first formal gown I sewed for my daughter’s prom. And now I
am busy helping with preparations for her forthcoming nuptials. While in the midst
of planning her wedding gown, my daughter broached the topic of a dress she
could wear for her engagement photoshoot. It didn’t take a lot of planning as I
immediately knew the perfect pattern.
 |
With its neckline exquisitely adorned with three dimensional leaves, its princess seams on front and back and its graceful bottom flounce this dress is photo shoot ready.
|
Fabric:
Recommended fabrics are medium weight linen, crepe back satin and shantung. My daughter and her fiancé have a keen affinity for the purple color so I sent them swatches before ordering the fabric online.
 |
| Fabric no. 41035 in color 159. It had a satiny sheen on one side and a matte finish on the other. |
For the main fabric, I used crepe back satin which I
purchased online from Emma One Sock. I cannot rave enough about Linda, the owner of the store. I won't go into the details of the circumstances that resulted in me needing more of the fabric and needing it ASAP. But Linda was able to procure it for me and ship it right away so I was able to mail the finished garment to my daughter in the nick of time.
For the lining, I used charmeuse in the same shade and from
the same online store.
I toyed with the idea of underlining the main fabric but it
was quite substantial already so I skipped it.
Construction:
Fitting:
Because my daughter is based in the East Coast and I’m in
the Midwest, we had to rely on long distance fitting which was facilitated by
Skype and her body double dress form which I blogged about here.
*Muslin 1—I sewed a straight size 6 and then
made some fitting changes using the dress form. I had to reduce ease at both front
and back princess seams, side seams at the waist and hips and flounce. I also
added two darts at the back neckline to remove gaping. Then I mailed this
muslin to my daughter.
*Muslin 2—just some fine tuning around the
side seams and the length of the bottom flounce. The adjustments in the
princess seams necessitated corresponding adjustment to the shoulder strap. The
bodice was also shortened by 1” along the lengthen/shorten line above the
waistline. (There was another L/S line below the waistline.)
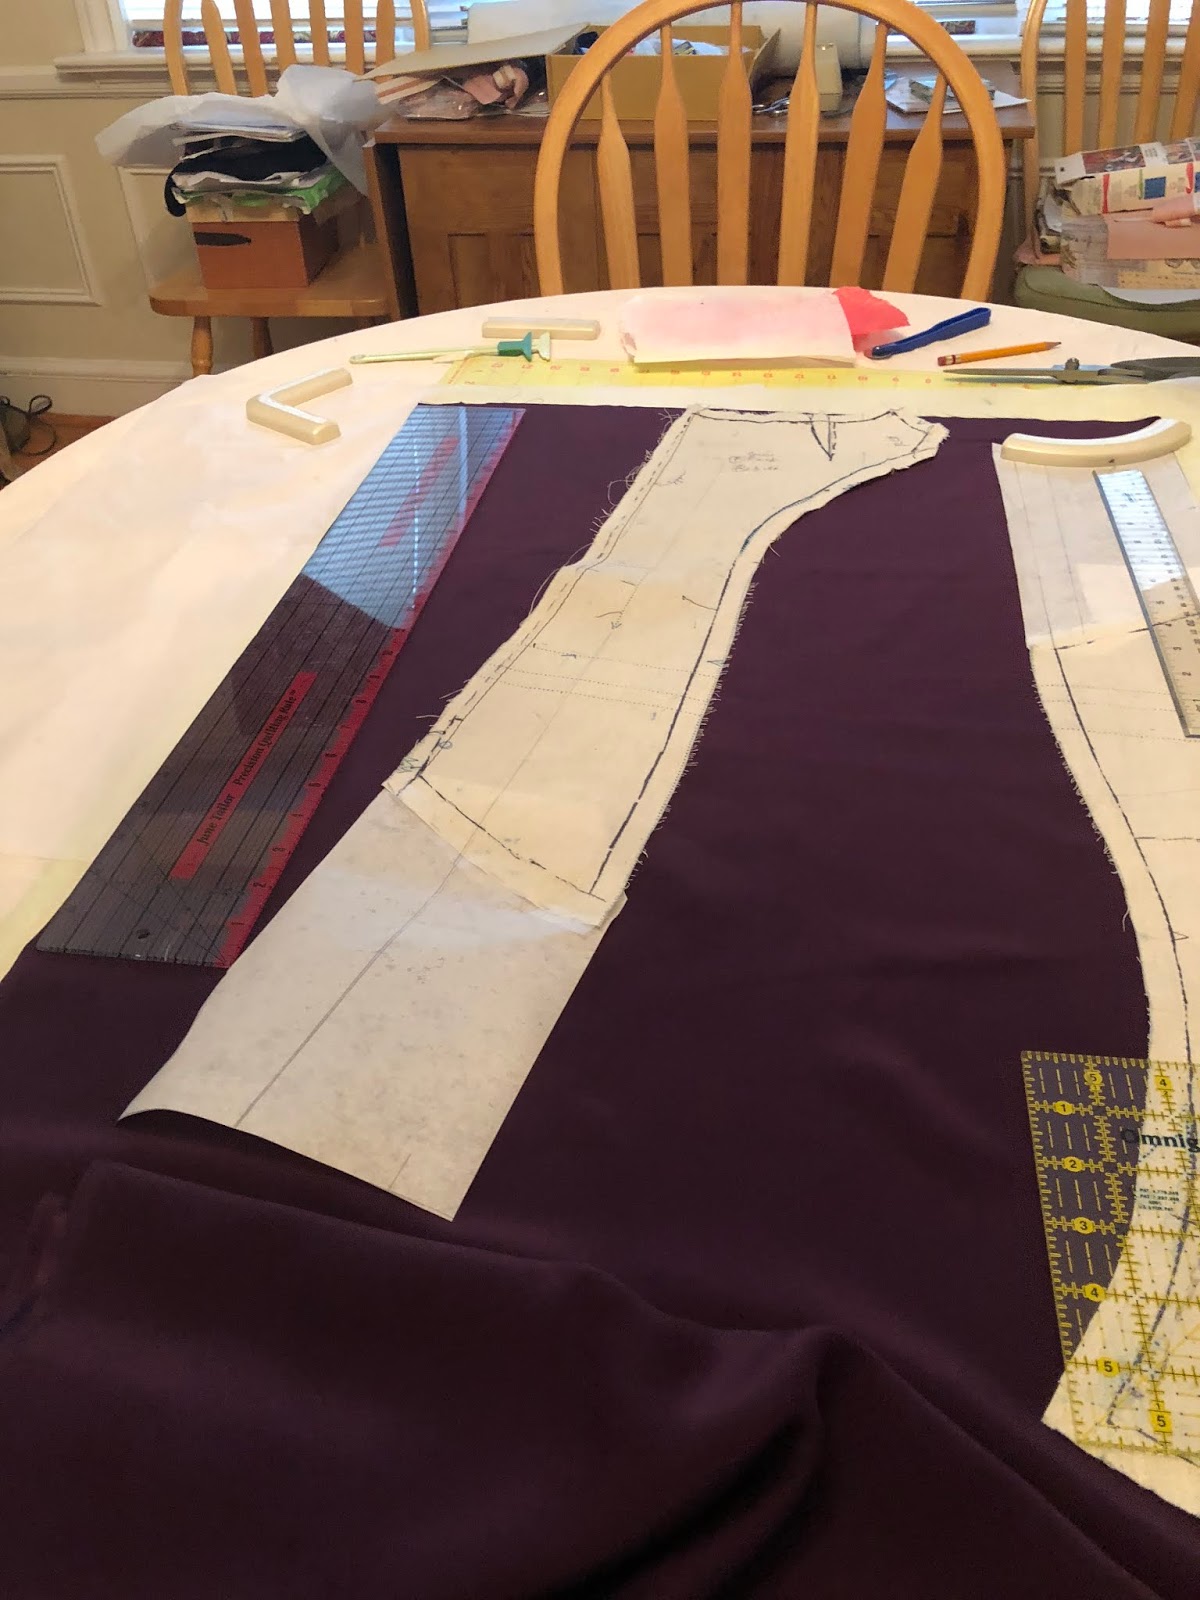
Sewing Process:
1. Using the final fitted muslin as pattern pieces, I traced the seamlines onto the fashion fabric using black waxed paper and tracing wheel. 
 | ||
 This Kai scissors have sharp serrated edges making it a breeze to cut through fine slippery fabrics. | |

 |
Using silk thread to baste made it easier to remove the temporary stitches. Needle sharps did not leave big holes in the fabric.
|

 |
| For machine stitching, I used silk-covered cotton thread and microtex needles. |
4. The construction of the dress itself was simple and straightforward. The instructions were clear and easy to follow. No guessing game here!


5. The dress was fully lined and the lining had front and back yoke facing. However, the lining hem had an odd length. It extended beyond the seamline of the upper part of the dress and flounce but ended mid level of the flounce. I extended the lining by 8".

6. The most fun part was adding the finishing touches.

  |
Invisible zipper attached.
|

 |
| Narrow hem |
5. The dress was fully lined and the lining had front and back yoke facing. However, the lining hem had an odd length. It extended beyond the seamline of the upper part of the dress and flounce but ended mid level of the flounce. I extended the lining by 8".
 |
| Lining pattern extended by 8". |

 |
| View of the faced lining. |
 |
| There were three separate pattern pieces for the leaves. |
 |
It's probably not too obvious from the picture but I used the matte side as the right side for two leaves and the shiny side for one of the leaves to provide subtle contrast with the dress itself which was sewn using the shiny side as the right side.
|
 |
| For a touch of sparkle, I added a few seed beads to the center of the assembled leaves. |

More photos of the finished dress...
 |
| Close-up of the shoulder strap. |


And some modeling shots.


I'll update photos with outtakes from the photoshoot once they are available.
Lovely dress & daughter. Congratulations!
ReplyDeleteThanks so much!
DeleteA fabulous pattern that you have made come to life, well done!
ReplyDeleteThank you so much!!!
DeleteGorgeous dress, your daughter looks stunning.
ReplyDeleteThanks so much Sharon!
DeleteYou made a lot of effort with mailing two muslins and such a beautiful work. It was worth it for your daughter looks beautiful in her lovely dress.
ReplyDeleteThank you so much! I have to admit the whole process was more stressful than usual but seeing my daughter wearing it with a huge smile on her face makes it all worth it!
DeleteStunning and to think you did this long distance! Your daughter is beautiful in her dress.
ReplyDeleteThanks so much Bunny! Modern technology is so wonderful!
DeleteSuch a sublime dress! Your daughter looks so thrilled to be wearing one of your custom designs.
ReplyDeleteThanks so much! I love sewing for her!
Delete