
This is a panel print from the Max Mara Heritage Prints line. I bought two panels and it's enough to make myself a skirt and a top. It is a silk twill, lightweight but opaque.


Here are some inspiration pieces from the Max Mara collection using that print. I decided to sew a simple skirt and let the fabric print be the star.
Pattern:

New Look 6345
This is an old pattern which I have had in my stash for a while and have never actually sewn. I think it is still available at Etsy but the current pattern number at the Simplicity website is now for a different pattern. It features three different skirt silhouettes and six design alternatives. I made view C minus the details. It is a short A-line skirt with yoke and back zipper.
Sizing:
I went with size 10 based on my hip measurement, made a muslin and found the fit okay around the hips and waistline. However I felt there was too much wearing ease and decided to make some adjustments along side seams, shaving off 3/8" from the upper edge along the waistline and about 1" along the bottom to reduce the A-line silhouette.Fabrics:
Main fabric*100% woven silk twill
*lightweight but opaque
Underlining
Because of the lightweight nature of the silk twill, I decided to underline with silk organza to add more body.
Lining:
The pattern did not include lining but I like my skirts lined so I used rayon Bemberg lining from stash.
Cutting:


To have more control over print placement, I cut all the pattern pieces over a single layer of fabric.

For the underlining, I double the seam allowance along the vertical seams. The reason for this is I wanted to underline and finish seams in one procedure--a nifty trick I learned from "julieb" at Pattern Review.

Using a 5/8" seam ruler purchased from Pamela Leggett made the process of adding an additional 5/8" allowance so much easier!

Shown here is the cut edge of the center back with the additional 5/8" added.

For the lining I just used the same pattern pieces for front and back.
Construction:

Since the organza layer was cut wider than the main fabric, align the two fabrics along the vertical edges. With right sides together, sew using 1/4" seam allowance.

Vertical edges sewn together.

Clean up edges by cutting any loose fibers.

Turn right side out.

Press seams open.

Turn organza in so it wraps the main fabric's edge. Press.

A view of the main fabric vertical edges wrapped neatly by the silk organza underlining.

Seams pressed open. Looks like Hong Kong finish minus the work.

For the remaining horizontal edges (waistline and hemline), I basted the underlining to the main fabric with silk thread to avoid shifting during assembly.

Sew front and back together along side seams.

Press seams open.

Sew the assembled yoke pieces to the skirt before attaching the invisible zipper to the center back.
Assemble the lining:
j

Follow same steps as the main skirt, but using French seams for cleaner look except for center back seam).

Sew the interfaced yoke facing to the skirt lining.
Bring the main skirt and lining together by sewing along yoke waistline edges.

Sew a 1/4" twill tape along seamline of yoke waistline for stability.

View of the twill tape sewn to waistline.

View of understitching along the yoke facing.


Catch stitching the lining to the center back.

Hemming the bottom edge by hand sewing, catching only the underlining so the stitches are invisible on the right side.

Hemming on the lining.

Photos of finished garment

Front

Back


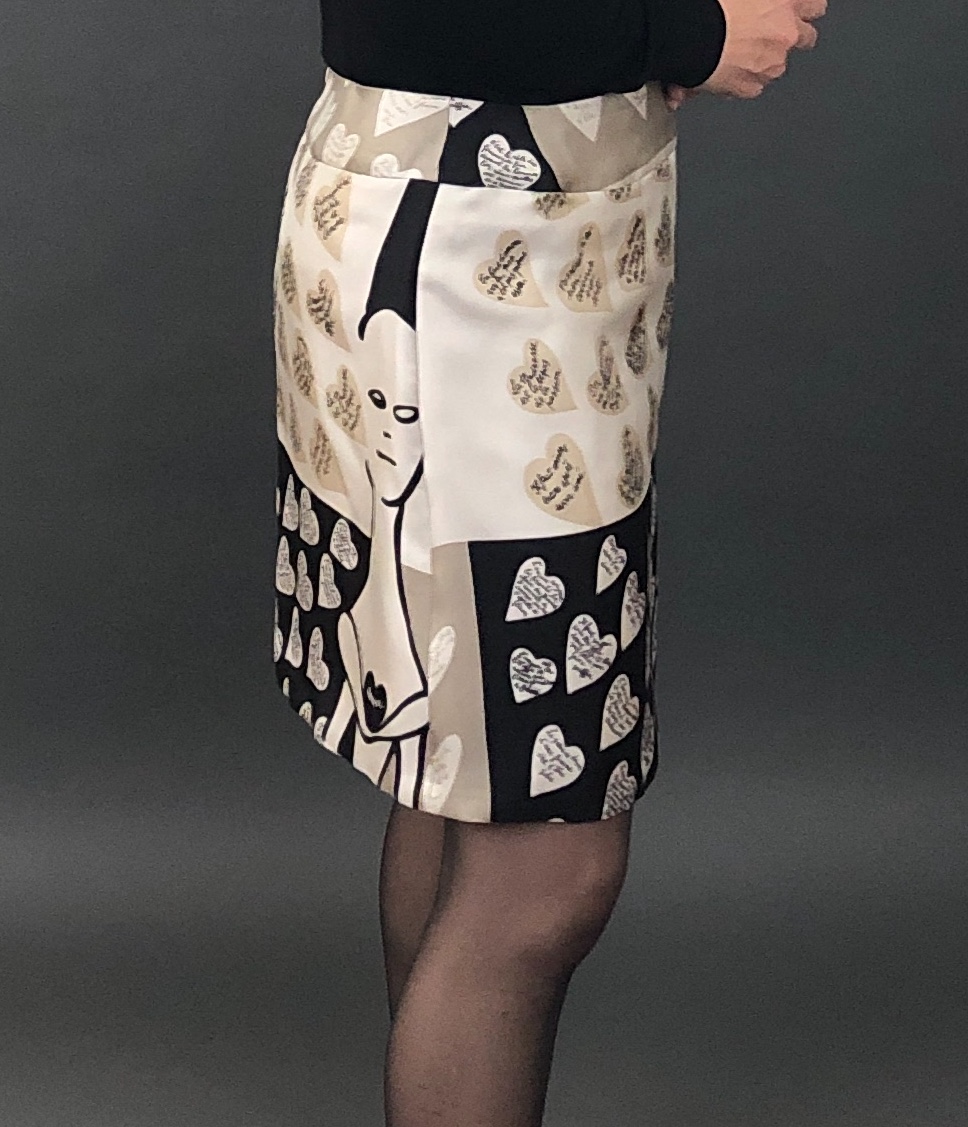


Needless to say, I love my new skirt! It is simple but the fabric makes all the difference!
Wow! Love what you did with that print. I have two of the panels on the way myself. Can't wait to see what you do for a top!!
ReplyDeleteThanks Lynn! Ooh, good for you, I just saw the fabric has sold out at the website. I'm looking through my small pattern stash for a suitable top pattern.
DeleteExcellent pattern placement of the wonderful print. Isn't that the greatest face? Thanks for the step by step pictures. I have been meaning to try that underlining technique for the wrap around edges.
ReplyDeleteThank you! Hope you enjoy using that technique as much as I did. It provides instant gratification!
DeleteI saw this fabric too! You have made a fabulous skirt, allowing the fabric to take centre stage! What a GREAT idea regarding the "Hong Kong" finish, I will definitely try this very soon! Why didn't I think of a technique like that??
ReplyDeleteThanks so much! I can't even remember how I stumbled upon this technique but it's really foolproof!
DeleteThank you so much for including all of the details about enclosing the main fabric seams within the interlining. I'm saving for future reference. Your finished skirt is gorgeous!
ReplyDeleteThanks so much Diane! I'm glad I could be of help in my own little way!
DeleteThis is such a gorgeous statement piece!
ReplyDeleteWith all the sewing I do, I can never, ever get the hang of HK finish. And I was following along here and then, Nope! Lost me! I may have to practice in the sewing room to get this one down!
Thank you!
DeleteTrust me, you'll easily get this one down once you're actually sewing it:)
Your generosity with your time intaking all of those wonderful photos noting your construction techniques is just amazing and ever so helpful to me. Ho many hours a week would you sew Maria? You work is simply mind boggling.
ReplyDeleteThanks so much for such a wonderful compliment! The advent of smartphone has made it much easier to document the sewing process!
Delete