Sunday, July 26, 2020

Style Arc Sienna Jacket

If you are looking for a graceful unstructured jacket that is easy and fast to sew, then this Style Arc Sienna may just be the answer. 


As always, I'll be posting a detailed review of the pattern at PatternReview.com. This post will concentrate on the sewing process involving the chosen fabric which is matte hybrid. If you are not familiar with this, it is a  reversible polyester spandex blend with a jersey side and a matte crepe side. It has 35% stretch widthwise and is quite drapey. I usually buy mine from Emma One Sock and she has shared a very helpful sewing guide which can be found here.  I followed Kathryn Brenne's excellent tutorial on handling that fabric and it made the construction process of this jacket a smooth and painless! Just a few of the tips I followed included:

*lower the pressure foot to make it easier to feed the fabric through the machine
*use microtex needle size 60 and polyester thread
*use pressing tools to aid in pressing since the fabric could not tolerate high heat

Since this jacket is unlined, I had to make sure the inside seams were properly finished. This fabric was prone to a bit of fraying. However I chose not to use my serger as the outline of the bulky stitches created would show through the right side. 

I used one of the overcasting stitches on my regular sewing machine (Juki F600). 
The center stitches are from the cover stitch machine which I used over the center back seam in an attempt to keep that seam nice and flat. The polyester fabric did not take to high heat so unlike cotton or linen, it was not possible to achieve a perfectly flattened seam allowance. 

This is the right side of the center back seam. 


The pattern calls for a lot of stitching in the ditch. Using the right machine foot makes the job more accurate. Above is the Juki edgestitch foot (R) which I also use for stitching in the ditch. 


Close-up of the sewing foot. 


Before stitching, I handbasted to make sure I catch the edge of the collar on the wrong side. 

A view of the back collar after it was stitched. 

The pattern provides one with the option to attach a front facing that becomes part of the waterfall edge. Leaving out the facing will require one to finish the edges nicely. I opted to use the facing. 


For the front facing, I used the jersey side of the fabric as the right side to provide a nice albeit subtle contrast to the crepe texture of the main body. It is not stated in the pattern but one has to finish the edge of the facing that is hanging free.

The front facing is anchored at two points. One is at the shoulder seam. 


The other anchor point is at the hem band. 


It may be helpful to know that the front facing will only partially cover the shoulder seams so best to finish that seam before attaching the facing. 

Although the jacket was simple to sew, it required some careful matching of crossing seams like the seams of the undersleeve and the princess seam at the back. To ensure this and avoid unpicking, I  machine basted just the area where the two seams met before stitching the whole seamline. 

Another area where crossing seams have to be matched--the hem band and facing, and the hemband and center back seam. 

I guess that's it for construction. Here are some photos of the finished garment. 


Thanks for stopping by!


Saturday, July 25, 2020

Butterick 6527 My Waterfall Cardigan with a Little Twist

The first time I made this pattern was last year for the Pattern Review Sewing Bee and I did not really dedicate a detailed blog post about it. Just to refresh your memory, here is the version I sewed.


This time I used a very lightweight cotton blend knit that feature "designer holes!"


I got this fabric from Marcy Tilton and bought only one yard. That was not enough to include the sleeves on the pattern so I paired it with a black cotton knit jersey from my stash. I made sure both had similar weight and stretch characteristics. 


I will be posting a review of this pattern at PatternReview.com soon. The thing that needs addressing about this pattern is the way the back neckline and front edges are finished. Merely turning them inside won't work because it is inevitable that the wrong side will show with the way the front cascades. 


Let's look at my first version where I addressed the issue by sewing a reversible trim along the entire front opening edge.


For this current one, I left the front edges unfinished because the fabric looked good from both sides. 
The unfinished edge was also in keeping with the deconstructed nature of the fabric. 


However, the back neckline was a weak point so in addition to fusing a knit stay tape, I also bound it with knit fabric. 

Hard to see clearly but I sewed the edges of the binding with triple zigzag. 

Here's a better view. 

A view of the wrong side which also shows the serged edges of the armsyce. 


One modification I made was to add ruching to the sleeves. 


It was quite easy to do this. There are lots of tutorials online and I found Pamela's Patterns video on sleeve ruching very clear and helpful. Here is the link to her YouTube video.

In a snippet, I just cut a 10" piece of 3/8" wide elastic and triple zigzagged it to the sleeve. I had to do it several times though until I was happy with the final length of the ruching. So if you are like me and unsure, do some machine basting first before finalizing with zigzag stitches. 

I am quite happy with how this cardigan turned out. It is less overwhelming than my original version and is just the perfect topper for a summer shell. 


Thanks for stopping by!


Friday, July 24, 2020

My DIY Max Mara Top

   In case you have not followed my blog, late last year (November 2019) I posted a skirt I have sewn using a panel print by designer Max Mara.

Panel print from the Max Mara Heritage prints line sewn into a New Look 6345 skirt
New Look Skirt 6345 in Max Mara Heritage print panel

I loved that fabric so much and I still have some leftovers. However for me it is the hardest fabric to work on because of the way the the whimsical prints are laid. I knew I wanted to make a wearable top out of it and after waiting and searching, I think I found the perfect pattern to go with it. 

Meet Dixie, a woven Style Arc top!

As  always a detailed review of this top can be found here at Pattern Review. So in this post, I am just highlighting some construction details that hopefully will be helpful to anyone using the pattern or sewing with similar fabrics. If you want to see modeling shots of the top, scroll to the bottom of this post. 

This Style Arc Dixie pattern has been drafted for soft woven fabrics like silk, crepe or rayon. After testing a muslin in my regular SA size (6), I thought there was enough ease to go down one size and combine a jersey fabric with woven. 

 I auditioned three different solid colors of a matte rayon jersey before deciding on the black. 


To facilitate handling of the slippery silk twill fabric, I laid down a piece of tissue wrapping paper under the fabric before cutting. I also made sure to replace my rotary blade with new sharp ones and I avoided using pins. Instead I used a lot of pattern weights. 

To prevent stretching of shoulder seams and slit openings on the jersey fabric, I use this fusible knit stay tape and ironed it on the wrong side of the seamline. One can also use elastic or some other lightweight fusible knit interfacing that is cut to size. I find it more convenient to have a ready made notion like this. I also have one in white. I bought them from Amazon. 

Although I have a serger, I did not use it to finish any of the inside seams because I did not want any bulk to show through my lightweight fabrics. So I experimented with the overcast stitches on my sewing machine and settle for this one. 


Sorry if it's a bit hard to see this but it just shows the overcasting stitches on the edge of the rayon jersey. 

Here is a better picture showing the overcasting stitches. 

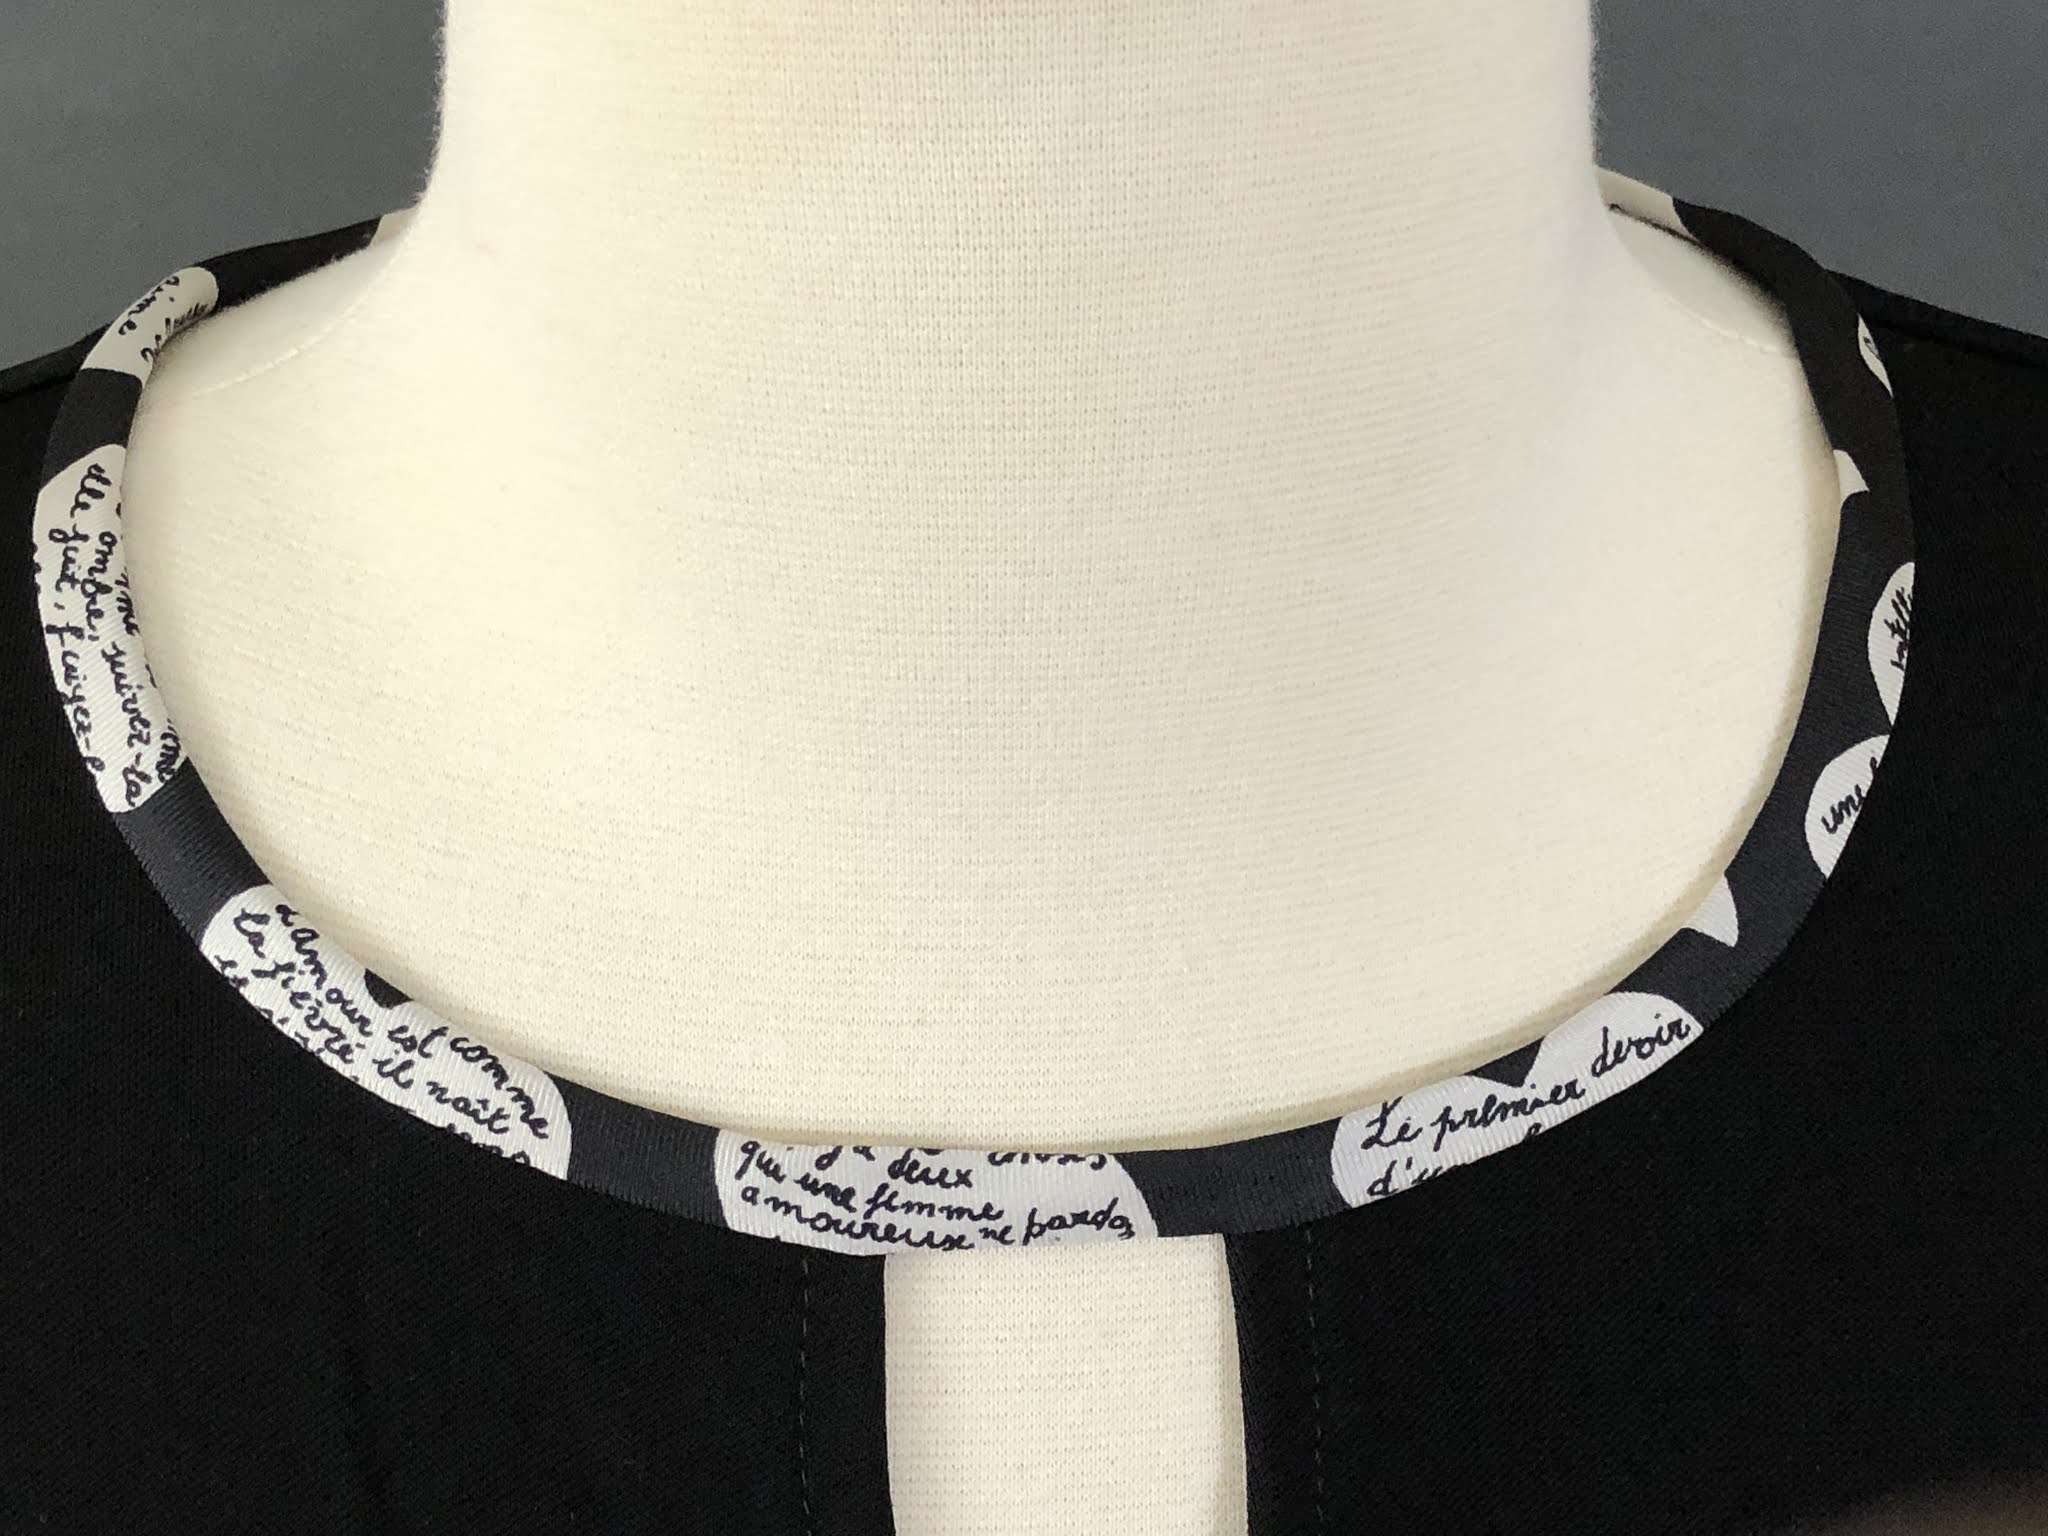
The trickiest part of the sewing the pattern was the neckline binding because it involved a front gap.

This is the neckline binding that has been pressed along one edge before applying. 

This is the front gap that requires a bit of precision during application to maintain the correct length of the opening. 

The short edges of the neckline binding are folded into itself by 1/4" before being sewn to the back opening. 


The instructions suggest stitching in the ditch to finish the neckline but I opted for hand sewing using slipstitches for better control. 

And here is what it looks like after sewing. 

Note the topstitching details on the slit and yoke. 


And this is the back slit opening. 

Another area worth paying attention to while sewing is the side seams. I basted them first to make sure the front and back yoke seams matched. It is worth taking time to do this to avoid unnecessary unpicking of stitches. 

For the bottom edges, I used narrow hem and I followed the tutorial from Threads Magazine which can be found here.


Here is the inside view of the finished top.

And now for some modeling shots!


Thanks for dropping by!