
First up is the Esme Knit Top. This is a PDF pattern and the sizes are grouped in threes (4-6-8, 10-12-14, etc) except for the last two sizes (28-30). I had no idea how Style Arc sizing went as far as ease was concerned. Based on the measurement chart posted on the website, I fell between sizes but it was a good thing those sizes were included in one group so I purchased 4-6. The good thing about the PDF file was the option to choose one size to print meaning no need to trace through multiple lines. The pattern itself consisted of only five pieces and two of those were optional. After sewing a wearable muslin, I decided that size 6 worked well for me.

There was one front piece and one back piece. Since my fabric had a right and wrong side, I had to make sure to layout my pattern pieces correctly with the right side of the fabric up and the right side of the pattern up.

I used two leftover rayon jersey fabrics from my stash. The blush pink was used for the body and the gray for the contrast collar. These fabrics were purchased from Gorgeous Fabrics last year and are indeed gorgeous--crepe like texture with fluid drape. It had 50% crosswise stretch and 15% lengthwise.

I also used a lightweight fusible knit interfacing for the collar since my fabric was really lightweight.
Settings:
For sewing seams together, I used small zigzag stitches on my regular sewing machine. I was planning to press seams open and topstitch with coverstitch machine so I skipped the serger.

I set the zigzag width to 1.4 and the height to 1.0. This was on the Juki F600. I used universal needle size 70 and polyester thread.
Construction:
1. Sew front and back at the shoulder seams using 3/8" seam allowance.

Tip: to prevent the feed dogs from "eating" the fabric at the beginning of the seam, use a piece of tissue paper underneath then just tear it off gently when done.
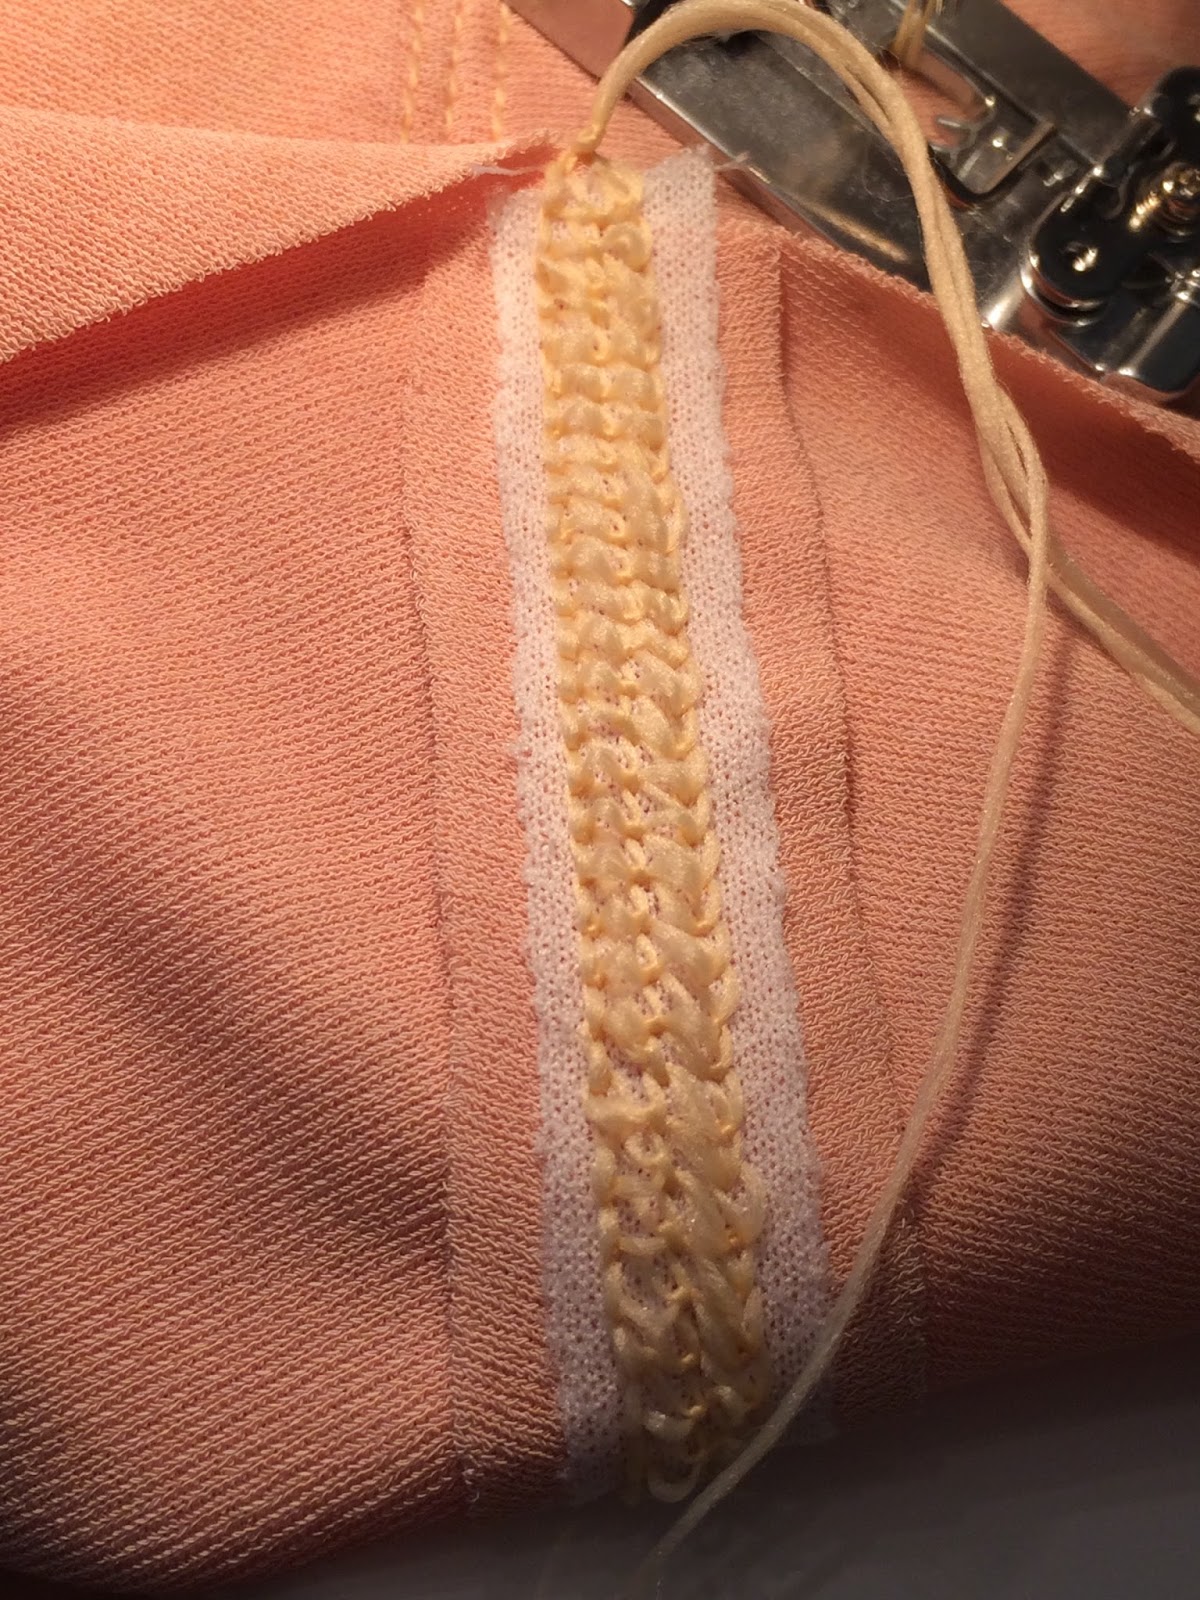
2. Press seam open then topstitch on the right side.

Tip: to stabilize shoulder seam on stretchy fabrics, use stay tape. I applied a 1/2" strip of fusible tricot interfacing on the wrong side of the shoulder seam, centering it over the seams after pressing them open.

I used the four-thread setting on my coverstitch machine (Juki MCS-1500).
I used Maxilock stretch thread on all the needles of the coverstitch but next time I will limit it to the lower looper. I found the thread to snag easily which may not be a good thing in the long run.
3. Construct the collar. (If using interfacing, apply it first.)

Fold the collar in half lengthwise right sides together and sew the two short edges together using 1/4" seam allowance up to the notches. If you forgot to mark the notches, just stop sewing till you reach the extended seam.

Before turning the collar right side out, trim corners.

This is what it should look like after turning.

Align the remaining unsewn seams from the two short edges. Sew them right side together.

This is what it should look like after sewing.

Finished collar.

Baste the remaining long edges together using zigzag stitches.

Now is a good time to try on the collar to see if it can fit over your head! My collar looked floppy because my fabric was soft and drapey but I liked it that way.
4. Sew collar to neckline matching center and shoulder markings.


Sewn collar as seen on the wrong side.

Topstitching using three-thread setting.
5. Fold up the hem by 2", right sides together, and sew along the side seam using 3/8" allowance.


Sewn hem after turning.
6. Sew side seams together from armhole to notch marking the split.


7. Topstitch

I used long stitches on my regular sewing machine to topstitch along the side seams and armholes.
7. Press hem allowance and topstitch.

Here are some pics of the finishing details:

Some reviews of this pattern noted the wide armhole opening that tended to have a peekaboo effect. I basted before sewing the side seams and tried decreasing the armhole width by pinning but found doing so changed how the extended sleeves draped so I did not alter anything. Since my fabric was not totally opaque, I decided I will just wear camisole underneath.
I love my new top. It's more of a tunic length on me because I am short but I don't mind it. It will look great with leggings and the added coverage on the back is a plus! This will definitely be in my "to sew again" pile.


Your explanation regarding the collar really saved me! Thank you :)
ReplyDeletePs. The top looks awesome
I'm so glad this post was helpful! Thanks for taking time to let me know and I appreciate your kind words!
DeleteThank you so much for your detailed explanation of the collar construction. I was scratching my head and couldn’t for the life of me work out what I was supposed to do. Your instructions saved me. Thanks again 😊
ReplyDeleteYou're welcome! I'm delighted this post was helpful. Sometimes the instructions on the Style Arc patterns can be perplexing!
Delete