Meanwhile to get my blogging mojo back, I thought I would start by sharing a favorite of mine which is the Alabama Chanin tee.
Pattern: Classic T-shirt pattern from the "Alabama Chanin Studio. Sewing & Design Book." I used this pattern several times before and have tweaked the fit since to suit me better. I changed the neckline to a V silhouette.
Fabrics: As with previous shirts, I used two fabrics on front and one on back.
Main fabric: navy blue organic medium-weight (9.8 oz) cotton knit
Backing fabric: camel organic lightweight (4.6oz) cotton knit
Stencil: Anna's Garden which I used twice before already
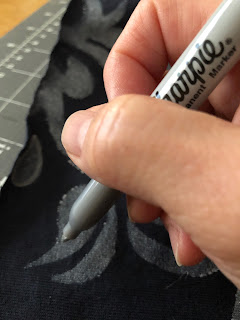
Paint: I added a few drops of Pearlized Createx Airbrush color (Pearl White) to Transparent Creates Airbrush color (medium gray). I had trouble with my airbrush tool resulting in uneven and splotchy finish on some of the stencil shapes so I touched up the borders using Silver Metallic Sharpie pen.
Thread for stitching appliqué: 100% cotton embroidery floss in camel. This came in a spool of 75 yards. I used four strands which were doubled and knotted. I only used one spool and there was enough left.
Needle for hand stitching: Japanese steel size 9 sewing needles (T.E.C. Tokyo brand) purchased from Etsy.
Scissors for trimming away the top layer: curved tip Kai scissors size 5
A peek inside the construction process.
I used backstitching to sew around the appliqués.
View of the inside.
Handstitching in action.
I used a 1-1/2" wide binding and Cretan stitch for the neckline.
I also used same binding for the sleeves
I cut the back of my tee to allow for a center back seam and after machine sewing together, I used backstitches to topstitch.
I left the lower hem unfinished.
Here's a time lapse video of the cutting process. No matter how careful I was, I accidentally snipped three small holes in some of the appliqués which I fixed with patch and bonding agent.
And now photos of the finished garment.
Wrong side of the garment.
Inside view of the neckline.
Inside view of the center back seam.
Inside view of the sleeve binding.


Stunning artwork. What an inspiration.
ReplyDeleteThanks so much Janice!
DeleteThank you Maria. Lovely details in the blog. What a stunning top.
ReplyDeleteThank you for the kind words Sandy!
DeleteWow, this is beautiful! Such intricate work. Thanks for sharing how you made it!
ReplyDeleteThanks for the kind words Ann!
DeleteA lovely top, and it fits you perfectly.
ReplyDeleteThanks so much!!!
Delete