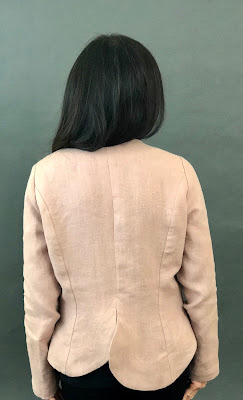
There are so many ways to wear it and the look changes depending on how I play with the front opening.
To have an idea of how the jacket was constructed, take a look at the main pattern pieces below:
Similar to Burda patterns, I had to trace the facings that are drawn inside the main pattern pieces themselves.
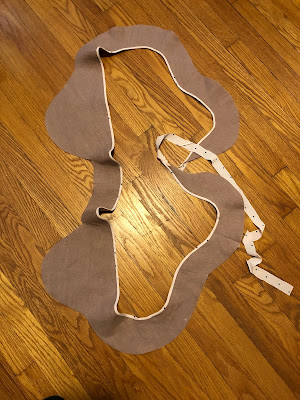
This is the front facing after it was traced. The main pattern piece had a slashed dart that was not transferred to the facing pattern.
And these are the back facings.
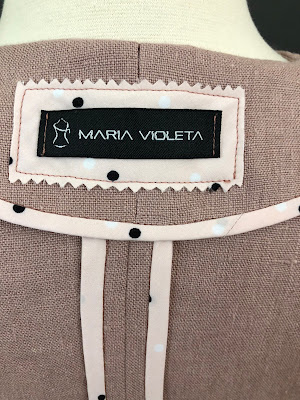
The reason for all those facings is the jacket is not lined. To make the inside look pretty I used Hong Kong binding to finish all visible raw edges.
I used a lightweight polka dot lining fabric to make the bias strips for the binding.
A 17" square cut of fabric yielded a continuous loop of 1" bias strip that was enough for the project.
Here are some photos of the Hong Kong binding application in action.
There were some errors in the labeling of some pattern pieces. I wrote about that in detail at Pattern Review. I have just emailed the designer about it and she said she will look into it. But there are more positives about this pattern that more than make up for the errors.
Aside from the wonderful unique design, the pattern is well drafted. All notches and markings matched. The sleeve cap was well drafted with just the right amount of ease.
Here is a photo of the sleeves being eased into the garment. After it was sewn, a simple pressing resulted in a very smooth sleeve cap!
Back showing uneven hem and topstitching.
View of the front dart.
View of the non-existent shoulder seam.


Maria, this jacket is stunning; it does scream 'designer' I know you don't love the fabric, but I do! I recently started a blog with blogspot and can't figure out how to add the PR badges... which you have done successfully; can you tell me how? Thanks!
ReplyDeleteThanks so much Danielle! As for the PR badges, first thing to do is copy the HTML code for the badge from the Pattern Review website. (Let me know if you need help with that). Then on your Blogger dashboard (left column) click on "Layout." On the Layout page, if you scroll you'll see on the right hand column "Add a Gadget", just click that and something will pop up where you can choose from several things. Choose "HTML/Java Script" and click on it. There you'll be able to paste the HTML code of your badge. Save it and then preview your blog. If you don't like where the badge ended up, you can always drag it to the location where you want it to be. Hope that helps!
DeleteThis might be a repeat - THANK YOU; this worked, I did not know which gadget to choose! I don't know how to move it, but it is fine where it is, for now.
DeleteAnd thanks also for highlighting Oki Style patterns - they are very avant garde and refreshing!
You're welcome! Glad it worked:)
DeleteAbsolutely fabulous jacket. Wonderful designer look that fits you so well. Oki Style design such fabulous patterns. Think I'll just abandon my sewing list and follow yours. I'm about to sew my third Issey Miyake blouse from V2814 because you made one!
ReplyDeleteThanks so much! What you said is the best compliment one can get! I'm so delighted to have inspired you with the Miyake blouse. I hope I don't lead you astray with my sewing list:)
DeleteYou make me want to make this jacket-it is so beautiful. I haven't been over to Pattern Review yet today but will before the day is out. Also, I need to check out Oki Style. I had forgotten about them. This definitely is an inspirational piece!
ReplyDeleteThank you so much! I'm new to Oki Style patterns and it feels like I have found a hidden gem. They are so affordable for a designer-look pattern! Definitely worth a try.
DeleteThis is positively amazing. I will definitely check out Oki Style so thank you for that. You did a beautiful job on this and that soft pink is lovely on you. Brilliant.
ReplyDeleteThank you so much! It's definitely worth checking out the brand. The designs are so unique and fun to recreate!
Delete