This is a Lisette design for a classic wool coat which I
have sewn twice before already—once for me in 2017 which I wrote about
here and another one for
my sister. For this third version I sewed view B which has a pointed collar and
went along with the length as designed.
Fabric:
If you regularly follow my blog or read my pattern reviews,
you may notice that there was a time I was obsessed with the color pink—specifically
the dusty hue. But lately that has changed and I started embracing warmer
colors that really suited my tone. So when I saw this shade of brown at the
Mood Instagram page, I decided to take the plunge and add a brown wool coat to
my wardrobe.
 |
This solid boiled wool is 60% viscose/40% wool.
Color: Adobe Brown |
 |
| For lining I used stretch polyester charmeuse in Italian Almond, also from Mood. |
The boiled wool fabric had a little bit of crosswise mechanical stretch so the stretch polyester charmeuse was the perfect lining for it. I love that the lining was a bit more substantial than China silk or Bemberg lining.
Notions:
Thread: Guttermann 100% polyester all purpose thread for the
seams.
Dual Duty Plus jeans thread for topstitching.
Needles: universal size 90 for the wool
Microtex size 70
for the lining
Sewing Foot: in addition to the standard, I also used a walking foot when sewing the thicker seams.
Blind hem foot for understitching.
Buttonhole foot for the buttonholes.
Construction HIghlights:
 |
| I used masking tape to mark one side of the fabric as the right and wrong side were almost hard to distinguish from each other. |
 |
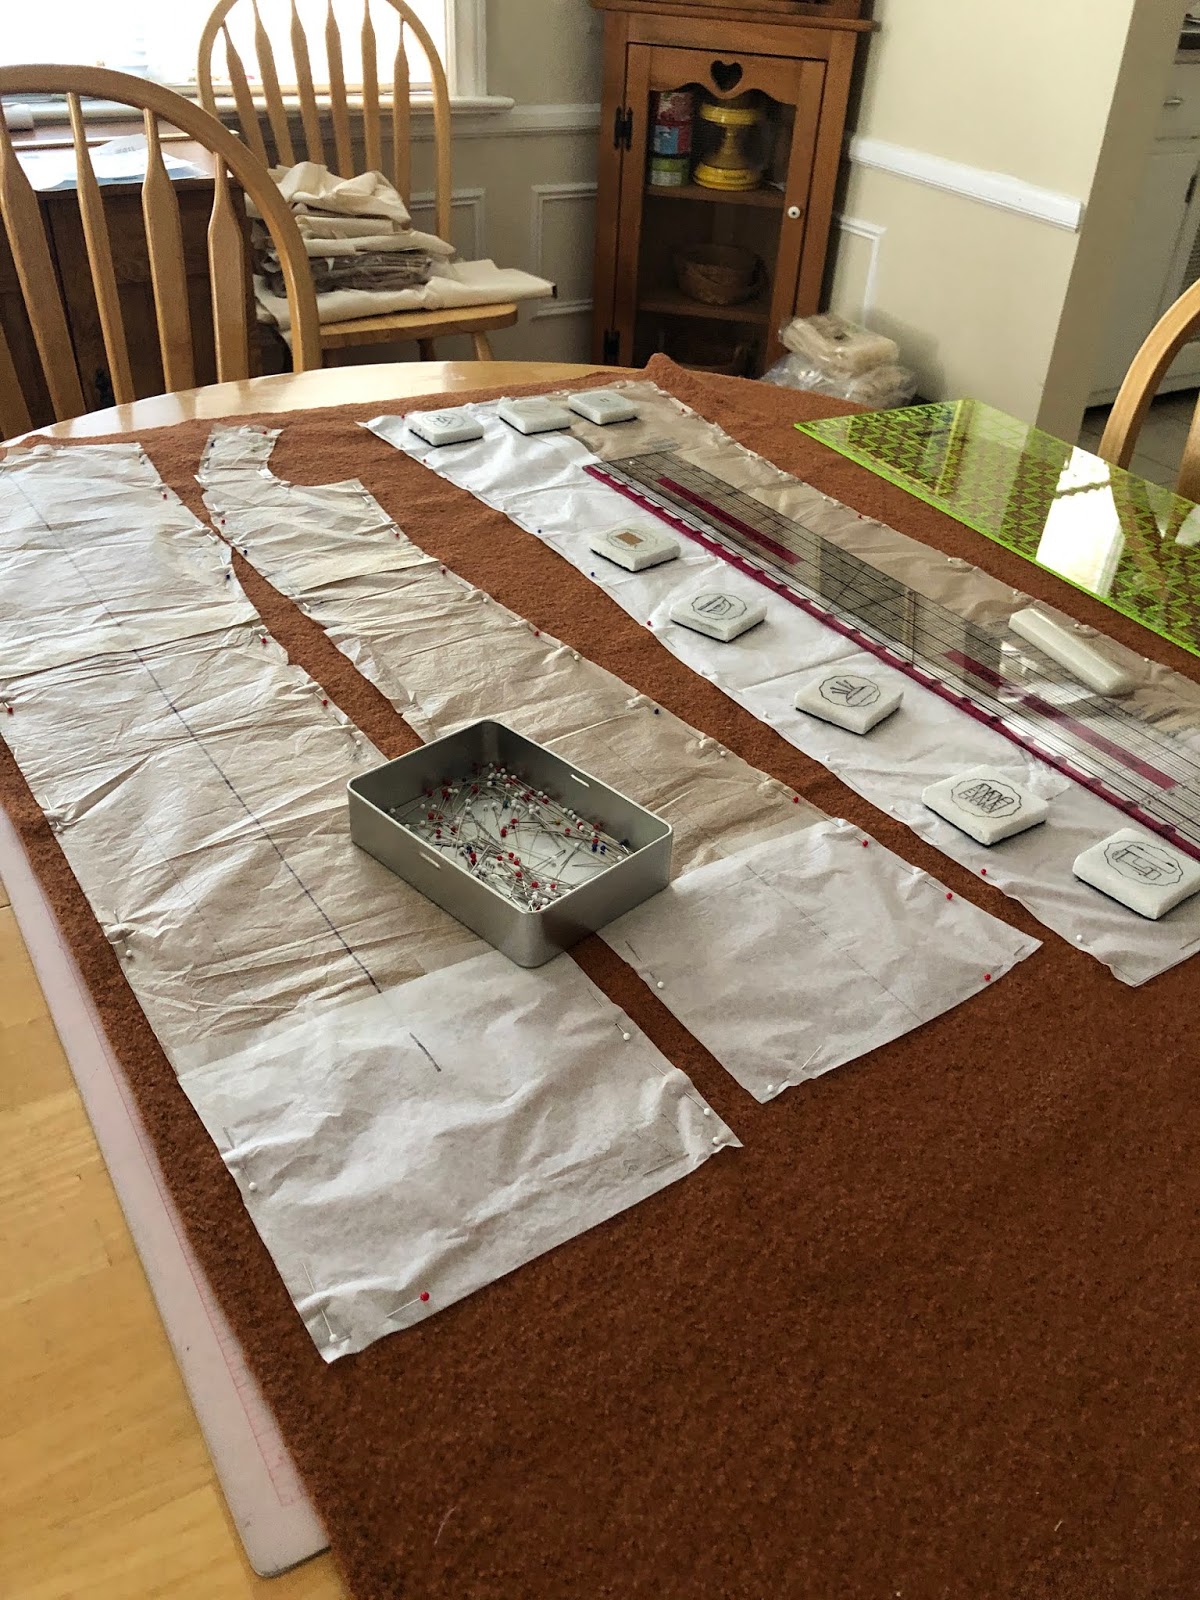
| Cutting the pieces took longer than normal as I had to use single layout for all the pattern pieces. |
 |
| Here are the cut pattern pieces. |
 |
| Clips helped in areas that were too thick to pin. |
 |
| Pocket flap after topstitching the edge. I did not really cared for how it looked. |
 |
| I decided to just hand sew in place. |
 |
| I think the flap looks better without the topstitching. |
 |
| Pocket in action. |
 |
| This is the finished shell. I already attached the shoulder pads and I added sleeve heads. I also added a chest shield on the front. |
To make the sleeve heads I cut a 2" wide piece of cotton batting and covered it with a bias strip of silk organza.
 |
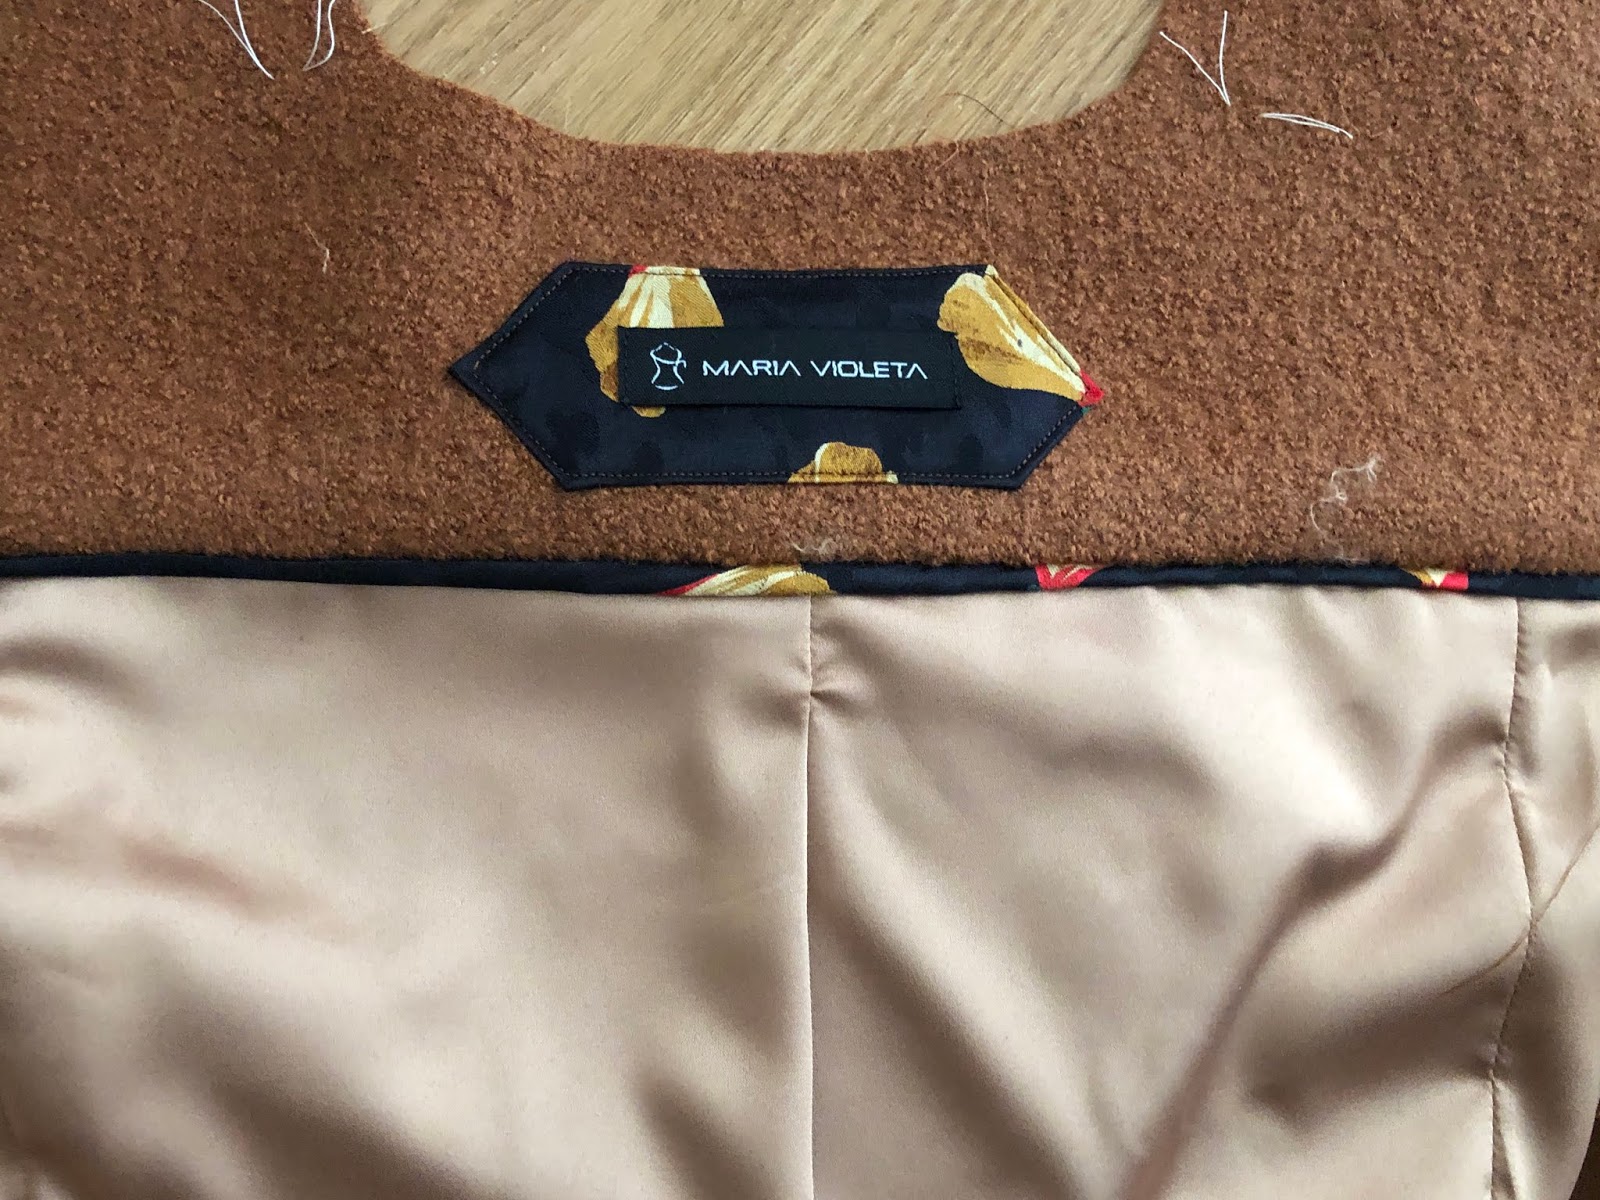
| These are scraps of silk fabric from a previous project. I decided to make some flat piping for the lining/facing seamline. |
 |
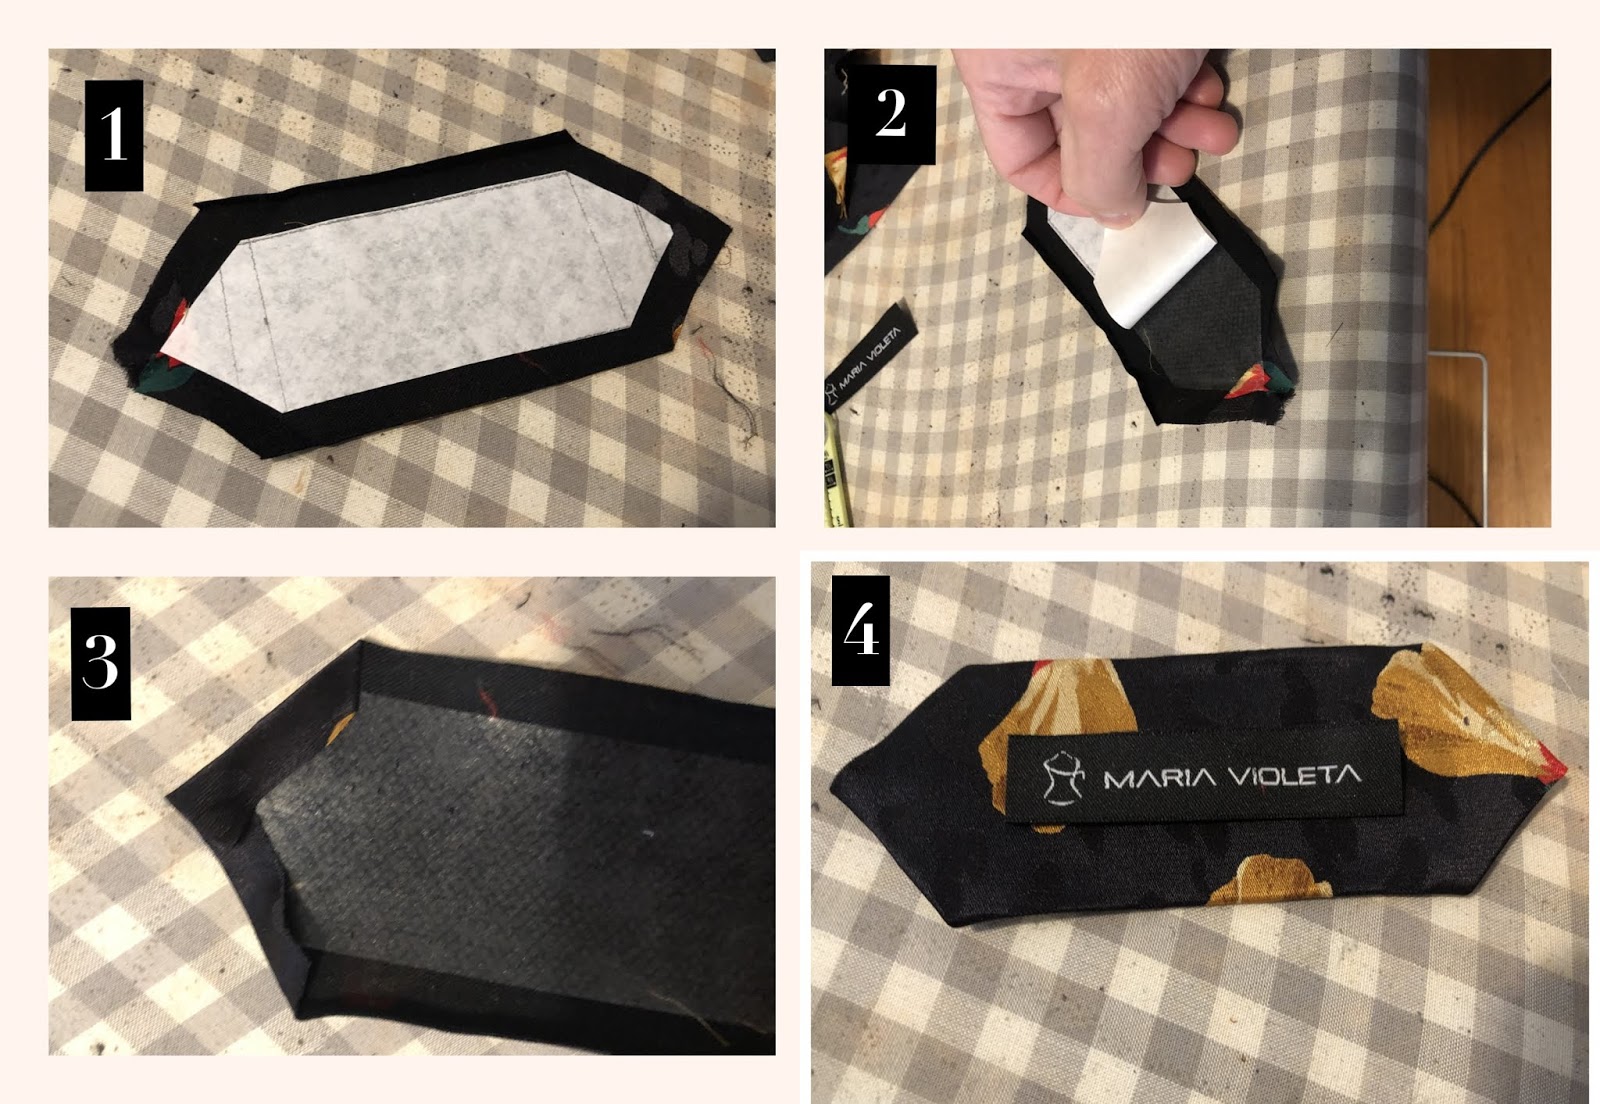
| In addition to the flat piping, I also used the silk print to make a frame for my personalized label. |
 |
| Here's how I made the label frame using Heat n Bond Lite. |
 |
| Hemming the coat's shell. |
To hem the shell's bottom edge I borrowed a technique which I have used before from Sew Stylish magazine Fall 2010. It involves using double interfacing, one lightweight and another hair cloth, in the hem allowance. This not only adds body to the hem but also allows one to hand sew truly blind stitches that will never show on the outside of the coat.
For the lining, I also did my own as I did not care for the pattern instructions which have you sew the lining hem and then leave it free hanging so you can still the wrong side of the coat if you peek. I prefer the other method where you sew the lining's hem to the coat's hem, a few inches above the raw edge so the lining will have a soft pleat when all is done.
An important note about this. The lining will end up wider than the coat's hem if you don't sew the center back allowance. The lining back pieces were purposely drafted to be wider than the coat to allow for the upper back pleat. However the pattern instruction only addressed the upper back pleat and neglected to tell you what to do with the rest of the excess center allowance. It only mentioned basting it down.
 |
| Sleeve hem |
I wanted to do bound buttonholes. I tested on some scraps but gave up as the wool was just too thick and bulky. So I just used regular buttonholes.
 |
| Testing buttonholes. |
I Using my Juki F600 automatic buttonhole stitches, I had to lower the presser foot pressure by one notch and lower the tension by one to achieve some nice stitches. I also did not use the exact button but went down one size because my fabric tended to stretch.
 |
| I added anchor buttons on the wrong side of the facing to hold the outside buttons more securely. |
And now for some photos of the finished coat.


I love it! It is such a classic silhouette and well fitting and sewn. I love that lining color too!
ReplyDeleteThanks so much!I just followed the recommended lining color at the Mood website and it turned out the perfect shade. It's a warm tone of gold, so gorgeous in real life!
DeleteBeautiful work. Thank you for the detailed explanations.
ReplyDeleteThanks for stopping by!I appreciate the kind words!
DeleteYour topstitching is impeccable. This coat has such beautiful proportions! Love that warm toasty brown!
ReplyDeleteThank you so much for your kind words! The coat felt toasty and warm too!
DeleteWhat a masterful coat you made! I love seeing all the details, and it fits you beautifully!
ReplyDeleteThank you so much! I appreciate you stopping by and reading my post!
DeleteThat cinnamon color works so well with your coloring, Maria. That boiled looks to be a challenge to work with, but wool is so wonderful, my favorite fabric! I am up to my elbows in wool right now, too!
ReplyDeleteThanks Kathy! Yes, that's the perfect color to describe it--cinnamon! I love the fabric but it's so thick that I had a hard time with the buttonholes. I can't wait to see your outfit for the Bee. You guys set the bar so high with the third round!
DeleteYour coat is amazing and gorgeous! The color is so beautiful and flattering on you. I was wondering if you needed to make a swayback adjustment with this pattern? I have been wanting to make this same coat pattern, so I wanted to know what you have done.
ReplyDeleteThank you so much Jen! No, I did not have to do a swayback adjustment on this one. Most of the time I do in more close-fitting garments, especially T-shirts.
Delete