First time I mentioned the "Burrito" method was in this post from 2017.
In this photo tutorial, I used the henley top I sewed using McCalls 7360. The pattern instructions on yoke attachment used a different method. The method I'm showing here is called the "Burrito" method. After reading this post, you'll understand why it's called that!
The top has a lined yoke that is attached to the lower back bodice. To better understand the tutorial, here is a rundown of the pattern pieces involved:
*Bodice front
*Yoke. The yoke is lined so there are two pieces cut from the same pattern piece--one will be the fashion piece, the other is the lining or facing. For the sake of clarity, I labeled the fashion piece Yoke 1 and the lining or facing piece Yoke 2.
*Bodice back
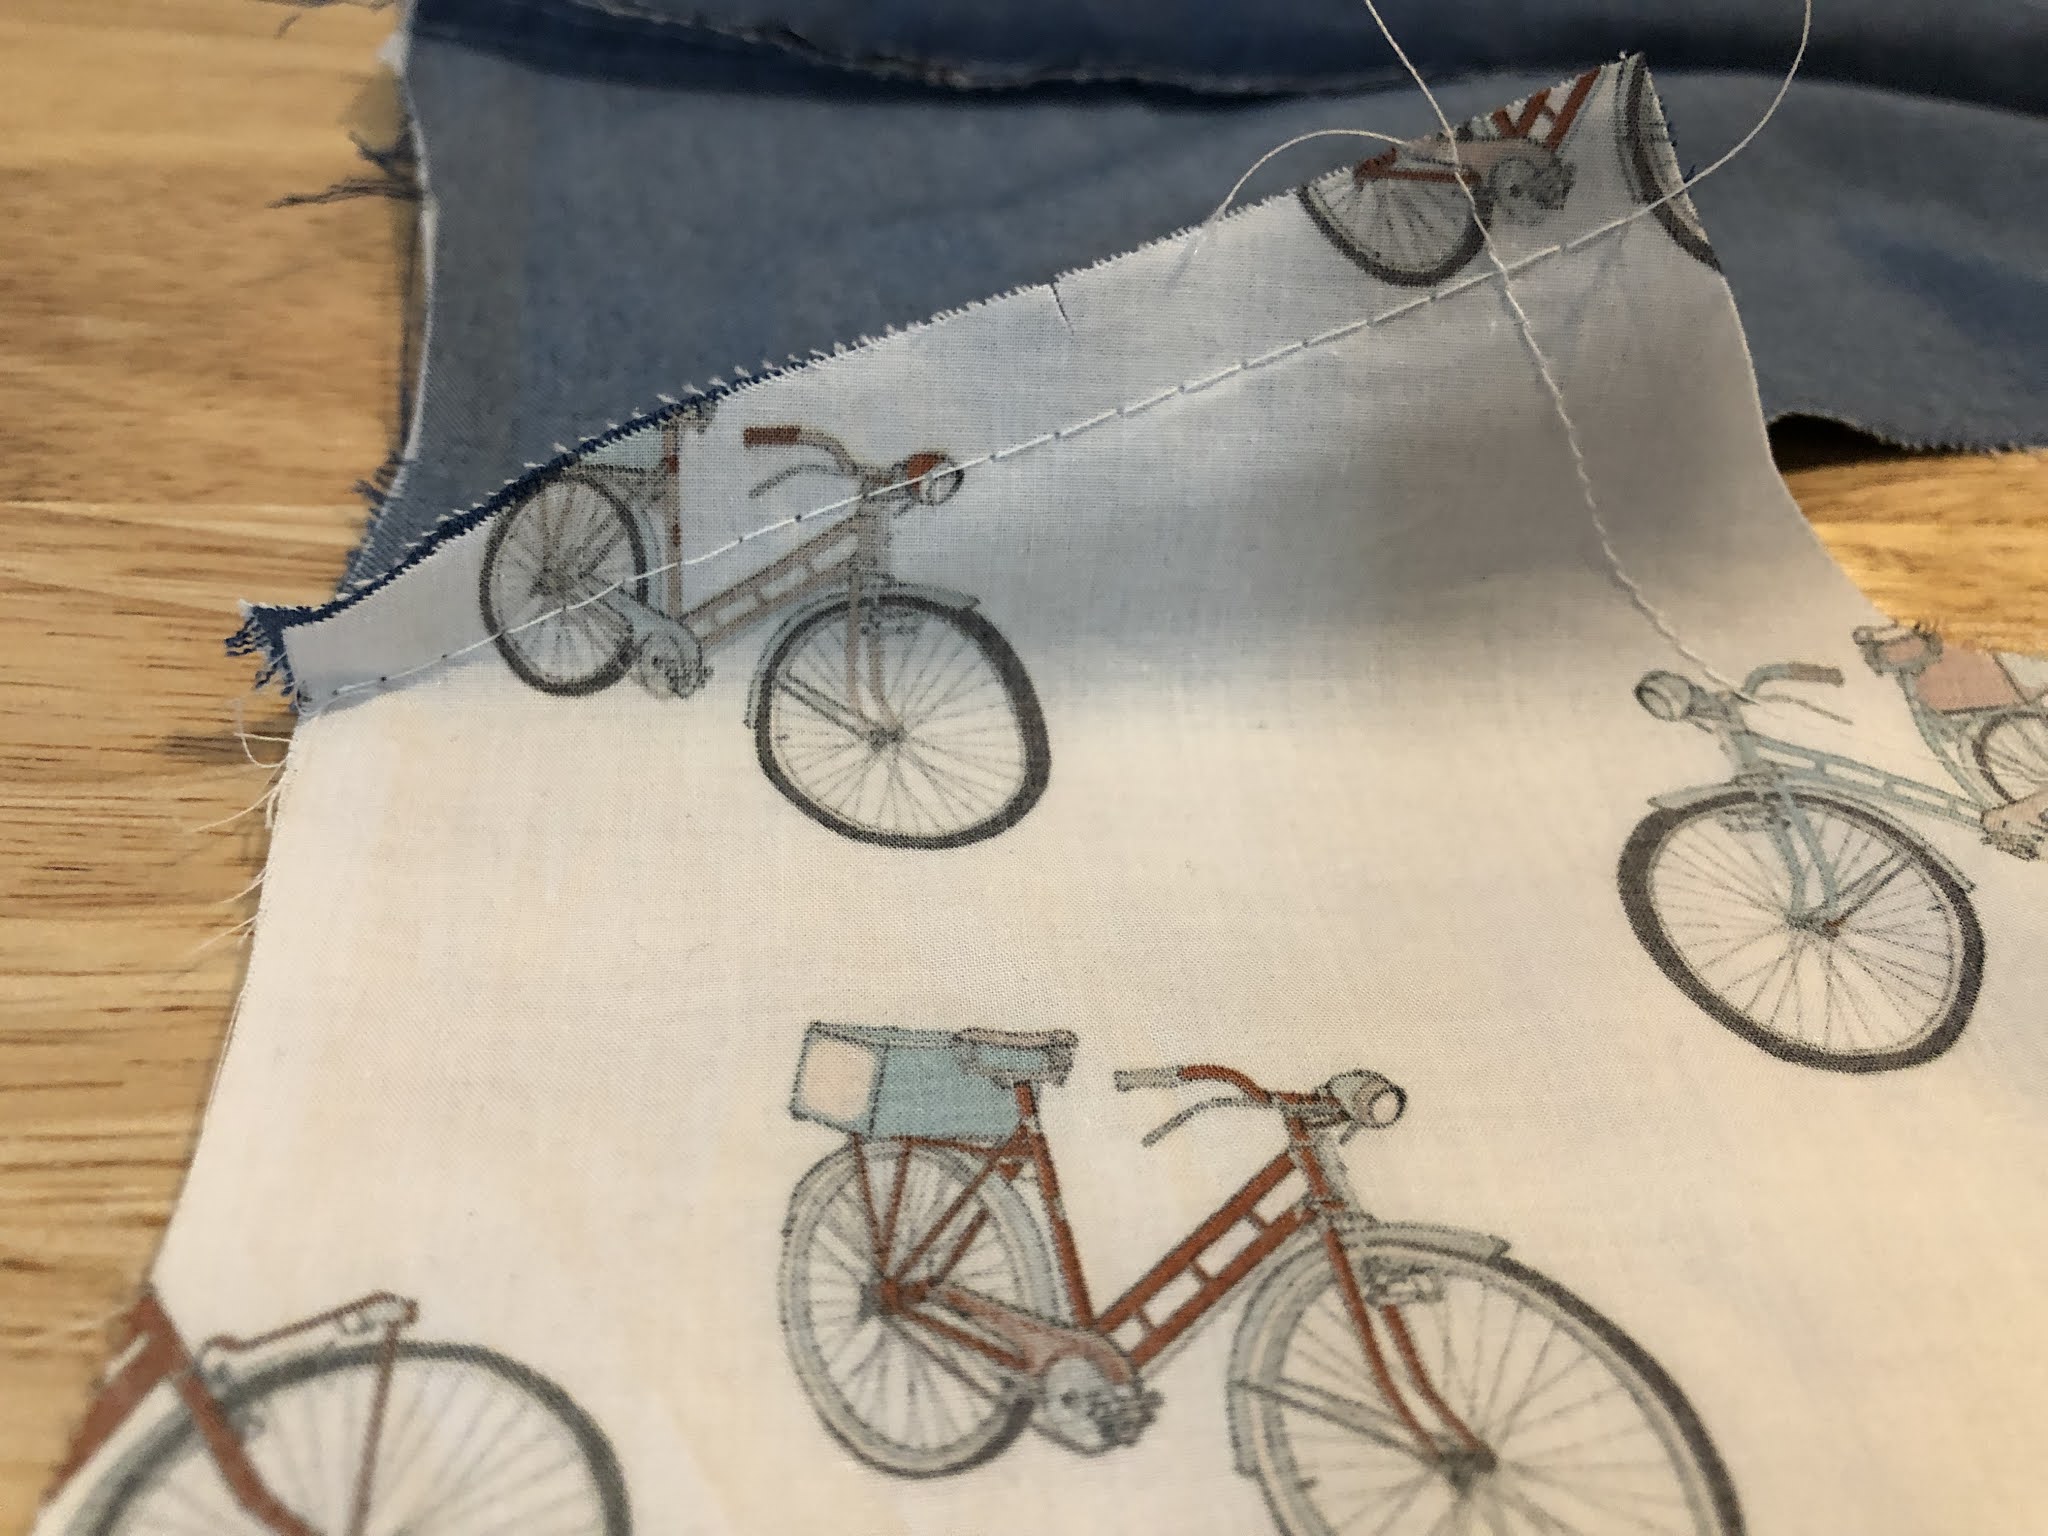
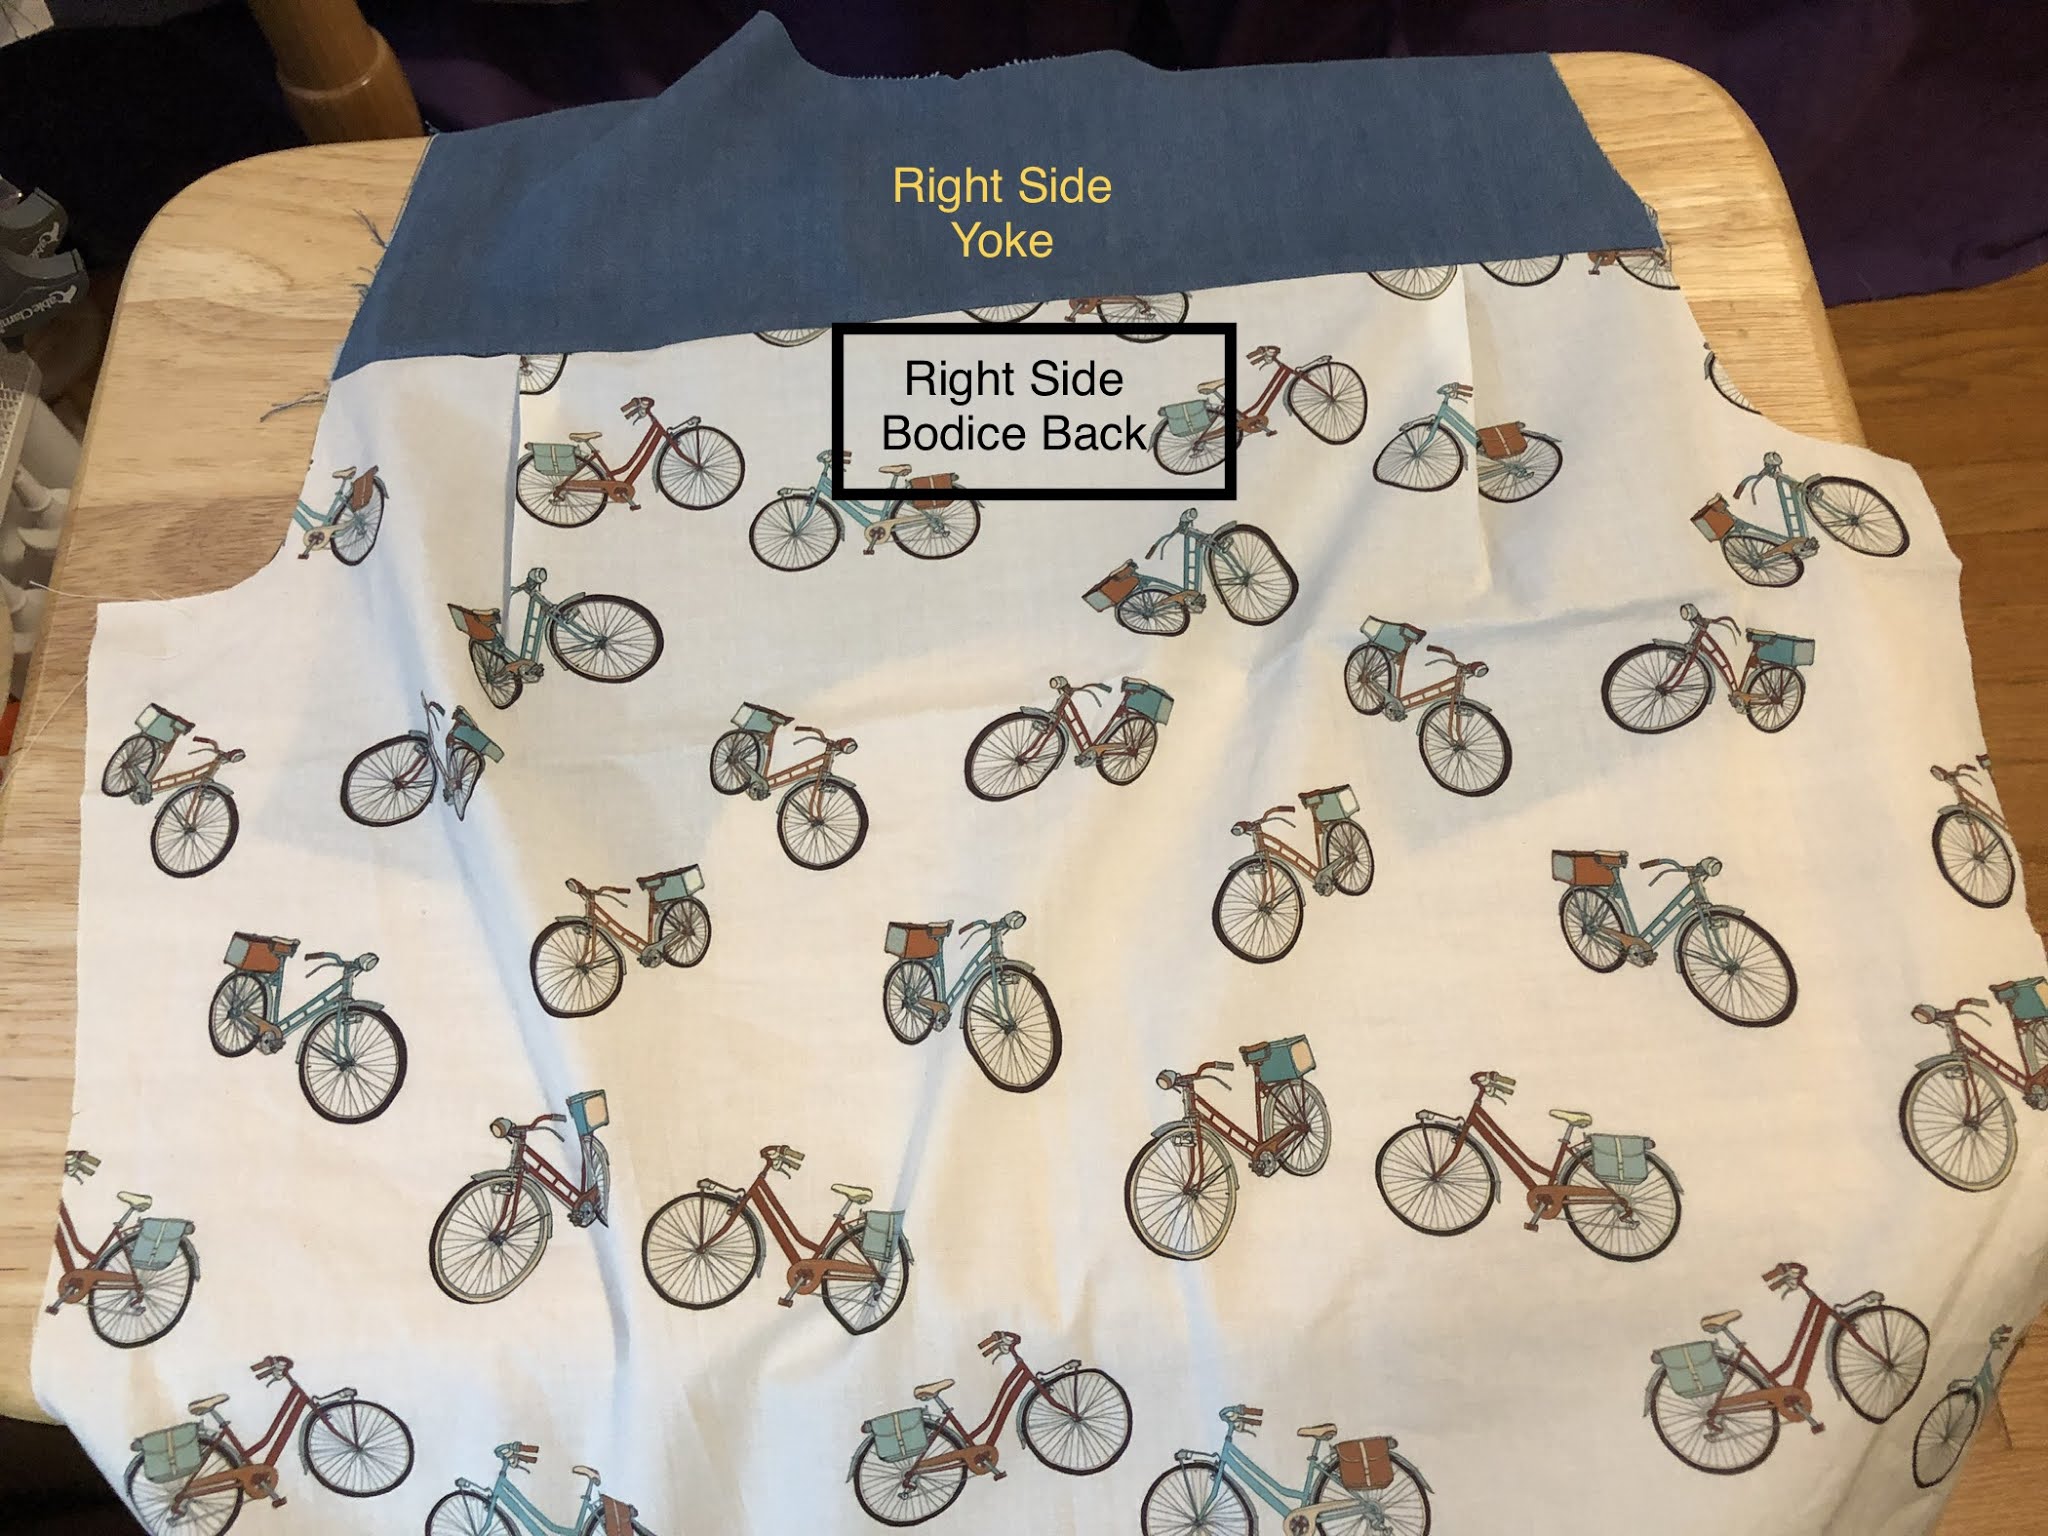
1. Sew Yoke 1 to Bodice Back, right sides together.
 |
| Disregard the basting stitches above. I initially tried to follow the pattern sewing instructions but realized that they did not follow the Burrito method. |
 |
| View of the sewn pieces, right side. |
2. Sew Yoke 2/Facing to the bodice back.
 |
Sew the right side of Yoke 2/Facing to wrong side of bodice back. The bodice back will end up being sandwiched between the two yoke pieces.
|
 |
| View of inside after yoke facing is sewn. |
3. Baste shoulder seams of Yoke and Bodice Front.
 |
| Keeping yoke 2/facing piece out of the way, sew Yoke 1 to the bodice front along the shoulder seams. |
 |
| Shoulder seams sewn. |
 |
| View of the wrong side after shoulder seams are sewn together. |
4. Roll the back bodice.
 |
In preparation for this step, lay the top with the back bodice right side out facing you.
|
 |
| Leaving the yoke facing free, roll just the bodice back piece in a neat tight roll upwards towards the shoulder area. After rolling, you will notice the yoke facing is revealed. |
 |
| Do the same with the bodice front. Roll it neatly and tightly towards the shoulders. Eventually the two rolled pieces will "meet" each other. |
 |
| Once the two rolled pieces have "met" this is what it should look like. The rolled pieces are wrapped inside the yoke pieces like a "burrito." |
 |
| Here is another view from the other side. |
5. Sew the two yoke pieces together along the shoulder seam.
 |
| With the rolled front and back bodice tucked tightly inside, pin the two yoke pieces along the shoulder seams. Note you will be sewing three layers here--the yoke 2/facing and the yoke 1 which has previously been basted to the front shoulder seam. |
 |
| View of the pinned shoulder seams. |
 |
| Shoulder seams sewn. |
6. Turn right side out.
 |
After turning the top right side out.
|


Posts, such as this, take a lot of time to put together, and, although they are certainly very helpful to your audience, it appears that few let you know that. Thus, I conclude that you do this for the love of sewing and the satisfaction of giving. You are so skilled, knowledgeable, and generous that I find myself wishing we lived near each other, so we could be girlfriends! Probably, I have told you that before. Sincerely, Ann (aka foo dog)
ReplyDeleteThanks so much Ann! I can just imagine how much fun we would have shopping for fabrics, comparing patterns and talking about sewing all day if we lived near each other! I really appreciate your kind and encouraging words which are more than enough to keep me going with this blog.
Delete