Some people may wonder why not just buy a ready made jacket and hot glue the embellishments to make a character hoodie. But if you are a sewist like me, you'll understand why I chose to make the hoodie myself.
My base pattern was Jalie 2795.


This is a multi-sized pattern for a jacket or hoodie and although it seems to be marketed for females (based on the model pics and sizing), I thought it could work for boys, too. I used my nephew's hip measurement to choose the appropriate size since that was the widest measurement. It didn't matter much if the chest ended up being a little wider since it's a hoodie meant for layering.
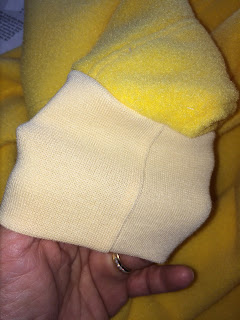
The fabric recommended was medium weight fleece or knit with at least 25% stretch. I used an anti pill fleece purchased from Jo-Ann's fabric. It didn't have the recommended stretch so for the cuff, I used a ribbed knit from my stash. Since I was going to make a Pikachu hoodie, I also purchased some felt squares in black, white and red.
I have sewn with this pattern before and found the instructions easy to follow especially if one pays close attention to the included illustrations. A few construction notes:
1. For my medium weight fleece fabric, I used a size 90/14 jersey needle.

2. Even though fleece does not ravel, I still serged the seams to finish the edges and make it easier to handpress it to one side in preparation for topstitching.


3. Topstitching was a bit challenging because the thick fleece tended to hide the seamline. So I just sewed from the wrong side, used one side of my pressor foot to serve as a guide and adjusted my needle position so that it sewed near the edge of the folded seam. I also lengthened the stitches so that they were more visible on the right side.

I tried sewing with the Edge Sewing Pressor foot on the right side but I liked the results better with the first technique I mentioned.

4. Instead of self-fabric, I used ribbed knit for the sleeve cuffs. I felt my main fabric didn't have enough stretch.

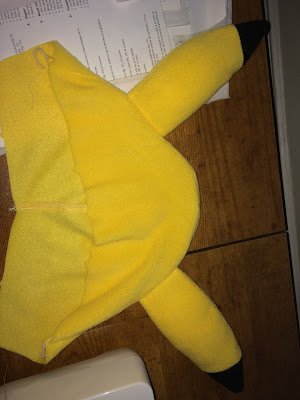
5. The hoodie was made up of three part--upper part, lower part and front. Before stitching together these three parts, I constructed the Pikachu ears first.

6. The ears were inserted between the upper and lower hoodie parts.


7. After the hoodie was assembled and before it was attached to the rest of the jacket, the other embellishments--eyes, cheeks, nose and mouth--were machine appliqued. It was easier to manipulate the hoodie without the rest of the bulky materials.


After the hoodie was embellished, it was time to attach it to the rest of the garment.

And for some finishing touches:

A really adorable Pikachu enamel zipper pull purchased from Etsy.

A patch purchased also from Etsy which was machine sewn to the left front of the hoodie.
And here is the finished hoodie!


Finished garment measurements:
Chest--32"
Waist--28
Hips as measured at the bottom hem--31"
Center back length as measured from neck to bottom hem--20"
Sleeves as measured from "assumed shoulder" to cuff--24"
Wrist circumference--8"

I can't wait for my nephew to try this on! I just mailed it out today and hopefully it should reach him in one week. Meanwhile, here is a modeling picture of my daughter wearing her own Pikachu hoodie which I made for her in 2011.
