
Before I delve into the construction details, here are some nice modeling shots of my hubby!


And now for the sewing details....
Pattern:
This pattern is still available for sale at the official Simplicity website and third party seller sites like Etsy and Ebay. It is not just for a pullover top but also includes design for men's shorts and pants.
The pullover top features:
*half-zip front closure
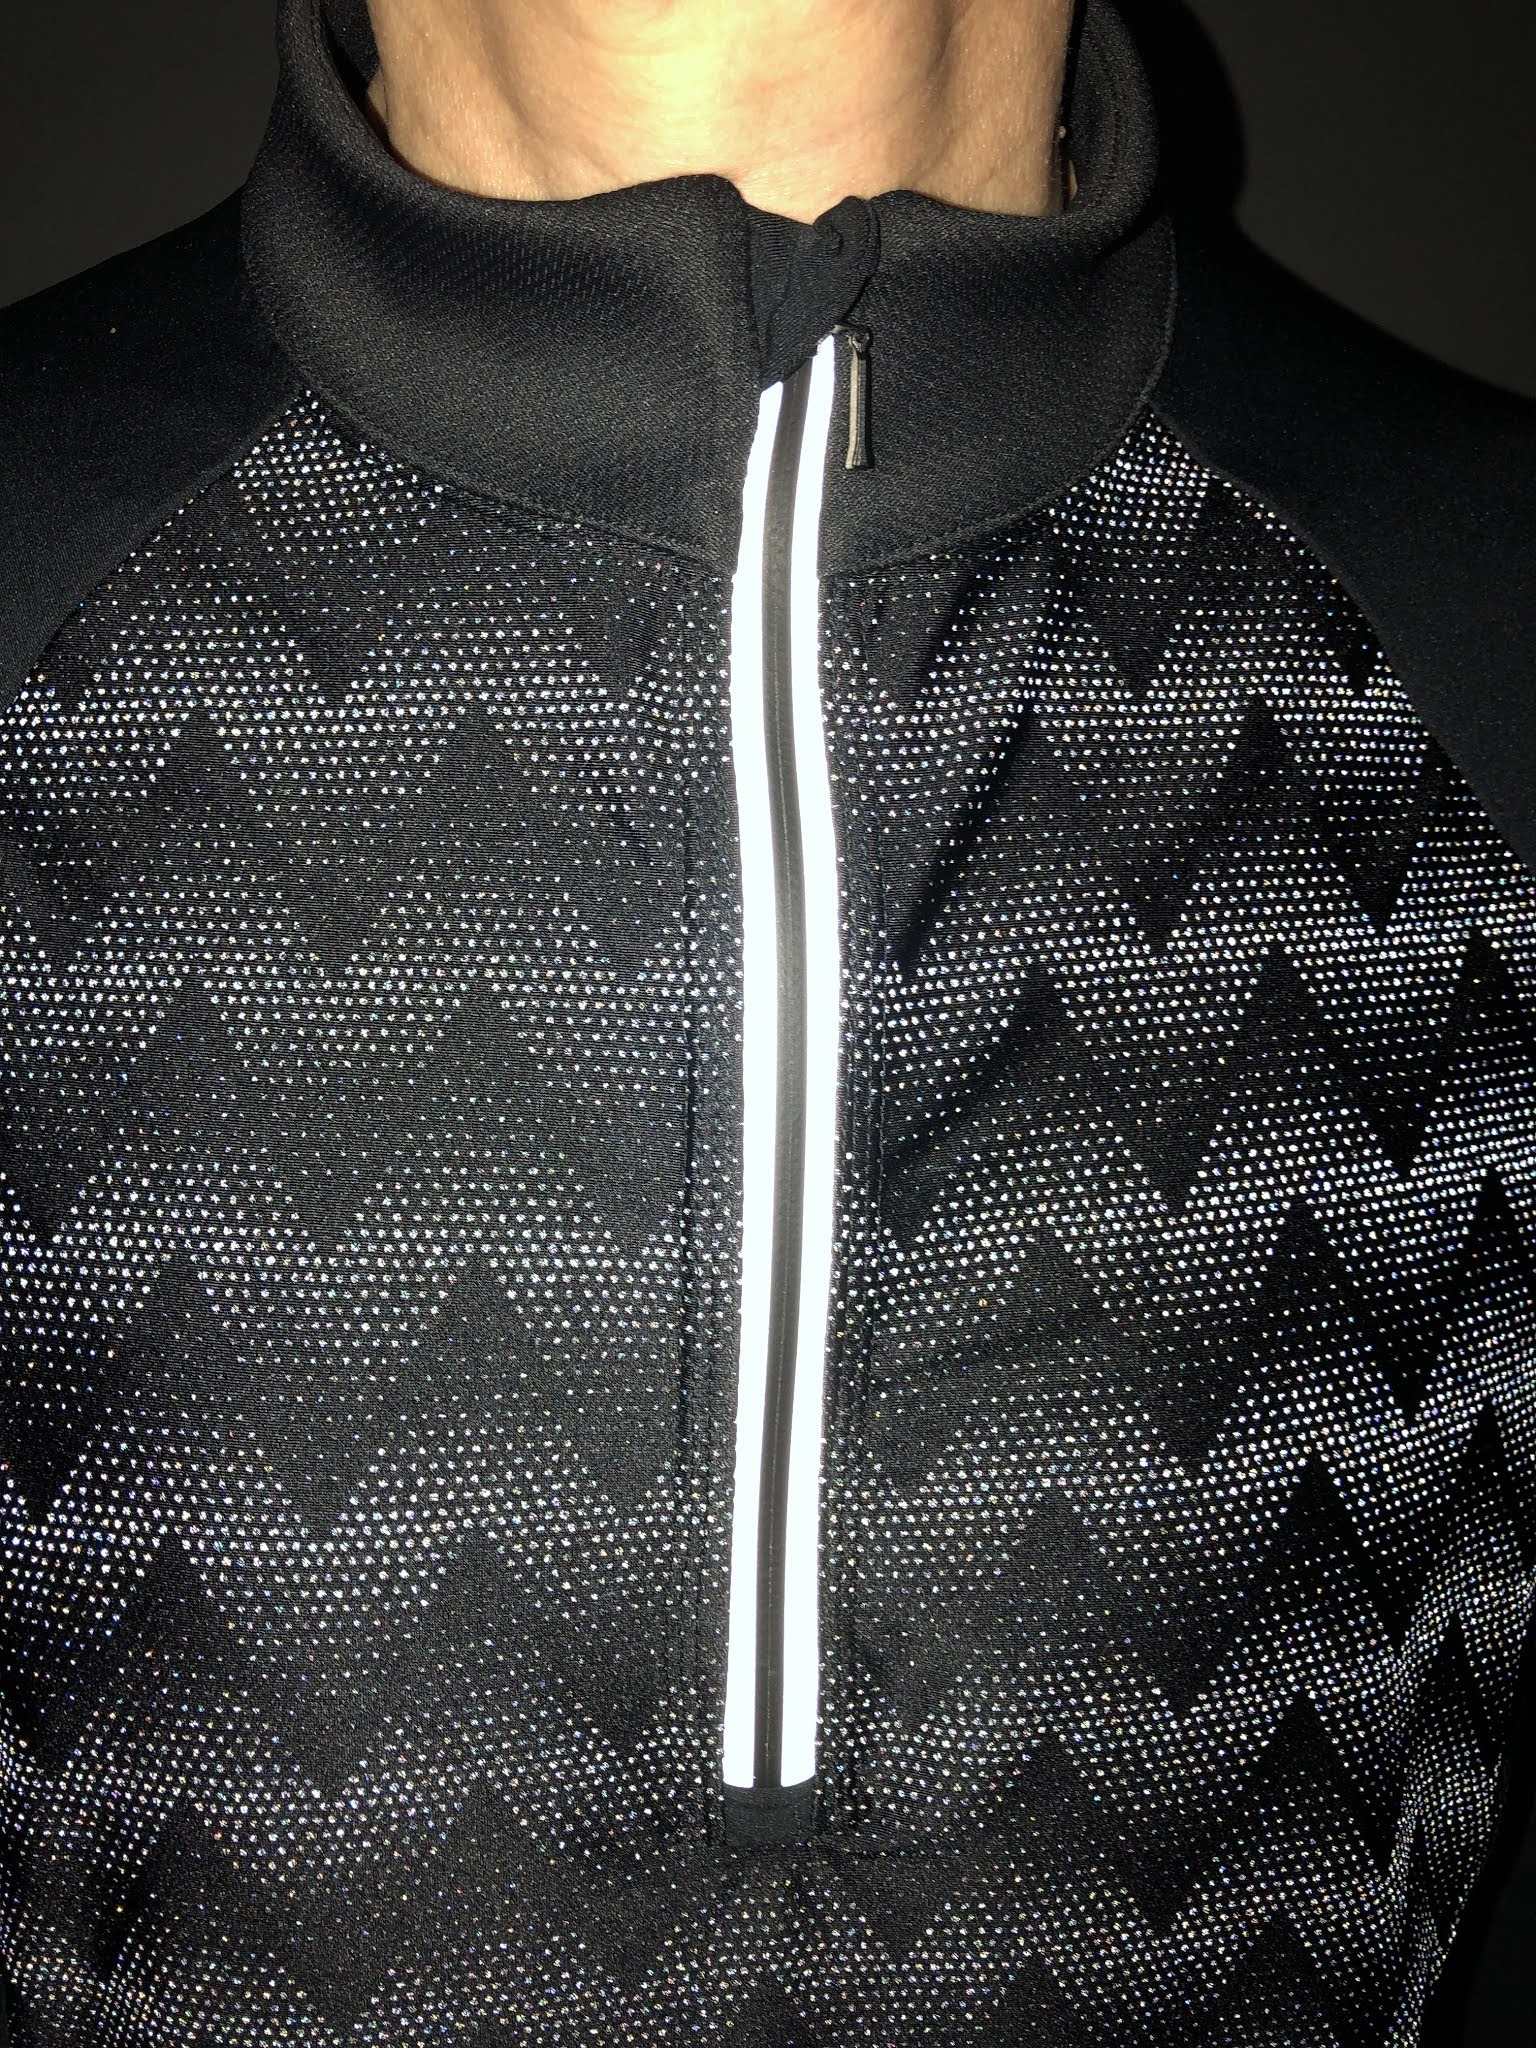
*raglan sleeves (shown here without the optional pocket)


Fabric & Trim:
This top pattern is designed for stretch knits only like activewear knits, double knit, fleece, Ponte, power mesh or sweatshirt fleece. There is a handy dandy "pick-a-knit" rule printed on the envelope to help with fabric choice.
For this version, I used three different kinds of fabrics.
1. For the front and back center panels, I used a reflective stretch panel purchased from Discovery Fabrics. I "discovered" this website through Instagram.

The chevron pattern on this fabric glows when hit by lights.
*80% nylon/20% polyester
*lightweight, 4-way stretch
2. For the side panels, sleeves, pockets, zipper tab and underlap, I used a super stretch interlock breeze fabric that was left over from some workout leggings I made for myself. I purchased it from SpandexByYard.com.

*75% polyester/25% spandex
3. For the neck band, I used another fabric from my stash and it's a high-performance moisture management polyester jersey mesh also from SpandexByYard. It has more of widthwise mechanical stretch. I ran out of fabric #2 hence this choice.

*100% polyester
4. I added a strip of 1" reflective trim around the sleeve opening. I purchased this from Discovery Fabrics.
Notions:
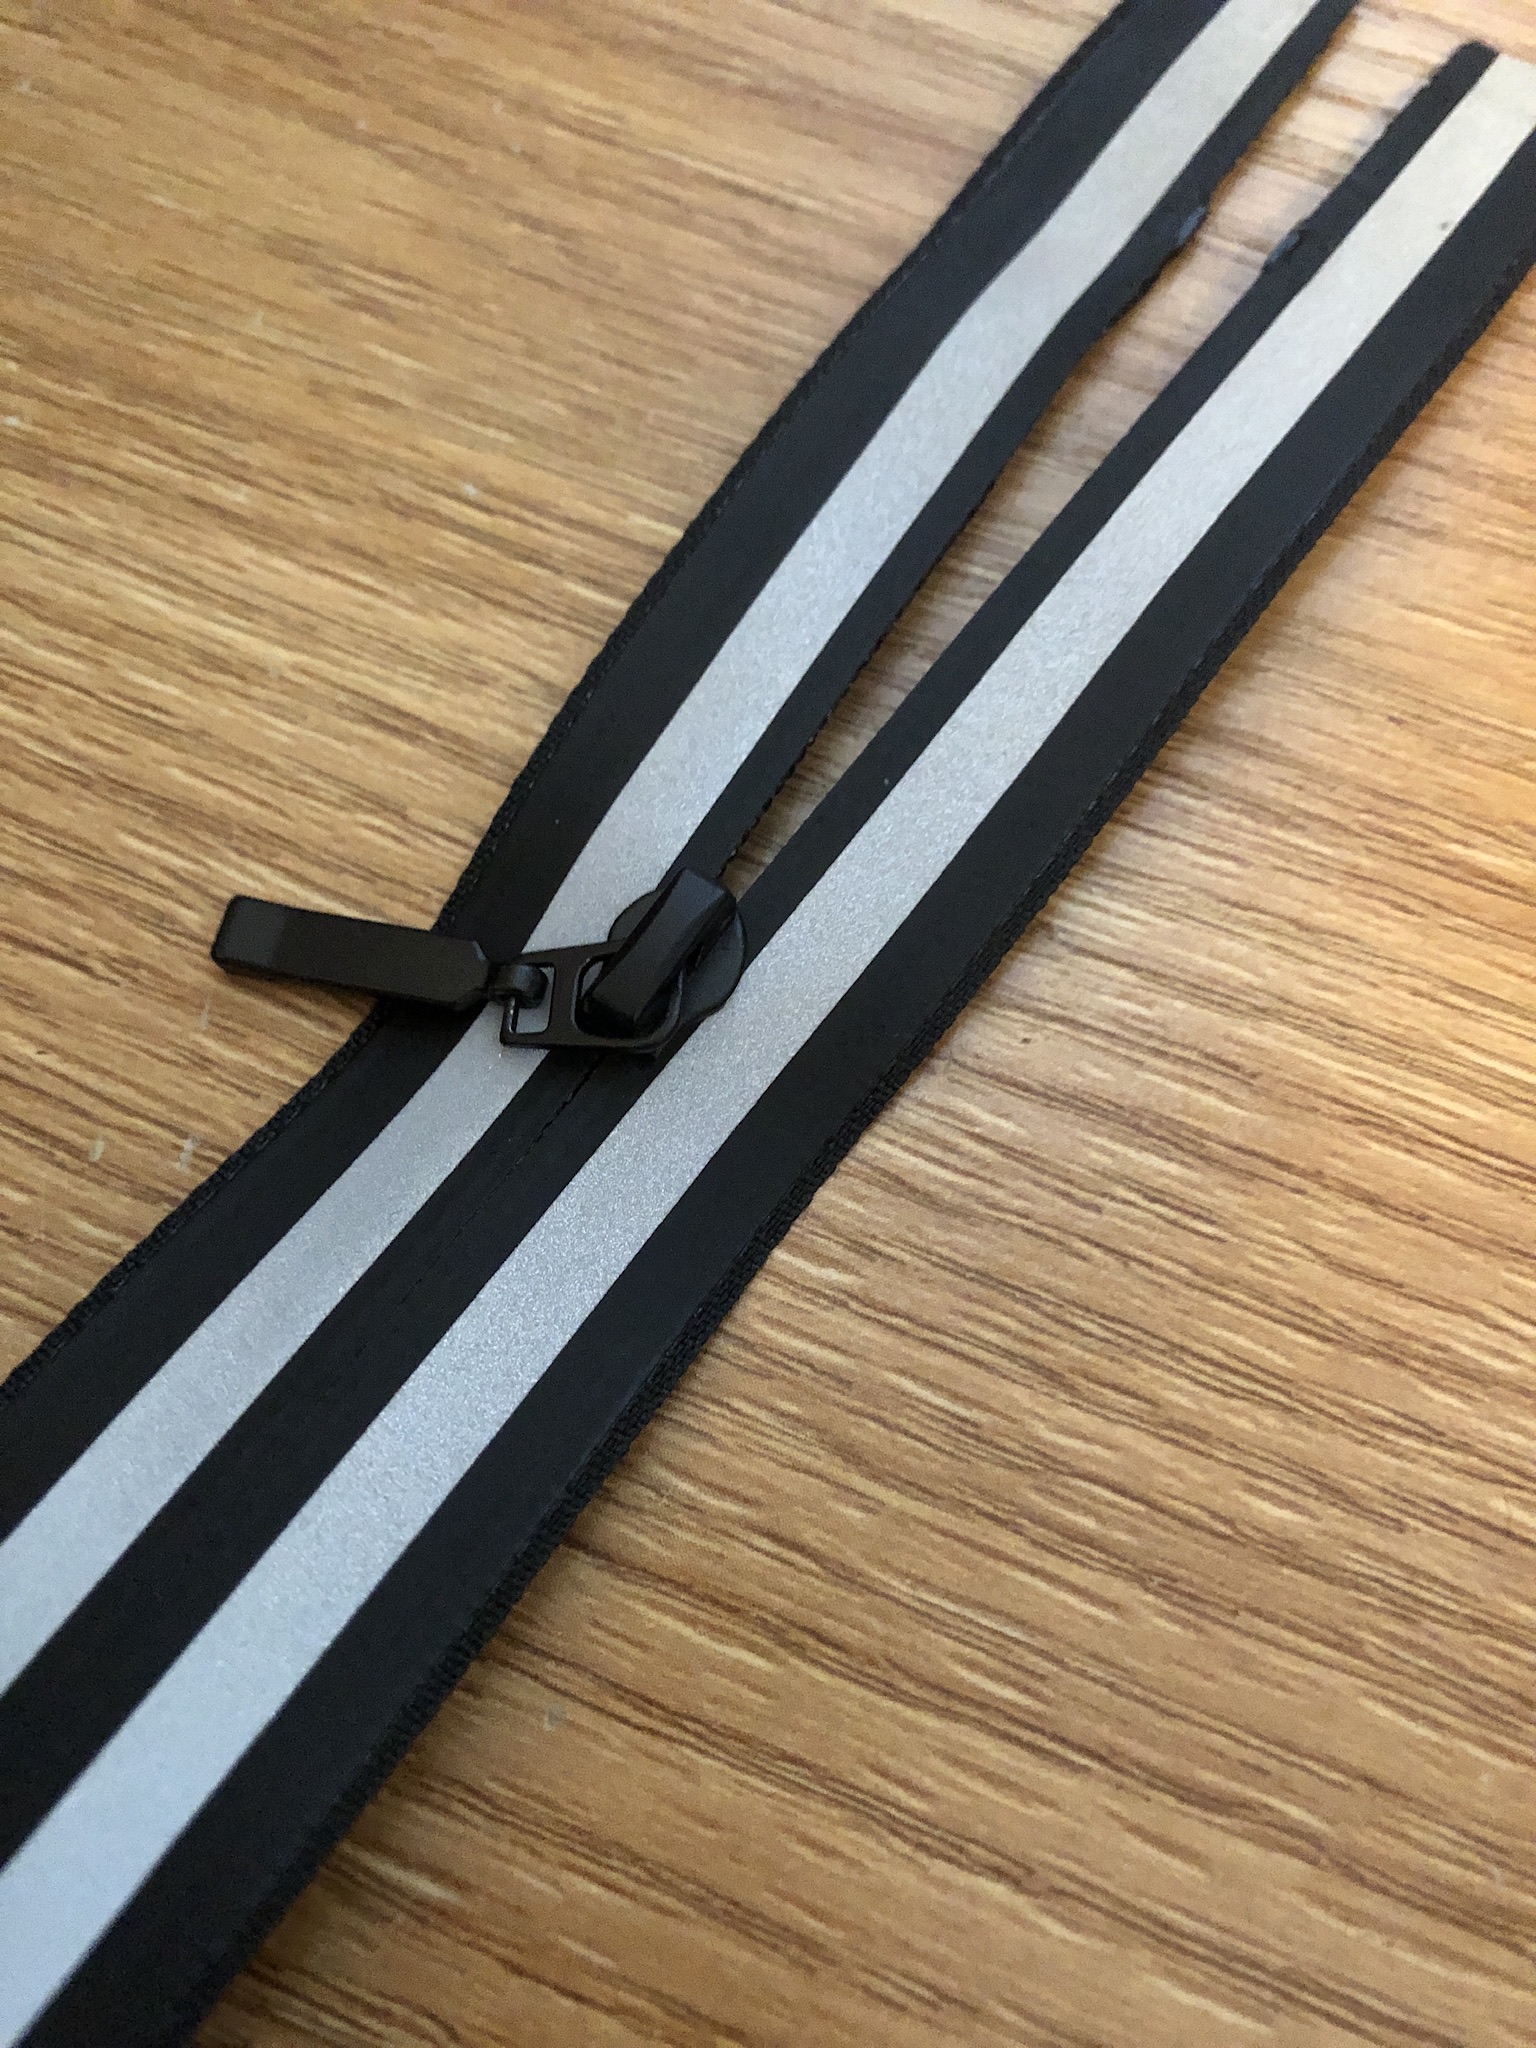
Zipper: The pattern envelope did not specify the size of the zipper teeth, just the length and in my opinion it is important to know. The first time I sewed this pattern, I used a zipper with wide teeth and I had to alter the tab and front zipper opening. This time I used a size 3 reflective zipper purchased from Pacific Trimming via Etsy and it worked perfectly.

Needle: stretch needle size 75/11
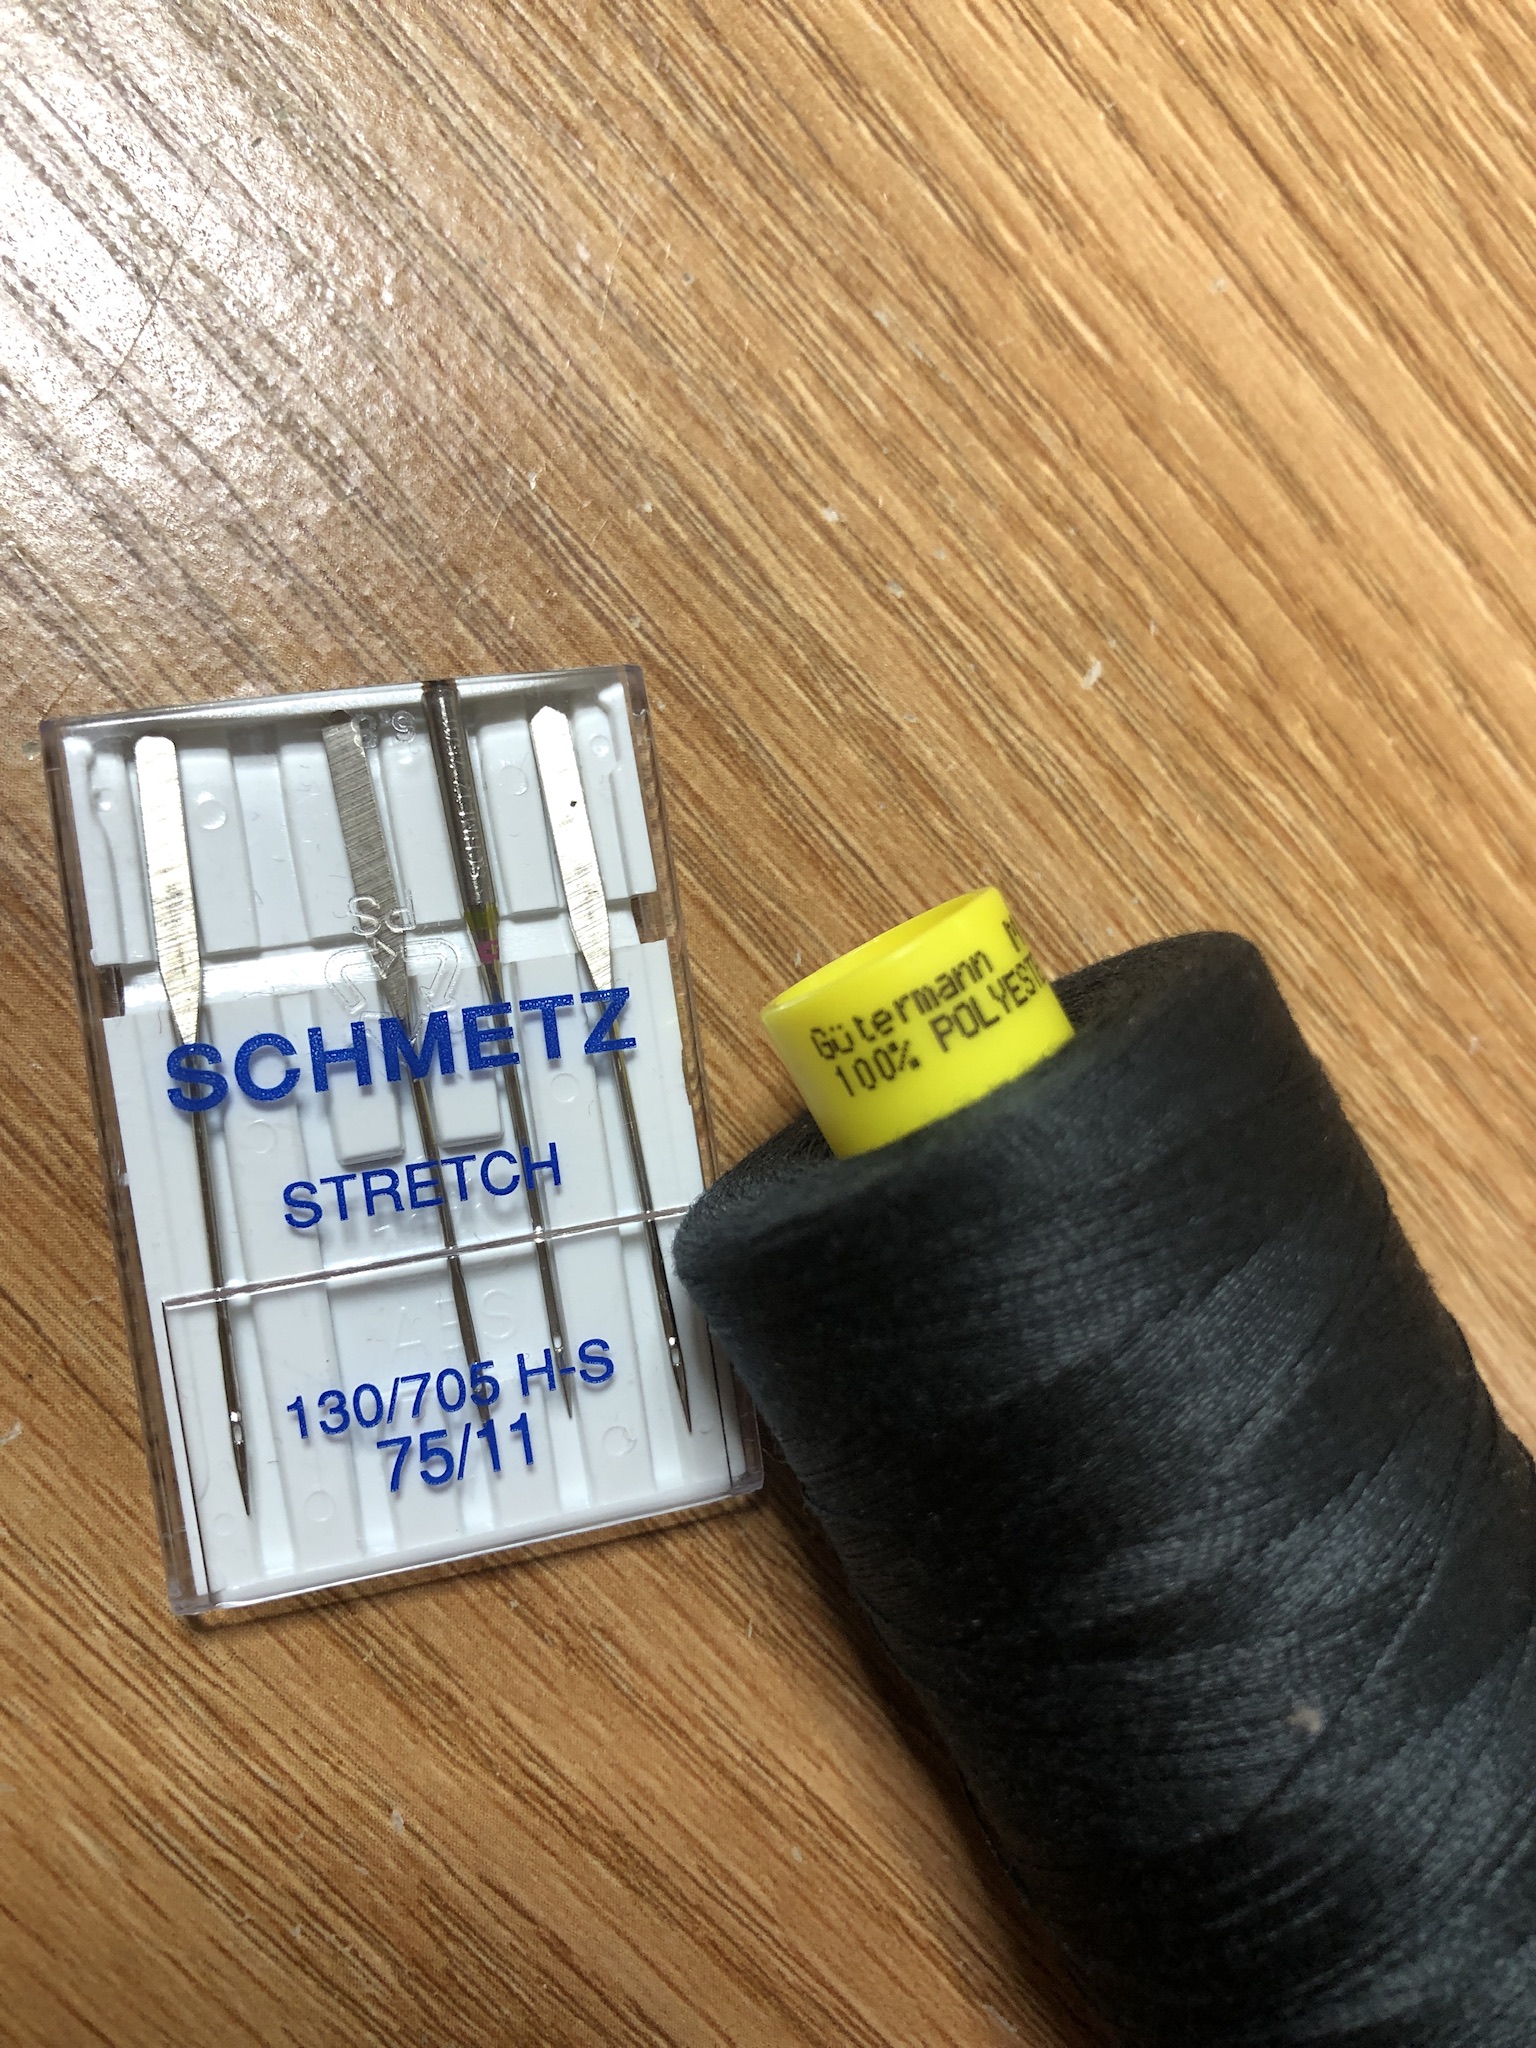
Thread: Gutermann 100% polyester mara 100
Sewing Machine:
Juki F600: used to sew seams in areas where I wanted to keep the seams open. I used tiny zigzag stitches.
Juki MO-654DE: used to serge seams where I ddi not use the zigzag
Juki MCS 1500: used for cover stitches on hems and neck band; also for topstitching
Some construction details worth noting:
1. Wait until you have applied the interfacing on the front zipper opening before tracing the stitching lines. Otherwise you will end up just covering them.

2. Heed the suggestion on the instructions and wait till it is time to apply the zipper before slashing the opening. Otherwise you risk unraveling the weak center point of the opening.
3. For step 5, take extra care to make sure you keep the pocket free when sewing the side front sections to the front.
4. In my opinion, it is easier to sew the sleeves on the flat and then sew all the side seams in one pass.
5. The part where you sew the zipper, tab and underlap can be confusing because of the wording. The illustrations really helped clear the confusion.
6. It is not mentioned in the instructions but when sewing the right side of the zipper after the left has already been attached, it is best to baste just the area where the neck band seams intersect to make sure they match when zipper is closed. This will save you from unpicking stitches.

7. For the neck band, instructions ask you to trim the free edge of the neck band facing to 1/4" after pressing in 5/8". I really do not see any benefit from this. In fact, it makes it harder to achieve a neat finish when it is time to sew the edge down to the neckline if the allowance is too small. So I skipped the trimming.
My hubby really loved his pullover top. I am sure this won't be his last! And here are some more photos showing closeup of the nifty details.


