Three years ago, I was browsing online looking for ideas for my stash of boiled wool fabrics. They were mostly leftover from previous coat projects. My search led me to a German website called Schnittquelle. I decided to give it a try and purchased a paper pattern for an asymmetrical unlined jacket

Although the instructions included with the pattern are written in German and not accompanied by any illustrations, anyone with some experience sewing jacket or coat will be able to figure out the construction without much difficulty. Thought I'd share the step-by-step process.
Fabric:

This is the boiled wool from my leftover stash. I purchased this from Mood
Fabrics several years ago. It is 60% viscose/40% wool. It does not ravel making it perfect for lapped seam construction which I used for this project.

The thing about this fabric is it does have a nap although it was not that obvious. Still I decided to carefully note it when cutting my pattern pieces. Above is a note I pinned to my fabric before storing it so I would remember what direction the nap is. I also cut my pattern pieces in a single layout--right side of pattern piece facing up over the right side of the fabric.
Notions:
Needle: universal size 80/12
Thread: Guttermann Mara 100 Polyester
Walking foot
Heat erasable pen
5/8" curved ruler

These two notions made the process of lapped seam construction much easier.
Construction:
If you do not want to do lapped seam construction, you can always substitute regular sewing while still following the chronological steps to make the jacket. If you want to use lapped seams, I highly recommend reading Kathryn Brenne's detailed tutorial on it. You can find it at Emma One Sock website.
1. Sew the bust darts on the two front pieces.

For lapped seams, I sliced open the dart along the upper leg and then overlapped it along the marking for the lower leg of the dart. Then I edgestitched with tiny stitches.


Right side view of the dart.

Inside view of the dart.
2. Sew side front to front. Do the same with the back pieces.

Note that the notch on the side pattern piece matches with the bust dart.
The succeeding photos below will give you an idea of how the lapped seam is made during the particular step of the construction.

Mark the 5/8" seam allowance using erasable marker.

This curved ruler has a 5/8" width so it makes marking much faster.

Trim off the edges along the marking. Do this only on the piece that will be overlapped, in this case it is the front piece that will overlap on the side piece. Use the marking as guide.

Pin then sew.

Using a walking foot made it easier to do edge stitching as I could see clearly where I was sewing. In this case, I used the inner edge of one side of the foot as my guide.
3. Reinforce shoulder seams.
This part was not included in the instructions but I followed Kathryn's tutorial where she used boiled wool so I did the same!

I fused a knit stay tape to a 5/8" strip of self-fabric the length of the back shoulder seams and sewed it within the seam allowance of the back shoulder seam.
4. Sew side seams of front to back. For lapped seams, front side seams will be the overlapping layer so they will be trimmed off.
5. Sew sleeves.
5a. Sew the dart on the sleeves.

Dart overlap.
5b. Sew the cuff to the sleeve hem.

View of the sleeve hem pinned to the cuff. I love that the edges are not straight but have a nice curved shape.
5c. Sew the sleeve side seams together.

I had to baste the seams before machine sewing because as you will see below it was challenging to sew the side seams through a small hole!

Yes, that's edge stitching the overlapped sleeve seams through the sleeve opening.

The finished sleeves.

6. Sew the sleeves to the body making sure to ease in the sleeve cap.
7. Sew the collar.
This is the easiest collar on a jacket that you will ever sew!
I did not use lapped seam here but followed the original instruction.

The right side of the collar is facing the wrong side of the jacket.


After it is sewn, the collar is flipped to the right side and the seams are hidden underneath the wide collar.


Ant that's it! There is no need to finish the cuff and bottom hems or the front edges.
And now for some eye candy!

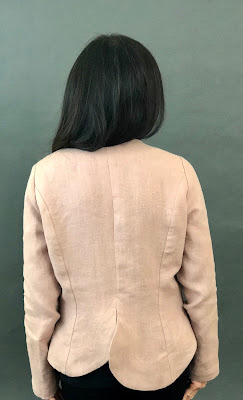
View of the right side of the jacket seams--side, princess and dart.


Small piece of self fabric to reinforce the button from the wrong side.


Finishing touch.


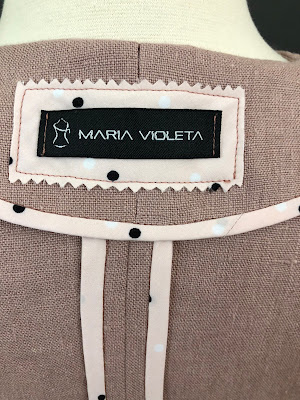
View of the inside.