Monday, April 24, 2017

Sewing the Style Arc Lani


I purchased a digital pattern from the Style Arc Etsy store and it is bundled in groups of three sizes. I bought size 4-6. Previous experience with this brand put me at size 6 but after sewing a muslin, I found the tunic too large overall so I tested size 4. It worked better but it was still too long. So I had to shorten it. However, this pattern did not have any shorten/lengthen lines and that was a bit tricky because of the piecing and diagonal seaming. 


 Shortening the pattern:

I drew my own "shorten line" perpendicular to the grain line. The first one was located 3 1/4" below the armhole. This was chosen arbitrarily. It was a location that would not affect the armhole or the diagonal seamline. I shortened here by 1".


The second shorten line was a bit more tricky since I placed it on the lower bodice section which consisted of several pieces. I avoided a location that would significantly affect the mitered edges. Then I "trued" the diagonal seam. For this part, I took off only about 3/4".

Overall, I repeated the process in all the pieces both front and back.

Construction Steps:

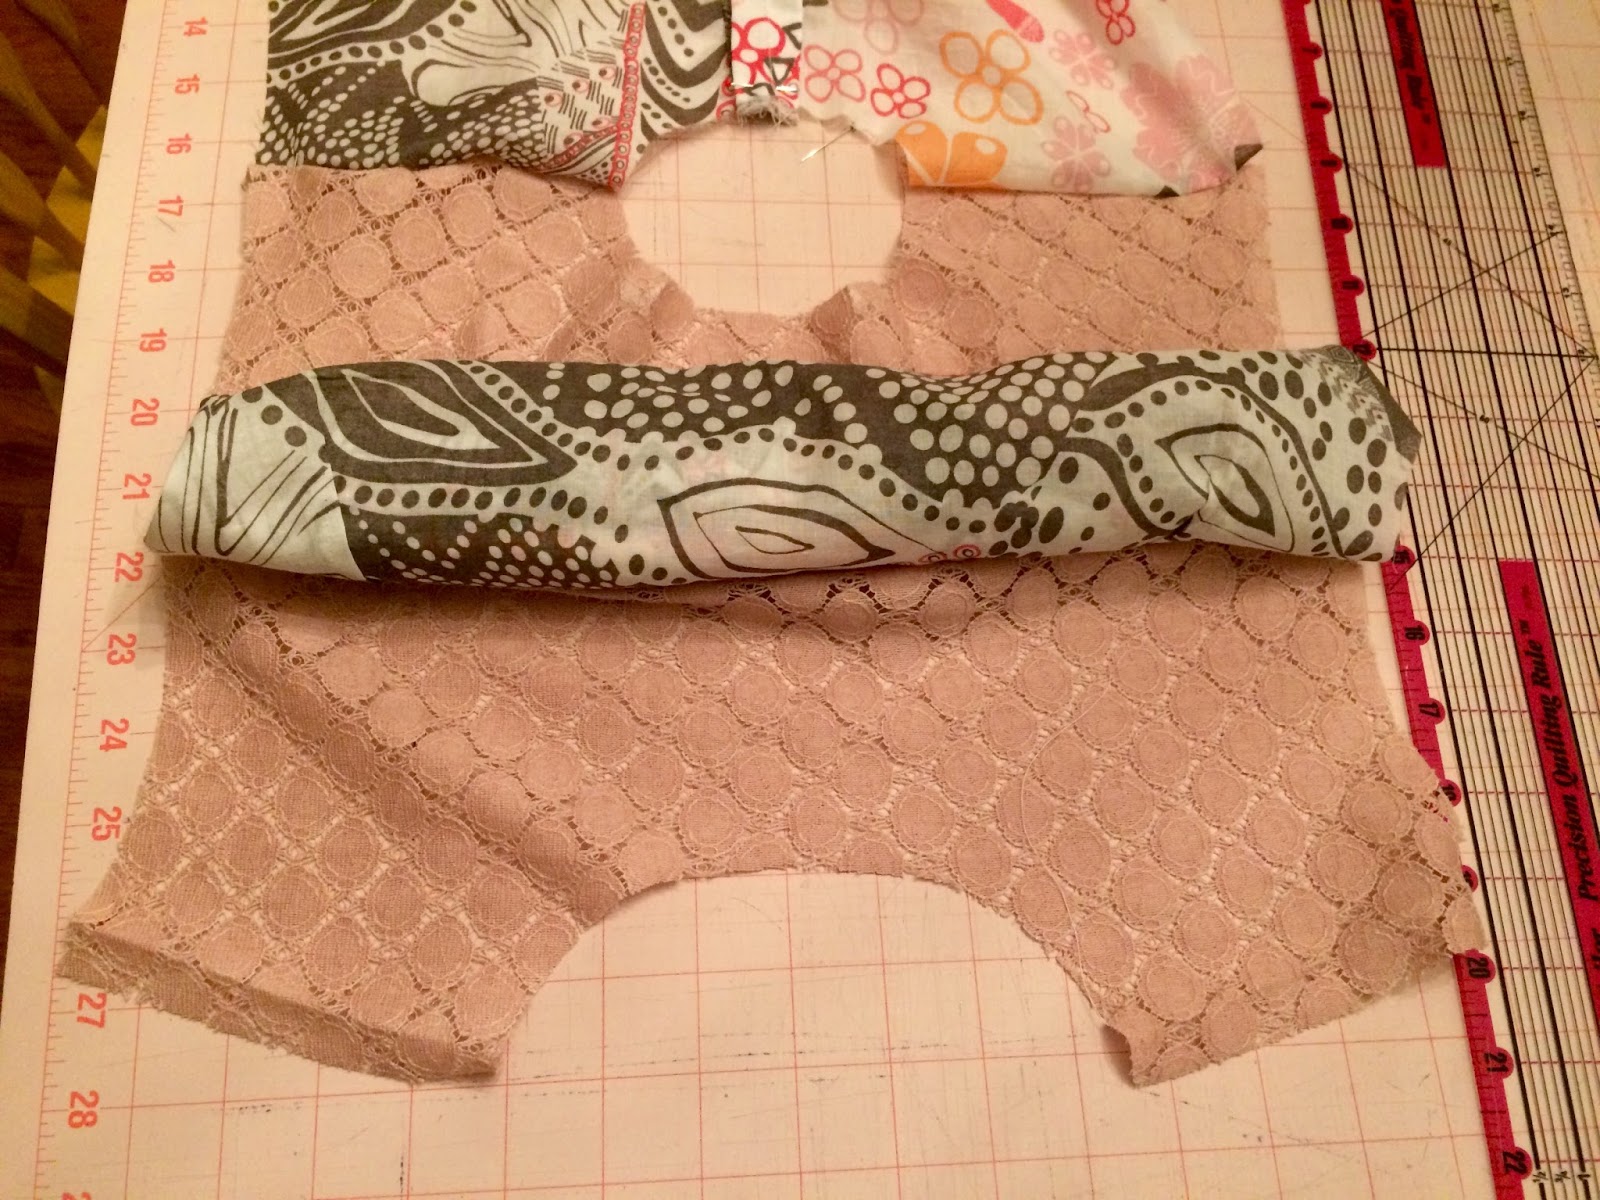
1. All pattern pieces are cut on a single layer of fabric. There are specific left and right sides so make sure to lay out the pattern pieces right side up on the fabric's right side facing up, too.

It is also important to transfer all markings as these would be helpful in matching diagonal seams.


2. After all pieces have been cut and before sewing anything together, make sure to finish the edges of all hem edges (front lower pieces and back lower pieces). Believe me, there is a reason for this!

This is the lower front under panel with the diagonal hem edges serged.

2. Sew the mitered corner of each lower front panel (under panel and over panel) individually.


See how after sewing the mitered corner it would be hard to serge the edges?
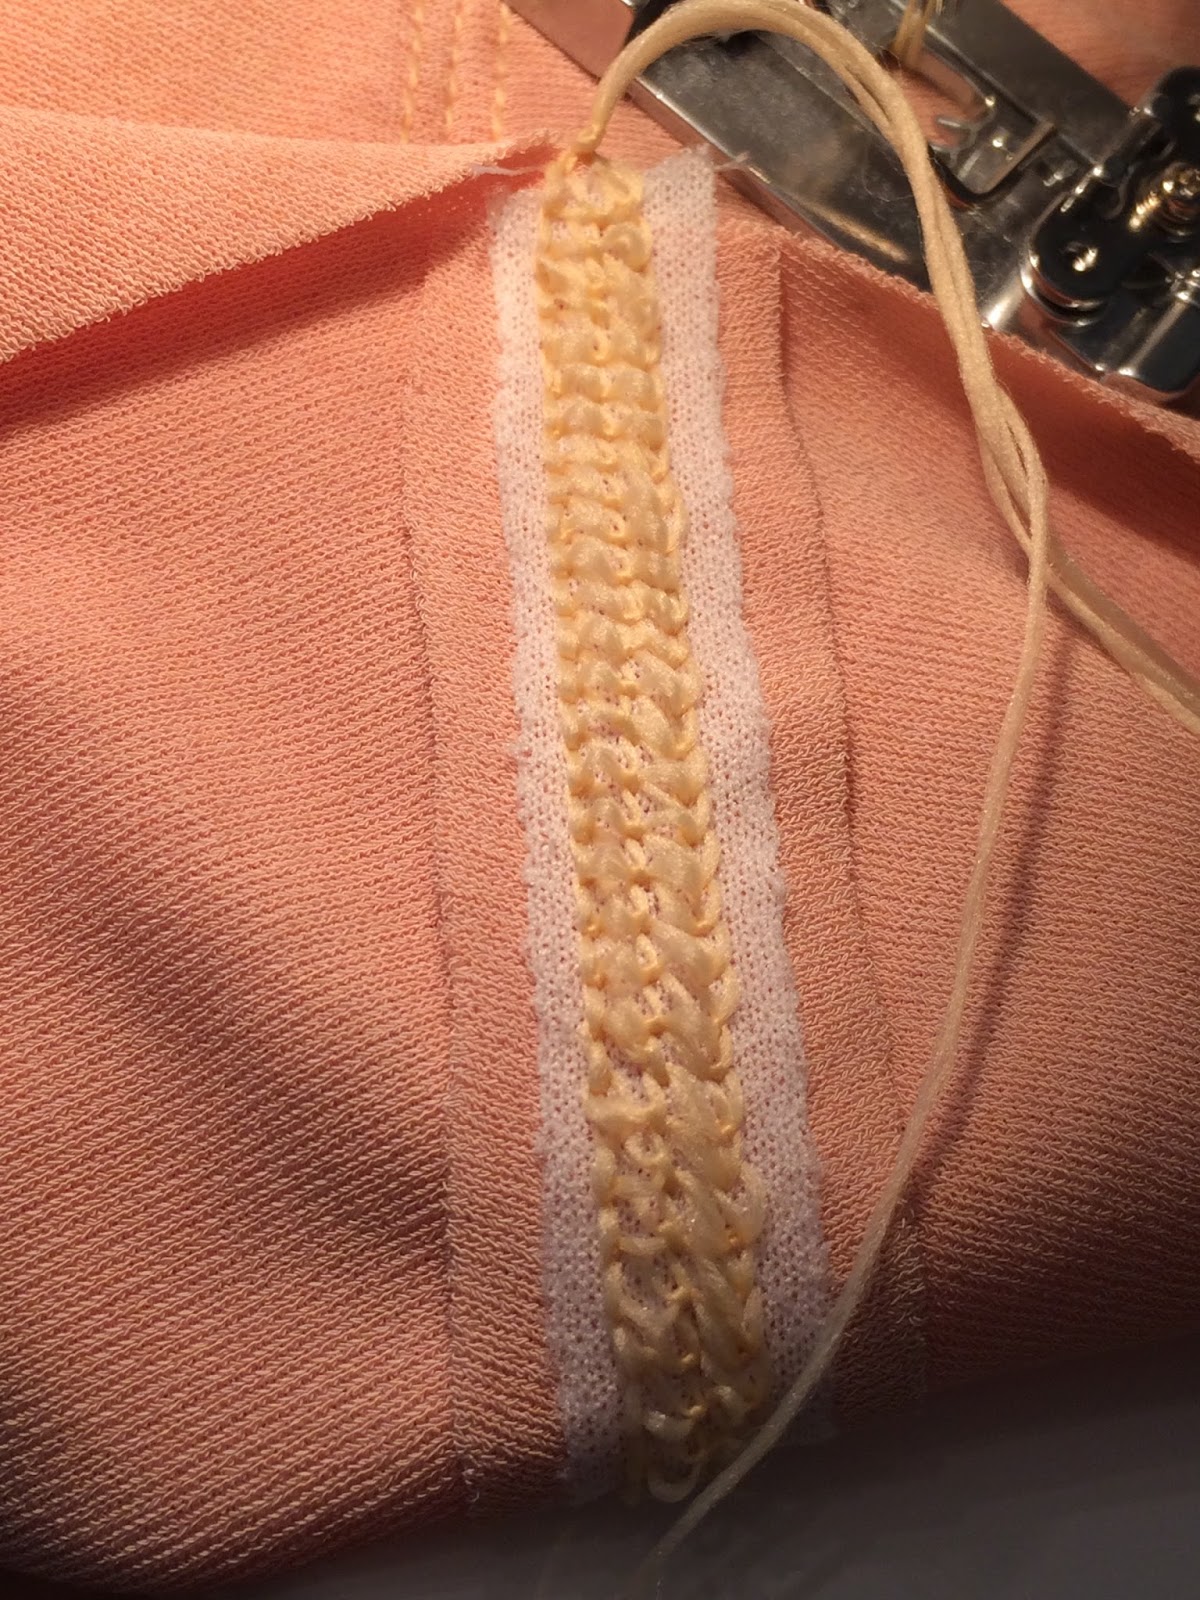
Topstitch the mitered corner hems leaving area near the side seams unsewn to allow you to join the side seams later on with ease. 

3. Assemble the pieces by referring to the helpful diagram accompanying the pattern. 

To achieve a nicely finished inside, after one piece is sewn to another, serge both seams together, press to one side, then topstitch. 


A closer look at the topstitching. 
4. Turn remaining bottom hem edges up and topstitch. 

5. I skipped the sleeves and facing and opted to use my own bias binding. 

I cut 2-1/4" wide bias strips from my fabrics to use as decorative trim for the armhole and neckline. 


Finished garment measurements:
Center back length as measured from the neckline--25.5" (I shortened the original by 1-3/4")
Shoulder breadth--14.25"


My Artsy Tunic: Style Arc Lani


I am a big fan of the Nani Iro line of Japanese fabrics so when I saw some beautiful combinations posted on the Marcy Tilton online store, I was smitten and scouted for more reasonably priced ones at Etsy.

Nani Iro "Vitality"


Nani Iro "Gift"

I used Style Arc Lani Tunic pattern since it allowed me to use fabric combinations. 


I deviated some from the pattern by doing away with the sleeves because I thought that together with the fabric design was going to be a bit overwhelming on me. I also did away with the neck and armhole facings and opted to sew bias binding using my fabric combo. 
I'm really happy with how the tunic turned out. 


I call this my "Artsy" tunic and love that no two sides are alike! 
For more photos and details pertaining to the construction process please refer to this post.


Saturday, April 22, 2017

Cotton with a Touch of Lace: McCalls 7360

I have been "auditioning" patterns that would work with the lightweight fabrics in my stash. 

McCalls 7360 is designed for medium-weight fabrics like chambray, poplin, linen or crepe de chine. My fabric is more lightweight but after testing on a lightweight muslin, I decided that it could work.

There are several options offered in the pattern and I combined the different views to come up with a pullover sleeveless henley style top. It has a yoke at the back that extends to the front shoulder and because I only had one yard of fabric that wasn't enough, I used a contrast lace for the yoke. 

This blush colored lace was purchased from Emma One Sock. 


I thought they looked great together!

This fabric is a lightweight semi-sheer cotton with a somewhat shiny finish and I believe it could be cotton lawn.


This pattern was really easy to construct once I got the fit nailed. That part is always the most time-consuming aspect of sewing for me. As most often the case, I had to shorten the front and back bodice by 1.5" along the provided shorten/lengthen lines. I also adjusted for some swayback problems.

During construction, I deviated a bit from the instructions to achieve a cleaner finish on the inside:
That is what the placket looked like on the inside. I finished it with triple zigzag stitch before trimming.
I used the same method to finish the lace. I didn't serge because it would have added bulk on the seams which would be visible through the semi-sheer lace. 


To trace the lines for the bust darts, I used my own method to avoid marking on a lightweight sheer fabric. Details of that method can be found on this post.

When it was time to sew the yoke part, the instructions asked to handsew the yoke facing in place. I decided to use the "burrito" method for a cleaner machine-sewn finish. 

Here are the steps that follow after the outside yoke piece and yoke facing have already been attached to the back bodice piece. 

Baste or pin the outside yoke piece  only to the front bodice piece at the shoulder seam. Note the yoke facing is kept free. 

This is what it looks like on the right side. 

Another view showing the back bodice. The yoke facing is underneath the yoke and is not visible here. 

Roll the back bodice like a burrito. Now you can see the underlying yoke face. Same thing will be done to the front bodice. 

The front bodice is also rolled like a burrito. 

Now that both front and back bodice pieces are rolled, it is now possible to bring up the yoke facing and meet the shoulder seams. 

Pin the yoke facing to the shoulder seams (consisting of the pinned yoke and front shoulders). There will be three layers of fabrics to sew in place. 


After sewing both right and left sides, turn inside out and this is what it will look like. 
For the remaining side seams, I used French seam to finish and for the hems I used narrow hem finish. 

I think I'm happy with the end result of this top. I'm definitely keeping this pattern in my TNT stash and might sew some more using rayon or chambray. 


Thursday, April 6, 2017

Style Arc Esme

I have never sewn a Style Arc pattern before but have read a lot of reviews about it. Most of them mentioned the scarcity of and lack of clarity with the sewing instructions. But through the years, I have tackled a lot of sewing projects and I felt more confident trying on this pattern company so I purchased a few from the company's Etsy storefront.


First up is the Esme Knit Top. This is a PDF pattern and the sizes are grouped in threes (4-6-8, 10-12-14, etc) except for the last two sizes (28-30). I had no idea how Style Arc sizing went as far as ease was concerned. Based on the measurement chart posted on the website, I fell between sizes but it was a good thing those sizes were included in one group so I purchased 4-6. The good thing about the PDF file was the option to choose one size to print meaning no need to trace through multiple lines. The pattern itself consisted of only five pieces and two of those were optional. After sewing a wearable muslin, I decided that size 6 worked well for me.

There was one front piece and one back piece. Since my fabric had a right and wrong side, I had to make sure to layout my pattern pieces correctly with the right side of the fabric up and the right side of the pattern up. 

I used two leftover rayon jersey fabrics from my stash. The blush pink was used for the body and the gray for the contrast collar. These fabrics were purchased from Gorgeous Fabrics last year and are indeed gorgeous--crepe like texture with fluid drape. It had 50% crosswise stretch and 15% lengthwise. 

I also used a lightweight fusible knit interfacing for the collar since my fabric was really lightweight.

Settings:

For sewing seams together, I used small zigzag stitches on my regular sewing machine. I was planning to press seams open and topstitch with coverstitch machine so I skipped the serger. 

I set the zigzag width to 1.4 and the height to 1.0. This was on the Juki F600. I used universal needle size 70 and polyester thread. 

Construction:

1. Sew front and back at the shoulder seams using 3/8" seam allowance. 
   
Tip: to prevent the feed dogs from "eating" the fabric at the beginning of the seam, use a piece of tissue paper underneath then just tear it off gently when done. 

2. Press seam  open then topstitch on the right side. 
Tip: to stabilize shoulder seam on stretchy fabrics, use stay tape. I applied a 1/2" strip of fusible tricot interfacing on the wrong side of the shoulder seam, centering it over the seams after pressing them open. 

I used the four-thread setting on my coverstitch machine (Juki MCS-1500). 

I used Maxilock stretch thread on all the needles of the coverstitch but next time I will limit it to the lower looper. I found the thread to snag easily which may not be a good thing in the long run. 

3. Construct the collar. (If using interfacing, apply it first.)
Fold the collar in half lengthwise right sides together and sew the two short edges together using 1/4" seam allowance up to the notches. If you forgot to mark the notches, just stop sewing till you reach the extended seam. 
Before turning the collar right side out, trim corners. 

This is what it should look like after turning. 

Align the remaining unsewn seams from the two short edges. Sew them right side together. 

 This is what it should look like after sewing. 


Finished collar. 

Baste the remaining long edges together using zigzag stitches. 

Now is a good time to try on the collar to see if it can fit over your head! My collar looked floppy because my fabric was soft and drapey but I liked it that way. 

4. Sew collar to neckline matching center and shoulder markings. 

Sewn collar as seen on the wrong side. 

Topstitching using three-thread setting. 

5. Fold up the hem by 2", right sides together, and sew along the side seam using 3/8" allowance. 


Sewn hem after turning.

6. Sew side seams together from armhole to notch marking the split. 


7. Topstitch
I used long stitches on my regular sewing machine to topstitch along the side seams and armholes. 

7. Press hem allowance and topstitch. 


Here are some pics of the finishing details:

Some reviews of this pattern noted the wide armhole opening that tended to have a peekaboo effect. I basted before sewing the side seams and tried decreasing the armhole width by pinning but found doing so changed how the extended sleeves draped so I did not alter anything. Since my fabric was not totally opaque, I decided I will just wear camisole underneath. 

I love my new top. It's more of a tunic length on me because I am short but I don't mind it. It will look great with leggings and the added coverage on the back is a plus! This will definitely be in my "to sew again" pile.