Friday, December 25, 2015

Sewing for the Holidays

Last month, I had the best intentions. I had several fabrics from my stash lined up for sewing. They were already paired with their patterns and they consisted of some sweater tops, blouses, dresses and even a coat. I only got as far as the dress which I blogged about last month. I'm midway through my coat but once December arrived, I had to put everything aside to sew some dresses for the holidays.

Burdastyle Pleated Designer Dress No. 166

This downloadable pattern is a simple sheath dress consisting of a bodice and skirt with pleats. Although the construction was simple enough, the lack of details and illustrations in the instructions doesn't make it the ideal beginner pattern. It requires some knowledge of sewing pleats and darts, neck facing and invisible zipper. 

The pattern works best with fabrics with some body like jacquard, brocade or linen. For the yellow dress, I used a J. Crew cotton blend brocade purchased three years ago from Emma One Sock. It has been in my storage box for so long that I wasn't able to iron out some of the fold lines. There was also some puckering that wouldn't come out as seen in the bodice below.

Focus on the bodice center and you'll see the puckering I was talking about.


Here are some views on the dress form.

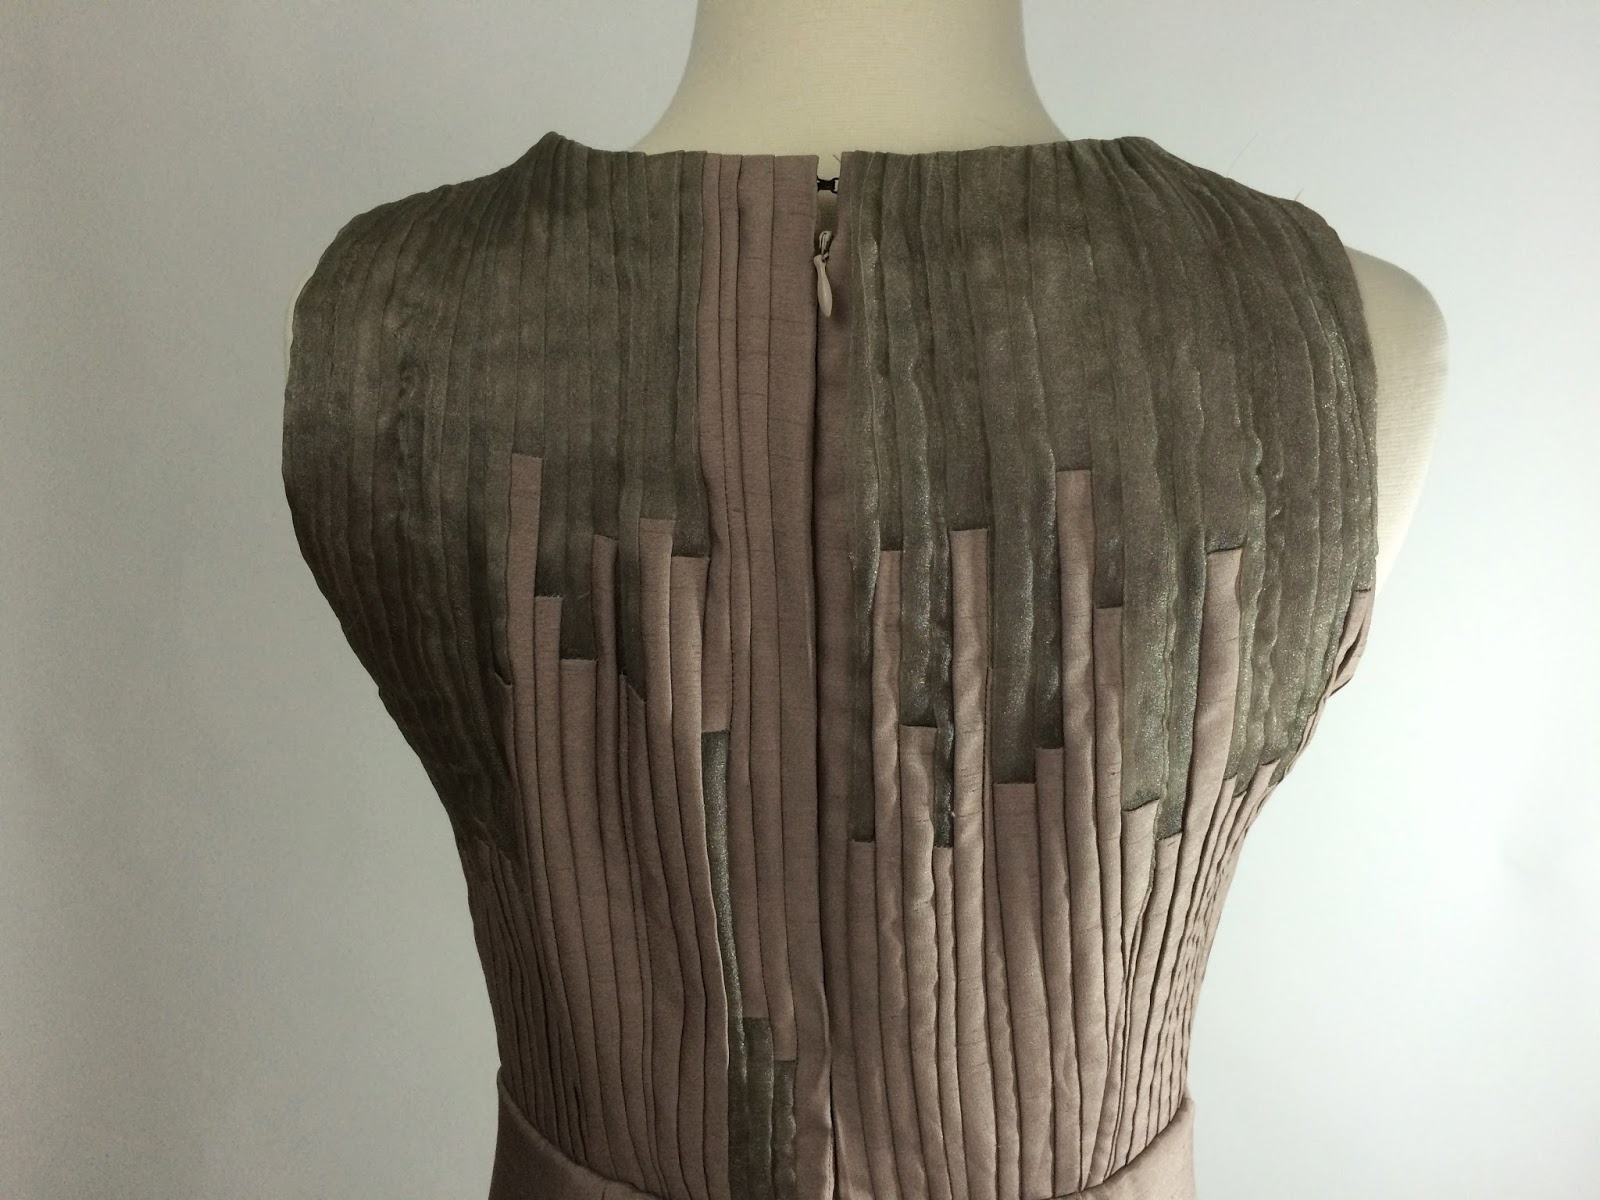
I love the raglan style sleeves. Here is a view from the back.

Although nicely finished on the wrong side, I wish there was a provision for adding lining to the entire dress. Drafting one for the skirt portion would have been simple enough but I wasn't sure about the bodice with the raglan sleeves. 

This red version was sewn using a polyester blend jacquard fabric purchased from Jo-ann's during the Black Friday sale. Originally priced at $16.99/yard, I was able to score at $6.99 per yard. It is gorgeous in real life and it's one of those yearly finds I seem to stumble upon at Jo-ann's during the holiday season. 

I'm not sure which is my favorite. I like both versions. One thing for sure. This won't be the last time I will be sewing with this pattern. It will definitely  be stored in my TNT stash.
Although this pattern was released in 2014, it is still available as a download at Burdastyle.com.
For a complete pattern review, please visit Pattern Review.com

New Look Workroom 6071 Project Runway

I love sewing for my daughter. However she has been away for college and I haven't had the chance to sew much for her. But during the last Black Friday sales, this sparkly sequined knit caught my eye. I immediately thought of my daughter and what a perfect holiday dress that would make. Without a pattern in mind, I purchased two yards which I hoped was enough. 


After searching through my pattern stash, I decided on the Jalie Bella dress. However, after trying on countless ways to lay out the pattern, I just couldn't make two yards of fabric work for a pattern that required three! So I settled for this New Look pattern and I'm glad I did. It was so easy to make and the results were very flattering. See for yourself.


Since the fabric had sequins I had to use a smooth velour fabric from my stash for the armhole and neck facing. The crossover feature on the bodice is so flattering especially to small-busted women. 
The center of the crossover had several layers of fabric to it but I had no trouble sewing it through my Juki F600. 


I highly recommend this pattern. Although no longer available at Simplicity.com, I was able to get my copy through Amazon. One thing though about sizing. I find New Look to have too much ease built into its patterns. For this project, I went two sizes down. Although that was an accident as I cut the wrong size, it turned out it was the perfect size.

For a complete review please visit Pattern Review.com.


Thursday, November 5, 2015

Butterick 6241

The weather is getting cooler and I'm really determined to finish some items in time for the current fall season. I wanted to update my fall wardrobe with some not so classic items so I decided to try out this dress from Butterick.

This is a pullover style with front zipper opening. There are several options for design and I chose view C which had long sleeves, single collar and no contrast fronts. 

I paired the pattern with a gorgeous rayon jersey from Gorgeous Fabrics. I can't get enough of anything in blush tone so I chose this warm mauve color. It has 60% stretch crosswise with no lengthwise stretch and it rolled only a bit at the edges so it was not that hard to sew. It was a bit sheer so I decided to partially line my dress with an organic cotton/lycra purchased from Fabric. com a long time ago. It had the same stretch characteristic as the main fabric. 

I used leftover Riri zipper from my entry in round 3 of the sewing bee. It's copper teeth and pull just went fabulously with the warm tone of the fabric.

I used contrast colored thread for topstitching.


For the interfacing, I used this particular interfacing as it had crosswise stretch only and did not alter the stretchiness of the main fabric.

This is the top edge of the draped pocket as seen on the right side.


This is the pocket edge as seen on the wrong side. One has to make sure that side is neat as the drape allows the wrong side to be visible on certain angles.


This is the part that gave me some grief. It was impossible to machine stitch the layers together so I just hand-sew them.


Without further adieu here is my newest dress for fall!


Here are some close-up views of the outside and inside.


Sewing Bee 2015: It's a Wrap

I haven't been very good at blogging about my sewing bee experience. The stress of sewing with a deadline, taking good pictures and writing a review were just too overwhelming for me and I wasn't able to keep up with blogging in real time. Anyway, I'm glad it's over. I made it to the end!

Of the items I created, the ones for rounds 2 and 4 were my favorite. Even though I did not win any of the rounds, I was lucky enough to win a randomly drawn prize during round 4. 


It's a set of Sulky embroidery threads! I can't wait to try them out. 

Meanwhile I'm raring to start sewing for fall before winter arrives!


Friday, September 25, 2015

Sewing Bee Round 2: Fabric Manipulation

Sewing Bee 2015 - Round 2


For this round, we were asked to add surface embellishments to an existing fabric/fabrics to make a piece of fabric/fabrics truly unique. We were then asked to make a garment out of that embellished fabric/fabrics.

There were so many embellishment techniques I wanted to try but with only ten days to complete the challenge, it was not the time for me to experiment into the unknown. So I knew right away what I wanted to do. A couple of years ago, I came across a Threads Magazine article  (March 2012) on how to apply strip-piecing to make a garment. This method is commonly used in quiltmaking and it involves joining two or more large fabric panels and then cutting them into strips of varying sizes. The strips are then sewn together in a staggered fashion to create a unique design. I have done this before but on a wider scale to sew borders for my quilt hangings and to make some minky blankets. It was my first time applying this to a wearable garment. 


I used three fabrics for this project. My main fabric was a solid double-faced polyester shantung in a lovely taupe shade called "latte." It had a shiny and a matte side and I decided to use the matte side for the right side of the garment to make it more versatile as far a wearability was concerned. I also used printed multicolor silk from my stash, a leftover from a previous project. Finally, I added a sheer crepon polyester made of nylon with a very subtle sheen and in a shade similar to the shantung.


I sewed the sheer nylon to the shantung to create one design.

I sewed the printed silk to the shantung to created another. 


So I ended up with strips of joined fabrics varying in width from 1/4" to 3/4".

A sample of how I joined the strips together.


I used 1/4" seam allowance to sew the strips together.

To make it easier to determine how to cut the bodice patterns, I used a transparency film.

 And traced the design on the wrong side of the fabric.

Using McCalls 5927, I sewed a dress to show off the modified fabrics and here are pictures of the finished garment.


I also followed some couture methods when sewing the dress. I underlined everything--the bodice to provide stability to the stripped pieces, the skirt to make it more substantial. Underlining also enabled me to catchstitch the seams open since I could not press them open with high heat. I was able to achieve a truly invisible blind hem stitch by catching the hem stitches to the underlining fabric instead of the main fabric. I used invisible zipper and hand sewed the lining to the zipper allowance to make sure it didn't get caught in the zipper teeth. 

This was such a learning experience for me not just in terms of the sewing process but also with regards to the various embellishment techniques. I invite you to visit Pattern Review and check out
all the wonderful entries in this round. I promise you it's a treasure cove of creative ideas!