Tuesday, November 20, 2018

Paco Peralta Draped Top Pattern


This weekend I was browsing through my old digital photos and chanced upon a picture of my daughter wearing a draped top that I have sewn six years ago. It was based off a Paco Peralta pattern and originally meant for me. However I thought it suited her better so I gave it to her and up to now, I still see her wear that top every now and then. So I decided to revisit the pattern and sew myself a wearable muslin using a matte jersey fabric from my stash.

About the pattern:
Six years ago when I purchased this pattern, it did not have the sleeve option. I bought it from the designer’s Etsy shop at bcnuniquepatterns. Unlike commercial printed patterns, this one was hand drawn by the designer on a medium weight onion skin paper. 


It is multisized but available only in four sizes—S (bust of 31.5”), M (34.5”), L (37.5”), XL (40.5”). There are no instructions included. However there are only four pattern pieces and the construction is simple enough to figure out. And 5/8” seam allowances are already included.

Construction Notes:

As mentioned above, there are only four pattern pieces:

*upper front that has a self facing which forms part of the draped neckline


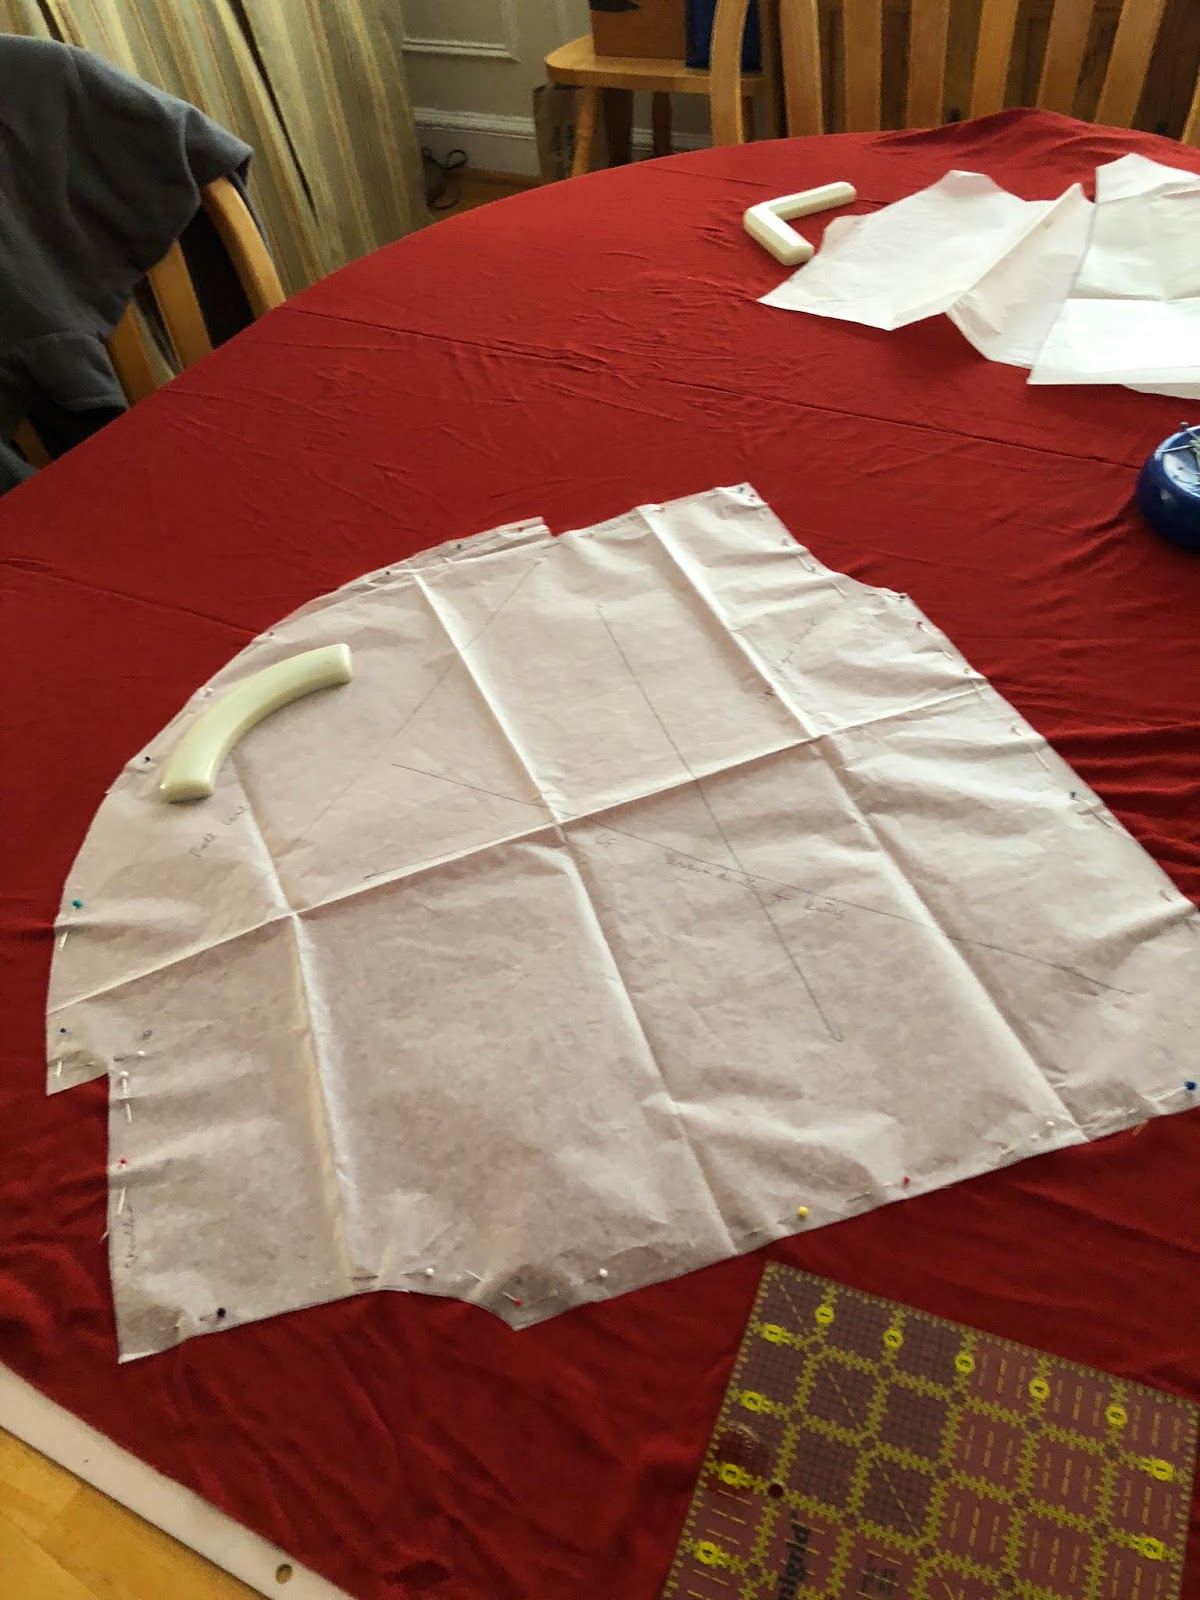
*lower front which has a v-shaped upper edge
Shown here, the lower front piece is laid out on the fabric fold. 


*back which is cut in two pieces, although one may also cut this on the fold

*back facing which I interfaced with a lightweight tricot interfacing since my fabric was a jersey


Order of construction:

1.       Stabilize the neckline edges by staystitching.

2.       Reinforce around the perimeter of the V-shaped edges in both upper and lower front pieces.

3.       Sew the two front pieces together along the V seam. To reinforce the area near the center of the V, sew small stitches about one inch on both sides of the center. Clip the center of the V in the lower front making sure not to clip the stitching.

4.       Sew the two back pieces along center back.

5.       Sew the back facing to the back neckline. 
        Note: If your fabric is woven, you may need to put invisible zipper at the center back seam. You can choose to sew the center back seam along the length of the back facing then leave the rest open for the zipper. 

6.       Sew front to back along shoulder seams continuing to the corresponding shoulder seams of the back facing and the front self facing. Understitch the back facing to help stop rolling to the outside. Tack the facing to the shoulder seams. 

7.       Sew the side seams.

8.       Finish the armhole edges and the bottom hem. In my case, I used a bias cut strip of self fabric to bind the armhole edges. Then I just used blindstitch to hem the bottom of the top.

9.       Since I used matte jersey, I just finished the edges with my serger. If I had used silk I would have probably underlined it then added a lining.


View of the V-shaped seam between upper and lower front. 

View of the right side of the front after V seam has been pressed.


The interfaced back facing sewn to the back neckline. 

View of the shoulder seam (the closer to the bottom) and the seam joining the back facing and front self-facing. 

Understitch the back facing. 
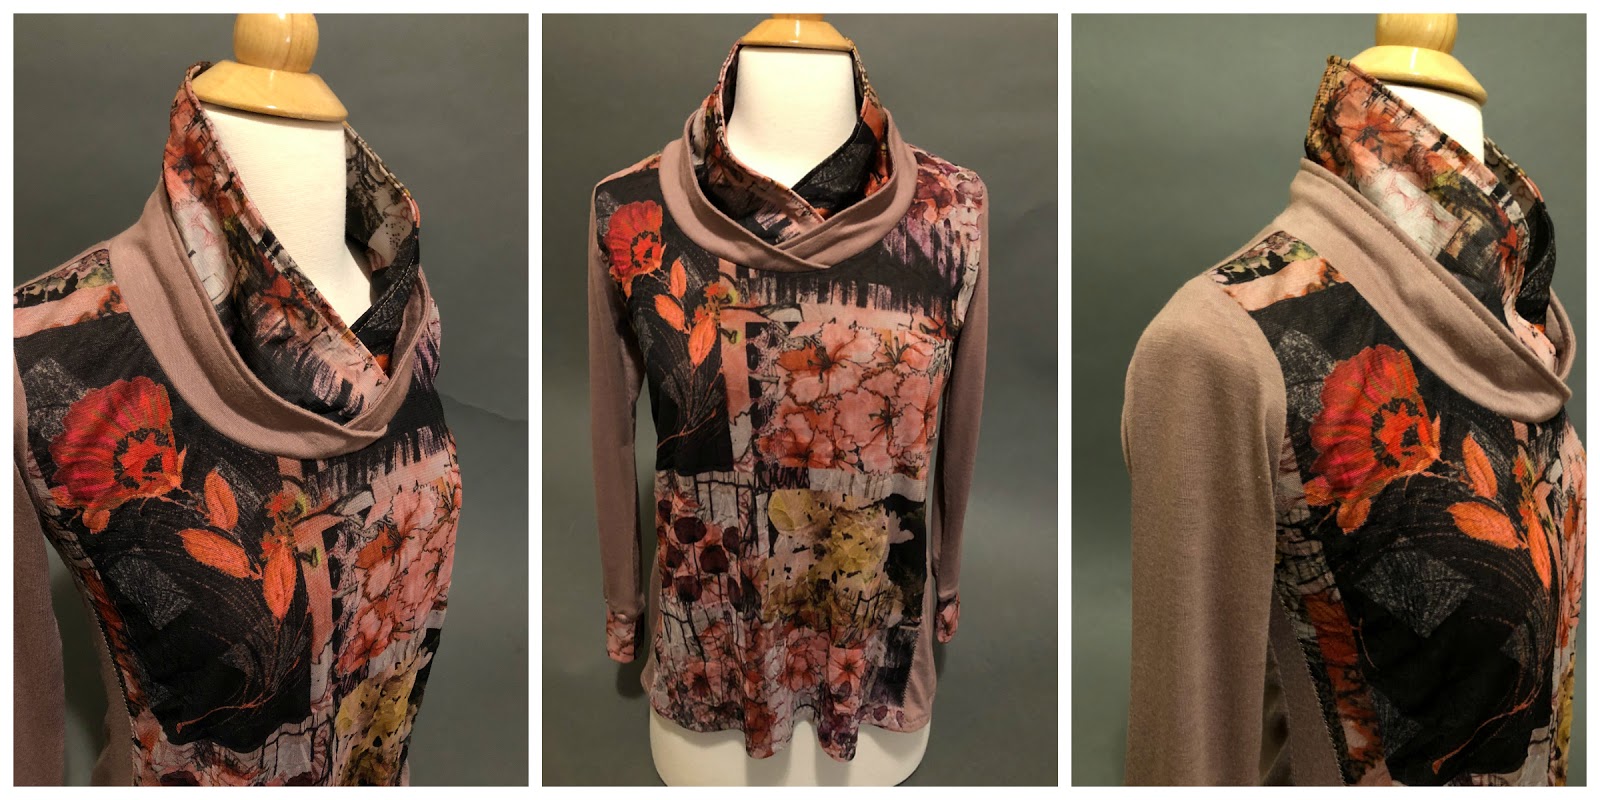
And now here are some photos of the finished top:

This dressform is more well endowed than me.


I played around with the different settings of the Iphone's portrait mode. This stage lighting can be really dramatic!


Finally here's a picture of my daughter when she visited us. She's wearing the first version of the draped top I made in ITY fabric. 

My review of the pattern can also be found at Pattern Review.


Friday, November 16, 2018

Revisiting Vogue 8793

Two years ago, I sewed Vogue 8793 and posted about it here. Although I was smitten with the collar.  I wasn't too happy with the resulting fit. I guess I could have tweaked it then but I wasn't too enthusiastic at the thought of unpicking some seams. I still wore the top even though the loose armhole and wide shoulders bothered me a bit. Last week I unpacked my fall/winter clothes and found that top and I decided to do something about it. I pinned around the armholes, shoulders, side seams and transferred the adjustments to my pattern and sewed a new version which is shown below.


I used a lightweight rayon jersey in mauve and mixed it with a gorgeous printed mesh knit. 


I didn't have a lot of the mesh print in my stash, just enough to use for one of the collars, the cuffs and the front. 

The pattern didn't really call for a double layer front but my main fabric was really thin and lightweight and I wanted to use my mesh print for something. 

As shown in the picture above, the mesh print didn't go all the way to the front side seams. 


To attach the mesh print to the front piece, I handbasted it before sewing with small zigzag stitches. 


For the collar piece, I ironed a tricot interfacing as the fabric was really flimsy. The tricot interfacing had the same amount of stretch as the fabric so it added a little bit of body without altering the stretch. 


Here is a closer view of the double collars. I wanted to add zipper accents but didn't have the right zipper in my stash. Anyway, I guess it was for the best as the zipper would have weighed the lightweight collars down. 


I really love how the fit turned out. I removed 5/8" from the shoulder width, adjusted the side seams near the armholes to remove too much ease and adjusted the sleeves accordingly. I also added 1" to the sleeve side seams from the elbow to the hem as I felt the sleeves too snug when I first made this pattern. 

The sleeves are still close fitting which is good as it would be easier to layer a sweater over the top. 


My complete pattern review can be viewed here

.


Friday, August 31, 2018

The Making of Violet & Abby: Bootstrap Fashion DIY Dress Form


Violet


abby

In my previous post here I introduced my newest sewing buddy. It is a dress form that is a replica of my own body. In a nutshell, after providing my own measurements, a sewing pattern for a body shell was customized for me. After sewing it, I stuffed it with polyfill and put it on a stand and voila, I have my own dress form. Bootstrap Fashion Sewing Patterns is the site were one can purchase such customized patterns and they are available in standard, missy, and plus sizes. 

The Pattern

I purchased the pattern for the Missy Fit DIY Dress Form and the add-on Arm. The former costs $24 and the latter $10. 
You will need to provide the following measurements: 
  *bust
  *underbust
  *waist
  *low hip
Since accuracy is very important, it may help to have someone assist you with taking your measurements. 
In addition, fit adjustments will ask for:
  *neck circumference
  *bust height from center back neck point
  *front length from center back neck point
  *back length
  *back width
  *apex to apex width
Although the fit adjustments are optional, I highly recommend providing the data. 


In addition to the measurements, there is drop down menu to choose what kind of belly protuberance, buttocks shape, posture and shoulder slope you have. I love this feature because it really allows for customization. 
Regarding the pattern itself, there is the option to add seam allowance which is 3/8". There are also several options for paper size. 
After paying for the PDF pattern, it took only about half an hour or less for me to receive my file through my email. It also came with complete sewing instructions. 

Sewing Process:


Materials: all the fabrics I used were from my stash. For the main body I used a medium weight upholstery fabric. For the inner support, I used a heavy weight twill for Abby but I ran out of yardage so for Violet, I used a medium weight cotton fabric and sandwiched a stabilizer in between.
Fabric used for Violet.

Fabric used for Abby. 


Markings: I know sometimes we forego these but in the case of this sewing pattern, it is important to copy them to the fabric pieces accurately.


*Notches--important for aligning pattern pieces prior to sewing
*Triangles--one triangle indicates front and two triangles means it is the back
*T-shaped marks inside the seams--used to mark location of pieces


The markings are especially helpful when it comes to assembling the cups.


Settings: 

Straight stitch for seams: 2.0
Zigzag stitch for topstitching: 3.6 (height) 0.7 (width)
Feet: walking foot, zipper foot
Thread: polyester

Sewing Instructions: 

There are 44 pages of detailed instructions and photos for the Missy Dress form and 31 pages for the add-on Arm. Overall, the instructions are very easy to follow and for the most part easy to understand. With that said, I have jotted down some notes where I found  details missing or  a little bit confusing.

Missy Dress Form:

 p.18 #6. It says "optional." I would really do it, that is topstitch the bust/waist/hiplines. In my opinion, it will help in the long run with garment fitting. 


p. 18. Although illustrated, the written instruction is missing for sewing the front to back pieces at the side seams. 


p. 20 #8. Easy to miss what is being referred to when it asks to clip corners of front and back princess seams. It actually refers to the seams allowances of the princess seams at the topmost, near the shoulder seams. 


p. 21 #10. Seasoned sewists probably know to do this already but for beginners, it helps to sew with the neckline of the body topmost with the neck piece at the bottom, near the feed dogs. It is similar to sewing two pieces together where one is more curved or longer than the other. Putting the longer piece beneath the shorter one makes it easier to feed the fabric through the machine equally. It also helps do away with using a lot of pins. 


p. 23 Same as in above, sew with the neck top piece at the bottom, near the feed dog. 

p. 25 #13. When sewing the armhole cover, ideally the armhole should be topmost and the armhole cover near the feed dog but it is quite difficult to maneuver with the neckline sewn shut.

p. 27  Inner Support:

   *Make sure to cut the pattern piece on the fold. 
   *Disregard the markings for the different pipe diameter sizes for now. Cut the pattern piece     following the outermost edges regardless of pipe size. Adjustment will be done later. 

  #3. There are two pieces for both front and back inner support but no mention at all on how to treat them. You actually treat the two front pieces as one and same with the back piece. In my case, my fabric for Violet was not as heavyweight as I wanted so I added a stabilizer in between before proceeding. I used a Peltex interfacing from my stash. I don't have the label anymore so I'm not sure which kind but it is not too stiff or thick. 

p. 29 The staystitching mentioned here is more like "quilting." The important thing is to stitch first around the seamlines to make sure you do not quilt the seam allowances closed. This is crucial because the seam allowances have to be open when sewing the inner support pieces to the main body. 


p. 32 When sewing the inner support pieces, expect the bottom edges not to align.


p. 36 #3 Just a minor annoyance but what is referred to as "staystitching" is actually stitching two pieces of fabrics right sides facing. 


The instructions for the add-on Arm are more straightforward although the part where the shoulder cover is attached to the main arm may be a bit confusing. My advice is to just look at the photo of the final product and figure out what is required to achieve it. 

Here are some photos of the arm construction.


There will be some hand sewing to seal the upper arm. 


Stuffing the body:

I bought a 5 lb box of PolyFil from Jo-Ann's using a 50% off coupon. It was more than enough to fill up two dress forms and an arm. 

View of the bottom opening where poly fil will be inserted. 


Tips:
   *Use small portions of the stuffing at a time. It is tempting to grab a big glob of filling but it makes the dress form lumpy. 
   *Measure the key points (bustline, waistline, hipline) as you fill for accuracy.
   *Compare you dress form to your body in the mirror as you go along. 
   *If your cardboard for the base support is thin, it helps to reinforce with another piece that does not have the two holes on the sides.


View of the underside, bottom of dress form which has two zipper closures. 

It's eerie how accurately the dress form captured my belly protuberance which is really prominent without undergarments!


As for the dress form stand, I just used the stand from my dress form mannequin. The pipe used to support the body was half of an adjustable closet rod. The length of the pipe you need is printed on the pattern pieces. 

Conclusion

I am quite happy with my two dress forms. I have already used Abby to fit a muslin of a foundation bodice I am sewing for my daughter. It definitely makes it easier to see where fitting adjustments need to be made. I am looking forward to using my own to fit some tops. Now I will be able to adjust for swayback without having to resort to numerous picture taking. The good news is the dress form can always be altered as far as the stuffing is concerned because of the two zipper openings in the bottom!

To see how the dress form compares to the real me, check out the photos on here.