Monday, November 16, 2020

Simplicity 8957 Cords for Fall

First time I sewed this pattern was three months ago for the Pattern Review Endless Combination contest. I loved how it fit right from the envelope and the only alteration I needed then was to shorten the total length. I used a woven stretch then. For this latest version, I used a 100% cotton corduroy that did not have any form of stretch at all so I played it safe by adding ½” to the side seam allowances of the waistline and waistband. It turned out to be the right decision as the finished pants fit me so comfortably!

Although the pattern envelope says Misses’ Slim Leg pants, I thought the pants was not really slim fitting. There are five design options to choose from and all of them are just variations of the hems—cropped or regular length, buttoned vent on side, buttoned vent on back and plain. All views featured a waistband with belt carriers, fly front zipper opening, single button closure, side pockets and faux welt at the back.


I made view C which features a cropped length with buttoned side vents on the hem. However, I used a regular length because I thought cropped length does not flatter my short stature. I also skipped the belt carriers, side pockets and faux welt.

Fabric:

 
As previously mentioned, I used a 100% cotton woven. It is a 14 wale corduroy in the most gorgeous    shade called “Pumpkin Pie.” I purchased it from an Etsy shop called Oak Fabrics.

If you have sewn with corduroy before, then you know it has certain characteristics that require special consideration.                                                                       

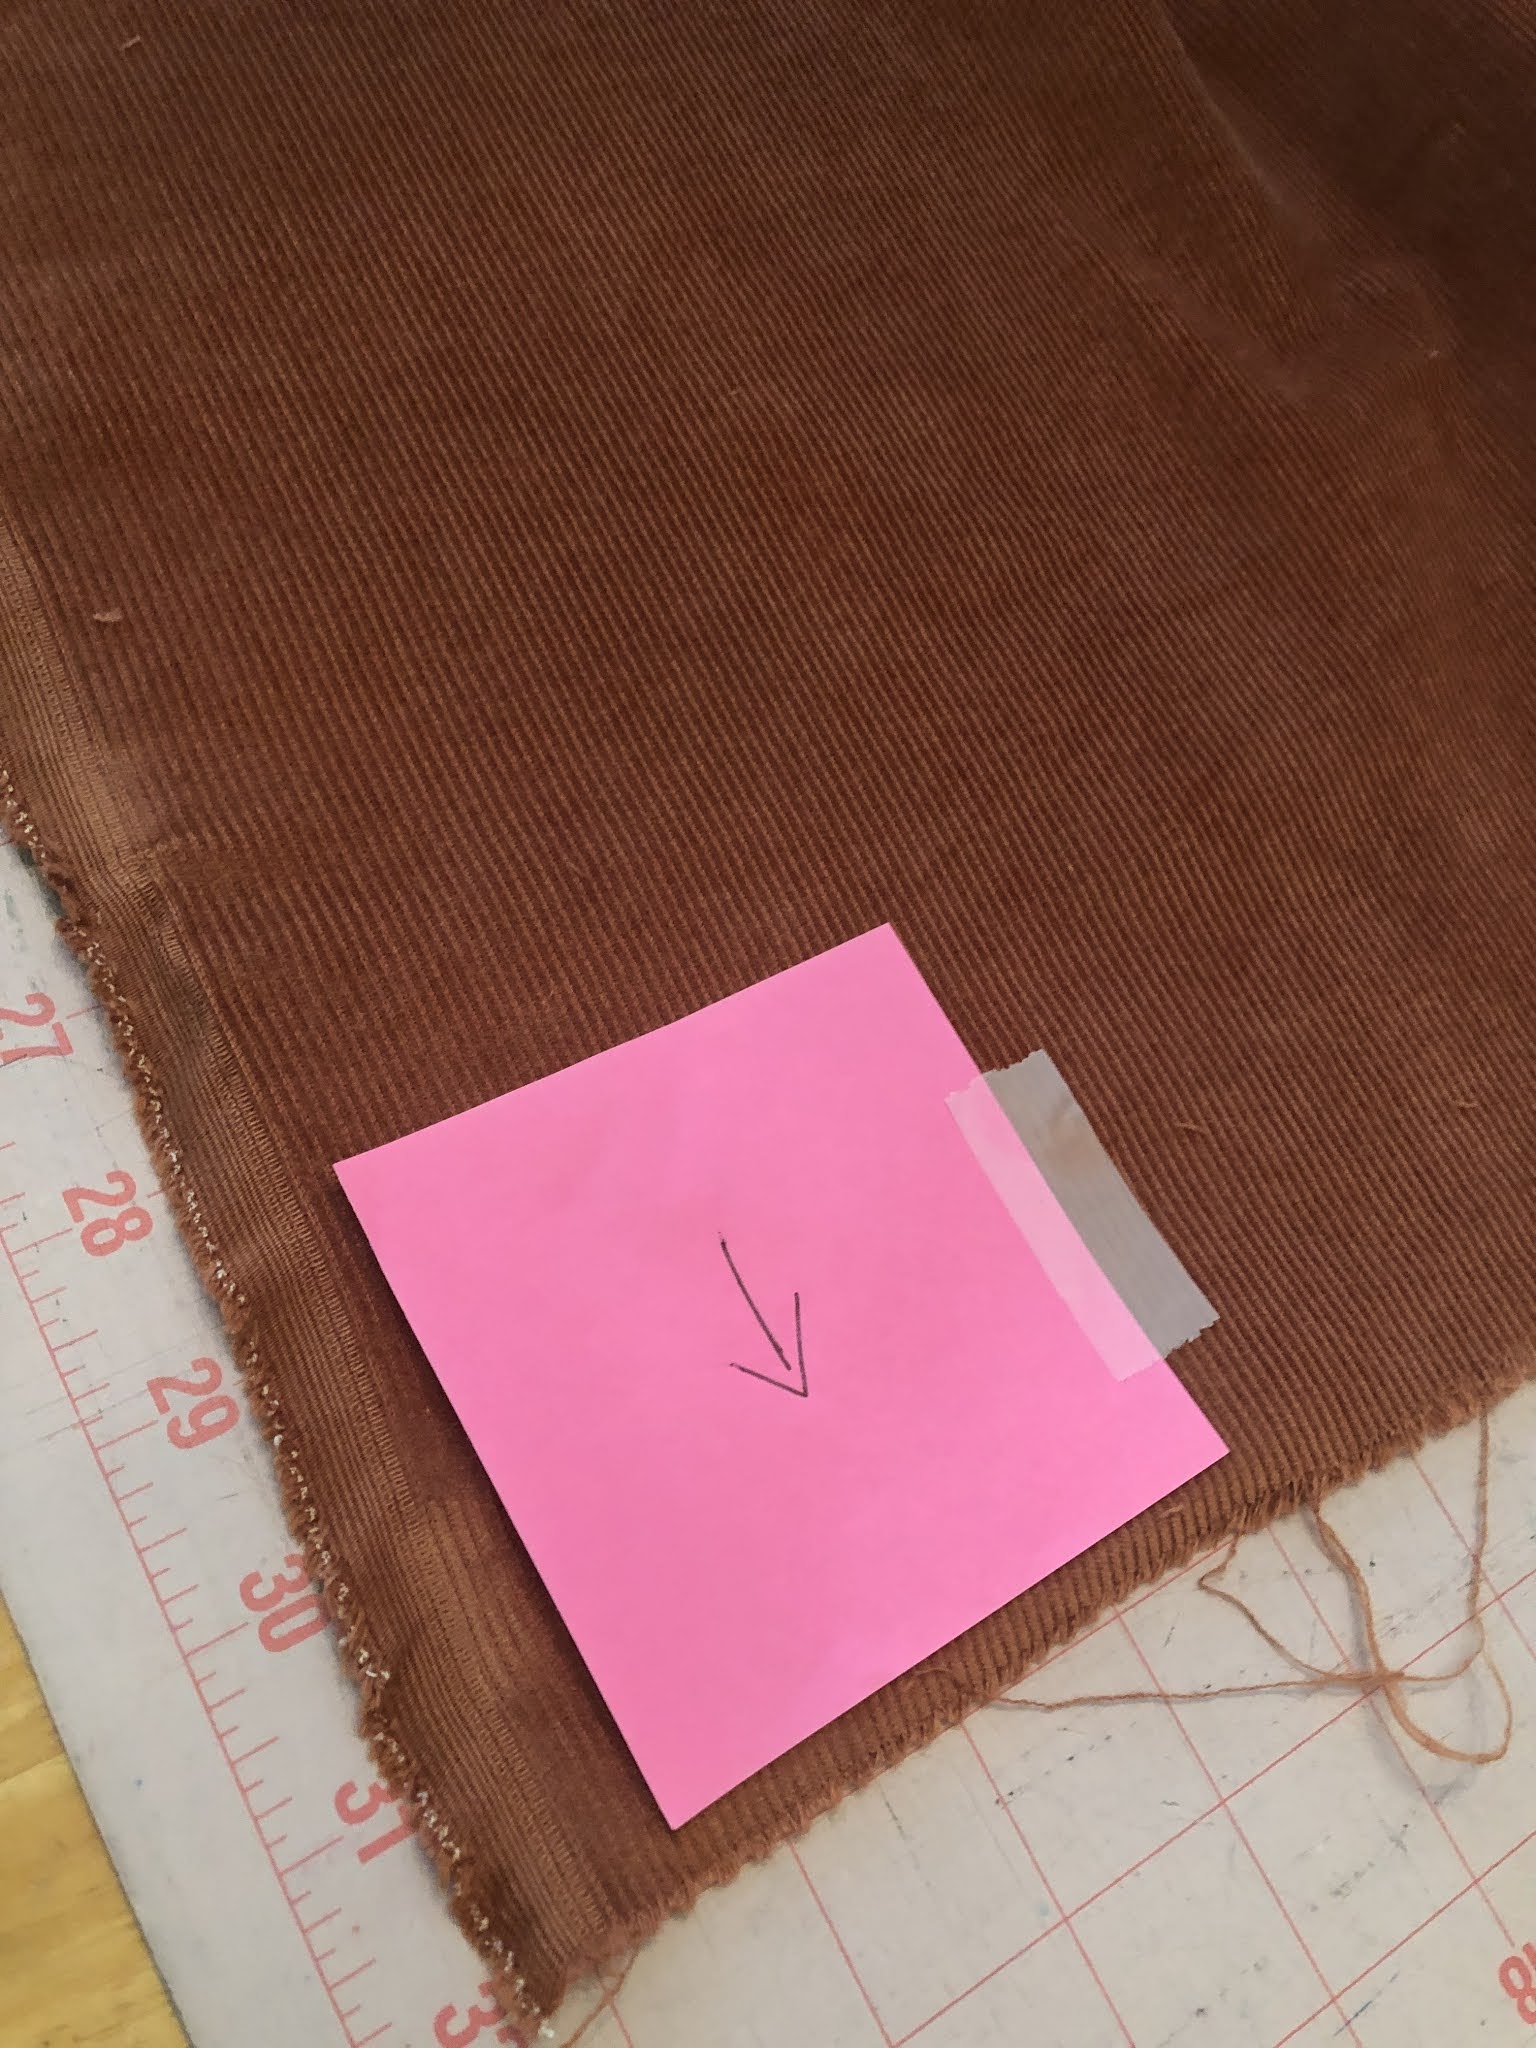
I checked the direction of the nap and marked accordingly with a small sticky paper to remind me while laying out the pattern pieces. I had to make sure all pieces were properly oriented. 


I decided to cut the pattern pieces on single layer of fabric to avoid shifting.


I used  sew-in interfacing instead of fusible as it is not advisable to use high heat on corduroy. I didn't want to flatten those beautiful ridges!


Here is an example of the sew-in interfacing already attached to the fly piece. 

I used this handy dandy seam roller to "press" seams open in lieu of pressing with iron. 

Another thing to consider with corduroy is the bulk. To address this, instead of using the same fabric for the zipper underlap and waistband, I used a lighter weight woven cotton.


This printed cotton made for a nice contrast to the solid main fabric. 


Shown above are the zipper underlap and waistband. 

Another way to reduce bulk was by grading seam allowances, making sure to trim the innermost one, the one that would not be facing the outside. 

Finally, I skipped some features that I thought would unnecessarily add bulk like the belt carriers and the faux welt pocket at the back. 


Construction:

The sewing instructions in this pattern were really  easy to understand and quite detailed especially when it came to the fly front. Even beginners or those who haven’t sewn a lot of this type of pant closure (like me) will have no trouble. With that said here are some additional tips which I hope you will find helpful:


       It doesn’t say in the instructions but I found it best practice to finish the raw edges of both front pant pieces along the curved edge. Otherwise (especially if you are using the serger) it will be impossible to do so after the fly front has been assembled.


For topstitching along the fly front, I used the triple stitch feature on my sewing machine. Alternative would be to use topstitching thread. 

For dealing with the thicker seams, I used walking foot for sewing and Clover Wonder clips for securing instead of pins. 


For the front facing on the leg vent, the instruction only suggests finishing the inner edge. I thought it was better to finish the top edges too. Otherwise you would be leaving an exposed raw edge after it is attached to the leg piece. 

Finally, there is an error on step no. 17. It is only for views A and B and not C which has a vent. 

So here are some photos of the finished garment.  


I love wearing this pair of pants. It is so comfortable! I see more corduroy pants in my future!


2.      


Saturday, October 24, 2020

Reflections on a Reflective Pullover--Simplicity 8705


For last year's Christmas, I made a half-zip pullover for my husband using Simplicity 8705 which I reviewed at PatternReview.com. Here is a photo of that top.


 He loved it so much he requested for more. This most recent version is my third iteration of that pattern and this time I incorporated some reflective materials so he could use the layering piece when he runs in the very early mornings when it's still dark. 

Before I delve into the construction details, here are some nice modeling shots of my hubby!


Taken with flash on. Notice the reflective materials on front, zipper and sleeves.


View of the back taken with flash. 


And now for the sewing details....

Pattern: 

This pattern is still available for sale at the official Simplicity website and third party seller sites like Etsy and Ebay. It is not just for a pullover top but also includes design for men's shorts and pants. 

The pullover top features:

*half-zip front closure                                                             


 *raglan sleeves (shown here without the optional pocket)                                     


*front inseam pockets                                                                    


 Fabric & Trim:

This top pattern is designed for stretch knits only like activewear knits, double knit, fleece, Ponte, power mesh or sweatshirt fleece. There is a handy dandy "pick-a-knit" rule printed on the envelope to help with fabric choice. 

For this version, I used three different kinds of fabrics.

1. For the front and back center panels, I used a reflective stretch panel purchased from Discovery Fabrics. I "discovered" this website through Instagram.  

The chevron pattern on this fabric glows when hit by lights. 

*80% nylon/20% polyester

*lightweight, 4-way stretch

2. For the side panels, sleeves, pockets, zipper tab and underlap, I used a super stretch interlock breeze fabric that was left over from some workout leggings I made for myself. I purchased it from SpandexByYard.com.


*75% polyester/25% spandex

3. For the neck band, I used another fabric from my stash and it's a high-performance moisture management polyester jersey mesh also from SpandexByYard. It has more of widthwise mechanical stretch. I ran out of fabric #2 hence this choice. 


*100% polyester

4. I added a strip of 1" reflective trim around the sleeve opening. I purchased this from Discovery Fabrics. 

Notions:

Zipper: The pattern envelope did not specify the size of the zipper teeth, just the length and in my opinion it is important to know. The first time I sewed this pattern, I used a zipper with wide teeth and I had to alter the tab and front zipper opening. This time I used a size 3 reflective zipper purchased from Pacific Trimming via Etsy and it worked perfectly. 


Right side view of the zipper showing the reflective silver surface.


Wrong side view of the zipper.

Needle: stretch needle size 75/11


Thread: Gutermann 100% polyester mara 100

Sewing Machine:

Juki F600: used to sew seams in areas where I wanted to keep the seams open. I used tiny zigzag stitches. 

Juki MO-654DE: used to serge seams where I ddi not use the zigzag

Juki MCS 1500: used for cover stitches on hems and neck band; also for topstitching

Some construction details worth noting:

1. Wait until you have applied the interfacing on the front zipper opening before tracing the stitching lines. Otherwise you will end up just covering them. 


Interfacing on the wrong side of the center front used to stabilize zipper opening. 


2. Heed the suggestion on the instructions and wait till it is time to apply the zipper before slashing the opening. Otherwise you risk unraveling the weak center point of the opening. 

3. For step 5, take extra care to make sure you keep the pocket free when sewing the side front sections to the front. 

4. In my opinion, it is easier to sew the sleeves on the flat and then sew all the side seams in one pass. 

5. The part where you sew the zipper, tab and underlap can be confusing because of the wording. The illustrations really helped clear the confusion. 

6. It is not mentioned in the instructions but when sewing the right side of the zipper after the left has already been attached, it is best to baste just the area where the neck band seams intersect to make sure they match when zipper is closed. This will save you from unpicking stitches. 


7. For the neck band, instructions ask you to trim the free edge of the neck band facing to 1/4" after pressing in 5/8". I really do not see any benefit from this. In fact, it makes it harder to achieve a neat finish when it is time to sew the edge down to the neckline if the allowance is too small. So I skipped the trimming. 


My hubby really loved his pullover top. I am sure this won't be his last! And here are some more photos showing closeup of the nifty details.


Reflective zipper up close.

Front zipper opened.


Back view

Reflective trim on sleeves.


Triple stitching courtesy of overstitch machine over front/side front seam.

Wrong side view of the triple stitches. 

Final touch. 


Looks like hubby loved this latest addition to his running wardrobe!