I just finished my first garment for the four-piece collection.
It is a simple top made out of a cotton silk voile with big bold print.

 |
| Simplicity 1693 |

Although the pattern was simple (in fact there were only two pieces for this view),
the print of the fabric and the sheerness necessitated special handling.
 |
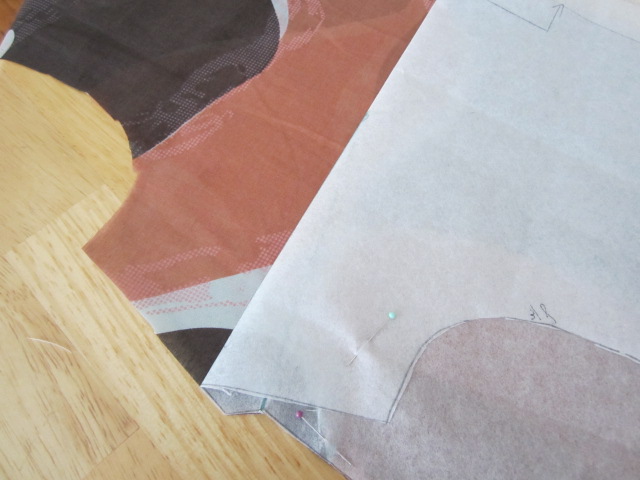
| I had to pay special attention where I laid out the pattern pieces. |
The front piece has bust darts. A regular marker and tracing wheel could damage the fabric
so I decided to thread trace.
 |
| I pinned the pattern below the dart location. |

 |
I folded the pattern paper along the upper line of the dart.
|
 |
| Using cotton thread and fine needle, I hand sewed loose running stitches along the folded edge of the pattern. The loose stitches resembled small loops. |
 |
| I gently pulled the top and bottom fabric along the thread-traced edge. |
 |
| I carefully cut along the middle of the exposed loops of thread. |
 |
 |
| Running stitches were visible in both sides of the fabric. |
 |
| I repeated same step with the lower edge of the dart. |
Thankfully there were not a lot of the markings, just one for the center back opening.
I just used tailor's tack to mark it.


Before sewing, I made sure to replace my sewing machine needles with the appropriate ones.
 |
Since the fabric was sheer, I opted to use French seams.
 |
| Unlike with regular seams, French seam starts with sewing the two fabrics wrong sides together. |
 |
| The first seam was sewn with 1/4" allowance. |

Since my fabric was cut on the selvedge, there was no raveling to worry about. Otherwise, I would have to trim before proceeding to next step.

I pressed along the seam.

A smoothly pressed seam made for a smooth French seam.

I sewed using a 3/8" allowance on the wrong side of the fabric, enclosing the 1/4" seam that was first sewn.


Finished seam. No raveling or serged thread visible.
Although not included in the instructions I opted to use sew-on stay tape where I thought it was needed.

Stay tape

 |
 | |
|
 |
| I also used it on the shoulder seam before proceeding with the French seam. |
The neckline and armholes were finished by using 1/2" single fold bias tape. I opted to make my own using the handy dandy Clover bias tape maker.


I used leftover scraps of silk habotai for my bias tape.

I basted before sewing the bias tape along the neckline edge.

Understitching helped make sure the bias tape didn't show through on the right side.

View of attached bias tape from the inside.

View of the finished neckline from the right side.
Bottom was finished using narrow hemline.

I machine basted along 5/8" seamline of the bottom edge.

It was easy to fold along the stitched edge.


I made the narrow fold along the 5/8" inch edge while sewing.
For the back closure, I used a 3/8" button I found from my stack and sewed a loop closure for it.


That's it! I'll post pics of the finished top soon. Meanwhile I have three more garments to sew.
No comments:
Post a Comment