Well, not really. Even though it has been officially winter, we still haven't seen snow in our neck of the woods. But it has definitely been cold for the past few days and I'm just glad I was able to finish this project in time for the season.

I have this gorgeous, luxurious coating in my stash. It's a dusty rose-colored wool/nylon/cashmere blend from Mood Fabrics.
I preshrunk it by steaming it with my iron.
I preshrunk it by steaming it with my iron.

For lining, I used a blush colored stretch silk charmeuse also purchased from Mood.

I paired my fabric with Vogue 9157, a pattern for a lined double-breasted coat with two-piece raglan sleeves and collar band. Even though there were no pictures of the coat on a live model, I decided to take a risk and give it a try. The fact that it provided custom fit for A-D cups was a plus for me. I made a muslin just to be sure. I used size 8 all throughout and found I only needed to work on the fit and shape of the sleeves. I had to shave off a few inches from the top of the sleeve and take in 5/8" from the back sleeve piece.


For the facing and collar pieces that needed to be interfaced, I used Pro-Weft Supreme Light fusible interfacing purchased from Fashion Sewing Supply. I like that there is no need to pretreat it and it's ready to be used.

The construction itself was really simple. One assembles the bodice sections first.

Then the lower sections.

The two sections were then sewn together.

I had to make sure seams were aligned.

I also made sure to press seams open. Using tailor's ham made it easy to press around the curved edges.

The same steps were followed when it was time to assemble the lining.

This is my lining after it was sewn together.


Layers of wool fabric created a thick seam. Fortunately, I now sew with a Juki F600 which was able to whiz through the thick layers with ease.

What was more challenging for me was creating a smoothly shaped collar. I used collar turning tool like this.

There was minimal hand sewing like this one when I had to slipstitch the small opening at the lower hem after bagging the lining.
 T
T
These are my essential tools for hand stitching. I find that passing my thread through beeswax helps minimize tangles and knots.


Although not indicated in the instructions, I interfaced the sleeves around the hem area so I could sew the fabric edge to the interfacing itself thereby making the stitches invisible on the right side.

I encountered a slight hiccup when it was time to sew the buttonholes. This was my first time to try the buttonhole stitch on my new machine. Testing on a sample fabric yielded the perfect results but when it was time to sew the actual one, the fabric kept getting stuck. The problem occurred while I was trying to sew the buttonhole located near the collar band. One side was too thick and the unevenness around the area made it impossible for the fabric to be fed forward. I was not ready to give up on my beloved Juki. I decided to try the clamping mechanism that came with the buttonhole foot. The manual specified it for sewing thin fabrics so I did not try it at first.

The clamping mechanism on the buttonhole foot.


Lo and behold! Buttonhole stitches without a hitch.

View of the keyhole buttonhole from the wrong side.


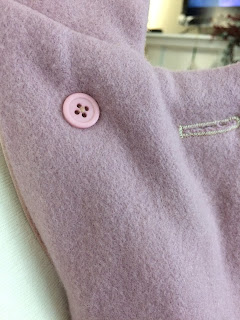
I used 1" gold toned metal buttons purchased from Jo-Ann's. I used four for the front, two for inside the facing and two for the belt. I decided not to attach any buttons on the sleeves. I also anchored the main front buttons with smaller buttons on the wrong side.

All in all, this was such a fun project. I had a few pieces of scraps left and decided to make a matching beret, details of which are posted here. Meanwhile, please check out the coat in action here.
It turned out great! I've had this pattern for a few weeks and haven't decided to tackle it yet. Looks like it will be next on my cutting table!
ReplyDeleteThanks Teresa! Go for it! It's really a great pattern once you've got any fitting issues corrected.
DeleteI'm impressed that a new machine makes keyhole buttonholes!
ReplyDeleteIndeed!
Delete